Document Preview - UI and Actions [V1]
Once you have generated your document from your document editor or widget, clicking the View Document button will open the document in a new tab. This article will explain and describe the UI and Actions that you can do in this document preview.
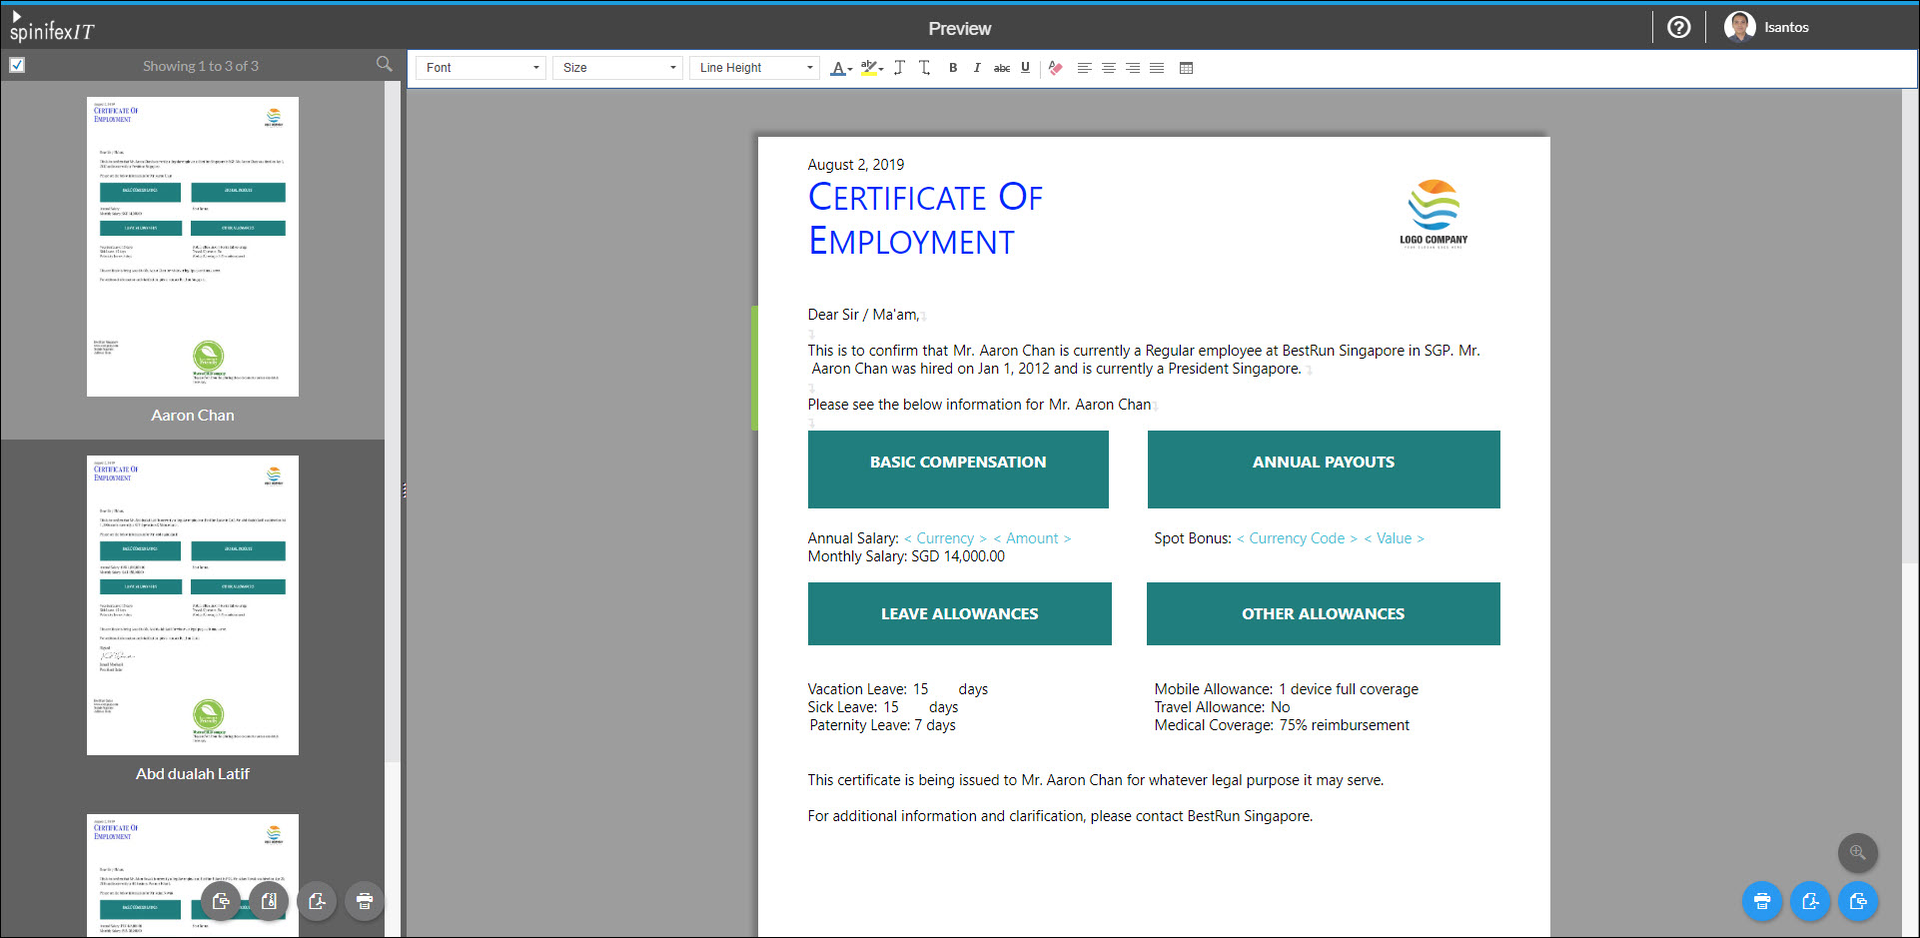
The Document Preview screen is divided into two areas:
Left:
- Select all - by default, all the documents in the left area are selected. If this will be unchecked, individual checkboxes will appear on the left side of each document thumbnail.
- Search - you can search the name of the recipient if you generated the document for a larger number of people.
- Download as ZIP folder - place the documents individually as a PDF file inside a single ZIP folder.
- Download all as PDF - download the selected document as a single PDF file.
- Print - print the selected documents.
- Send Email - send the selected documents to the email of the recipients. An email creation window will appear for you to type in text to your email.
Right:
- Document preview - displays the document filled with the data of the employee that is currently selected from the left.
- Send Email - send the document to the currently selected employee from the left. An email creation window will appear for you to type in text to your email.
- Print - print the document that is currently selected.
- Download - download the currently selected document as a PDF file.