Configure Integration Flow Between Strato and SuccessFactors
Follow the steps below to configure the Strato SAP-CPI to SuccessFactors:
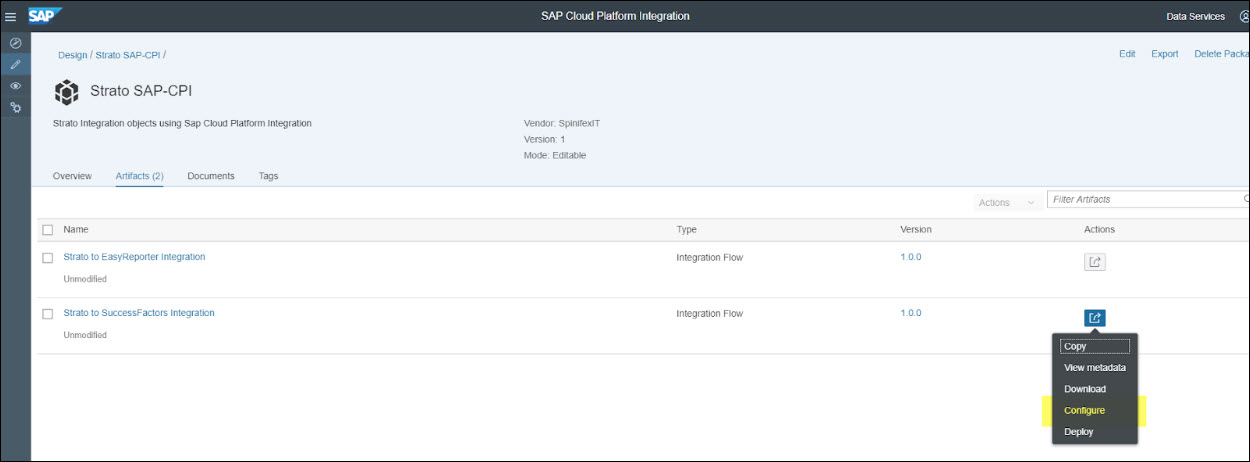
- Click on the Actions button on the right on the integration flow and then click Configure.
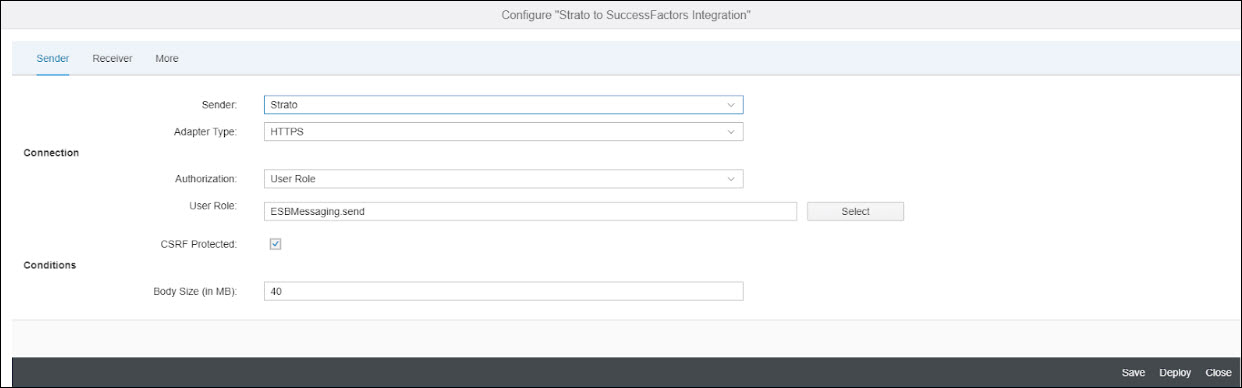
- In the Sender settings, if you like to use Basic Authentication or Certificate-to-user Mappings between Strato and CPI, you can leave the settings as is and just change the User Role to your custom role if needed.
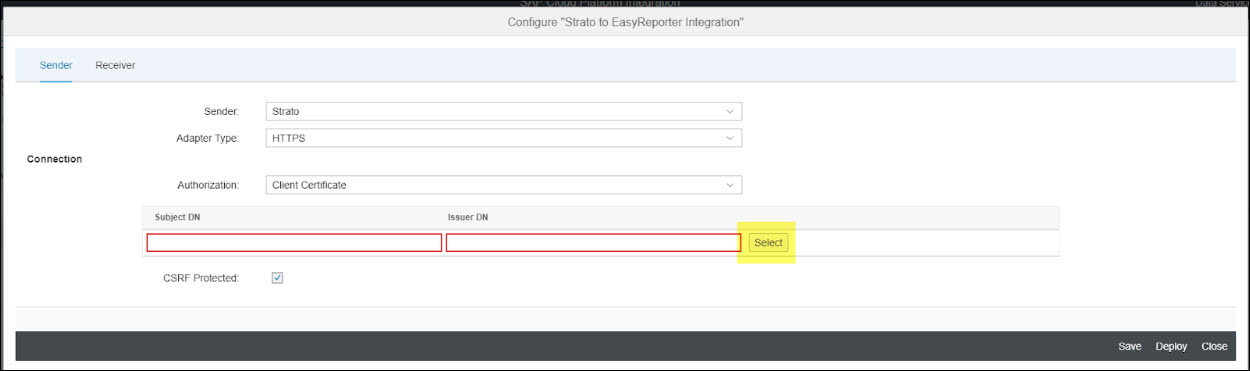
- If you will use Client Certificate authentication, change the Authorization to Client Certificate and then upload your client certificate by clicking the Select button.
- In the Receiver settings, there are multiple receivers, these receiver are grouped based on two authentication types which are Basic Authentication and SSO (Single Sign-On using SAML Assertion). These are the settings for each group of receivers:
- Basic Authentication - these Receivers are required:
- SuccesssFactors_GET_Basic, SuccessFactors_POST_Basic and SuccessFactors_metadata_Basic:
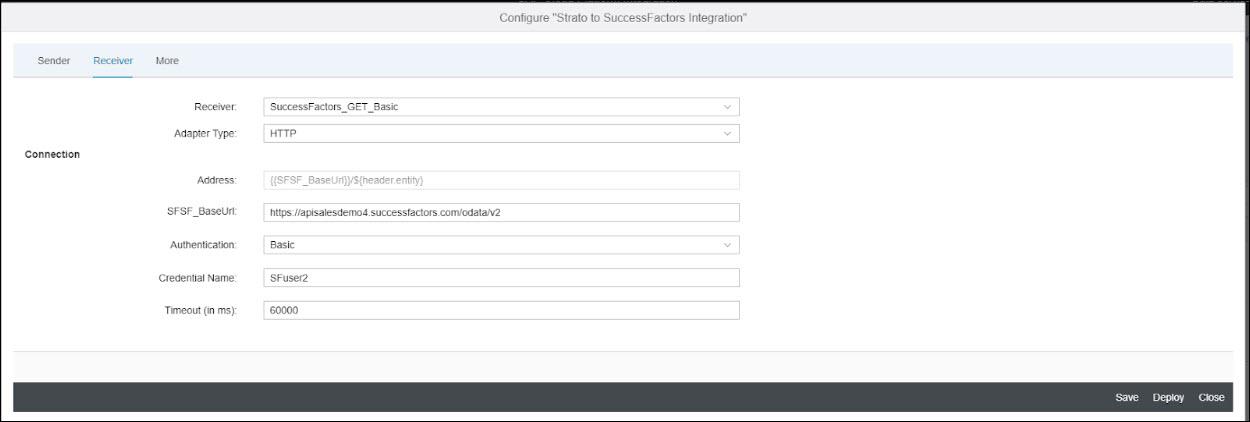
- SFSF_BaseUrl - enter your SuccessFactors base url for oData communications (e.g. https://apisalesdemo4.successfactors.com/odata/v2)
- Authentication - default is Basic (for Basic Authentication), you may change this depending on the authentication that you would like to implement between your CPI and your SAP HCM system
- Credential Name: for Basic Authentication, enter the credential name you created from Manage Security Material section. If you choose other authentication types, please enter the appropriate credential names
- Single Sign-On - these Receivers are required: SuccessFactors_GET_SSO, SuccessFactors_POST_SSO, and SuccessFactors_metadata_SSO
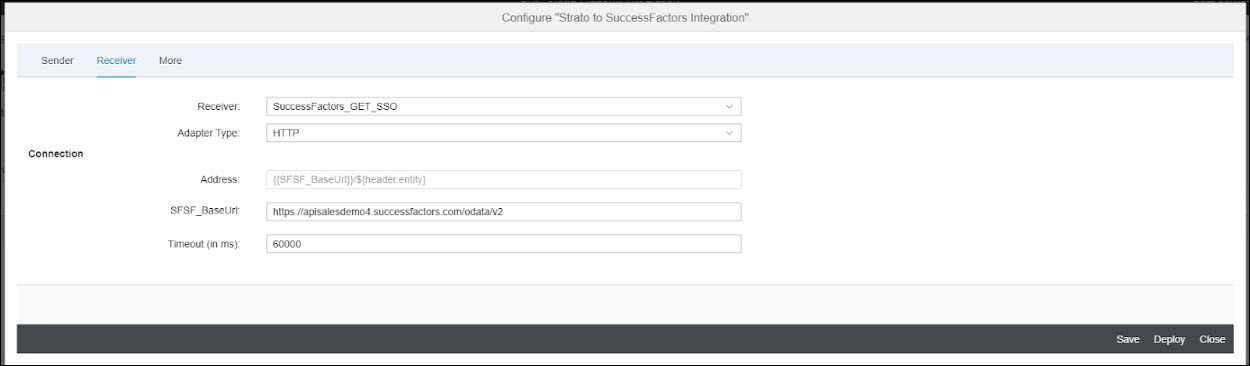
Since this is using SSO, the Authentication was automatically set to Basic. Therefore, the parameter to set here is only the SFSF_BaseUrl which should be your SuccessFactors base url for oData communications (e.g. https://apisalesdemo4.successfactors.com/odata/v2)- Other Receivers: this Receiver is required for SSO - SSO_OauthIdp - this receiver is for getting the SAML Assertion. Enter only the parameter for Address:
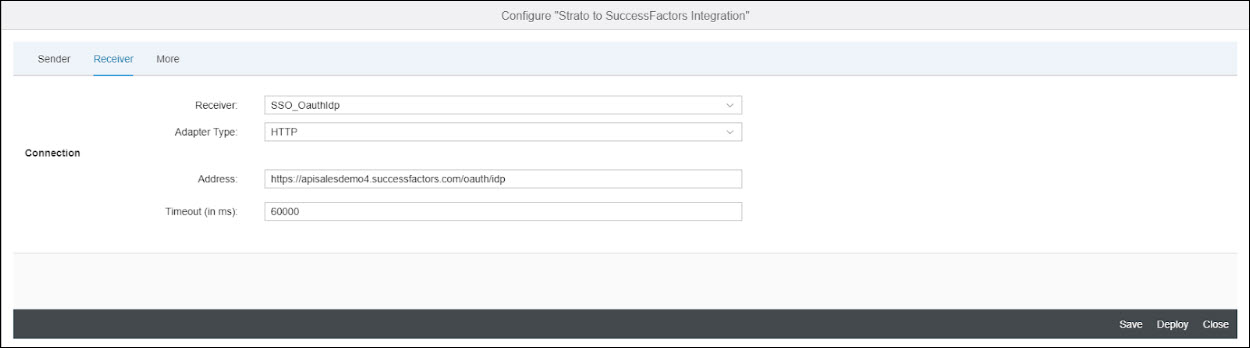
- The address should be your SuccessFactors base url (from 3.1 and 3.2), just replace the /odata/v2 with /oauth/token (e.g. instead of https://apisalesdemo4.successfactors.com/odata/v2, use https://apisalesdemo4.successfactors.com/oauth/token ).
- Other Receivers: this Receiver is required for SSO - SSO_OauthToken - this receiver is for getting the oAuth token (after the SAML Assertion was retrieved). Enter only the parameter for Address:
The address should be your SuccessFactors base url (from Basic Authentication and Single Sign On), just replace the /odata/v2 with /oauth/token (e.g. instead of https://apisalesdemo4.successfactors.com/odata/v2, use https://apisalesdemo4.successfactors.com/oauth/token ).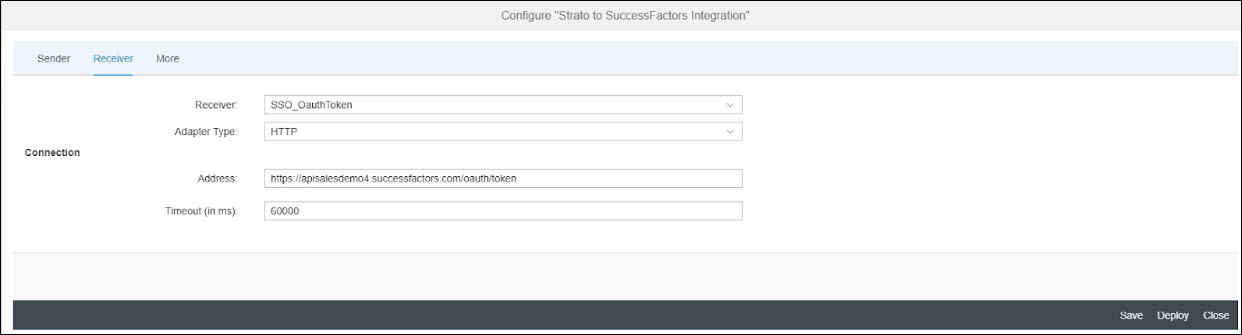
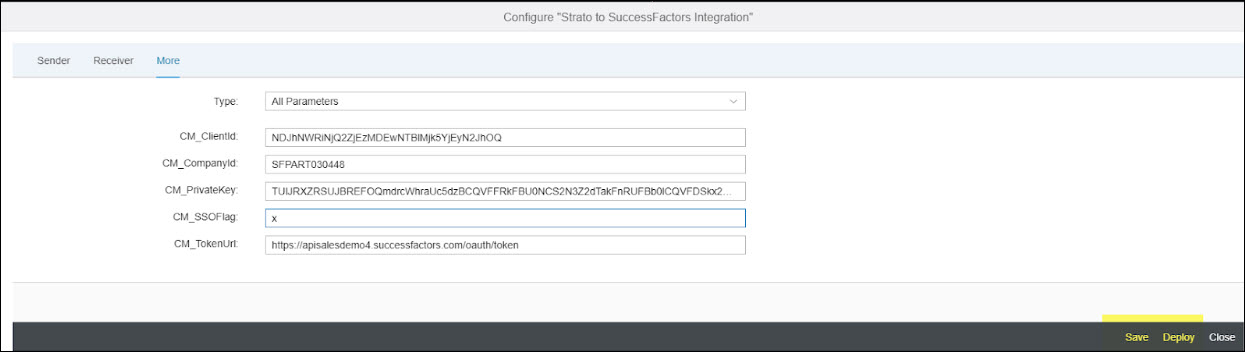
- If you setup the Receiver settings to use SSO, you should continue with More settings:
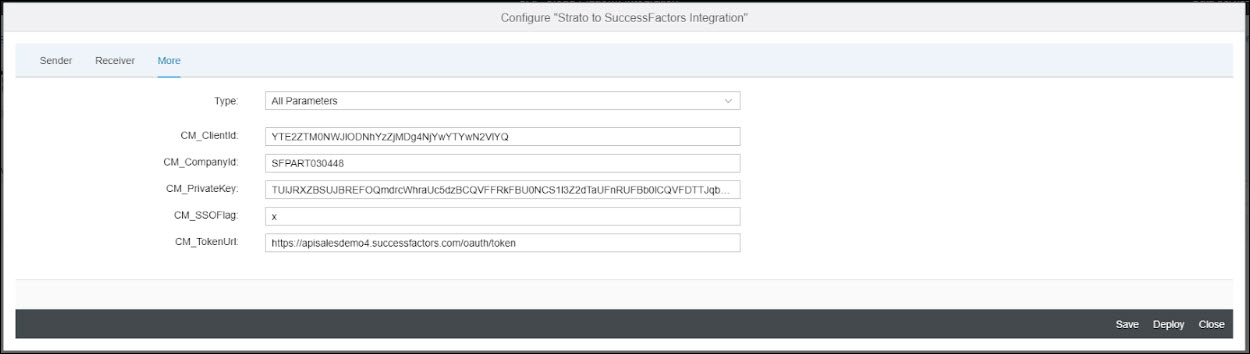
- CM_CompanyId - This is your SuccessFactors company ID
- CM_SSOFlag - this should be set to x (important note, if you set up Basic Authentication from Receiver settings, this parameter should be blank)
- CM_TokenUrl - This should be the same as the Address from the image under Other Receivers which is your SuccessFactors base url where /odata/v2 was replace with /oauth/token (e.g. https://apisalesdemo4.successfactors.com/oauth/token )
- CM_ClientId and CM_PrivateKey - These information are retrieved from SuccessFactors. Follow these steps:
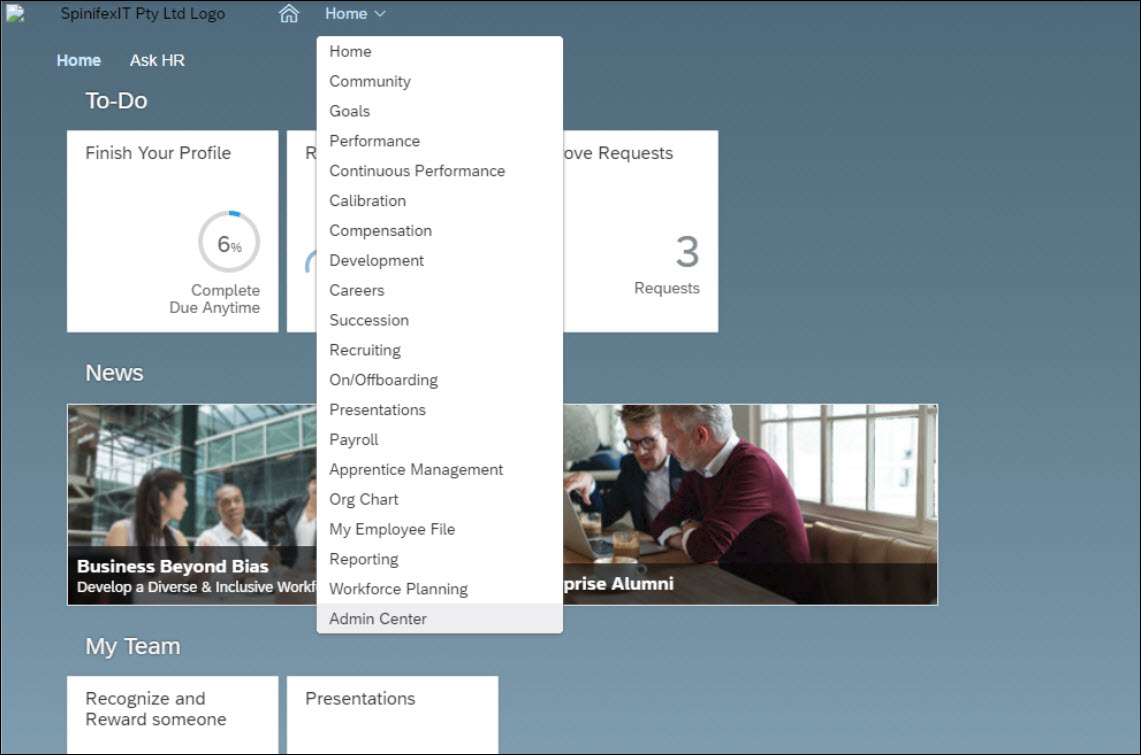
- Log in to your SuccessFactors instance:
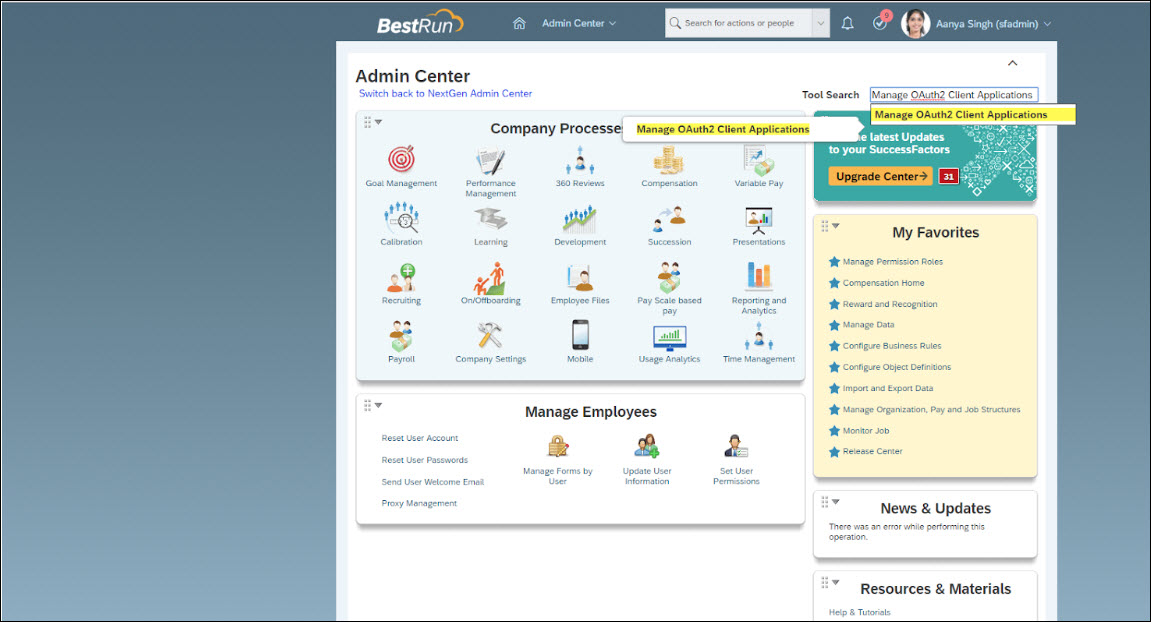
- Go to Home > Admin Center
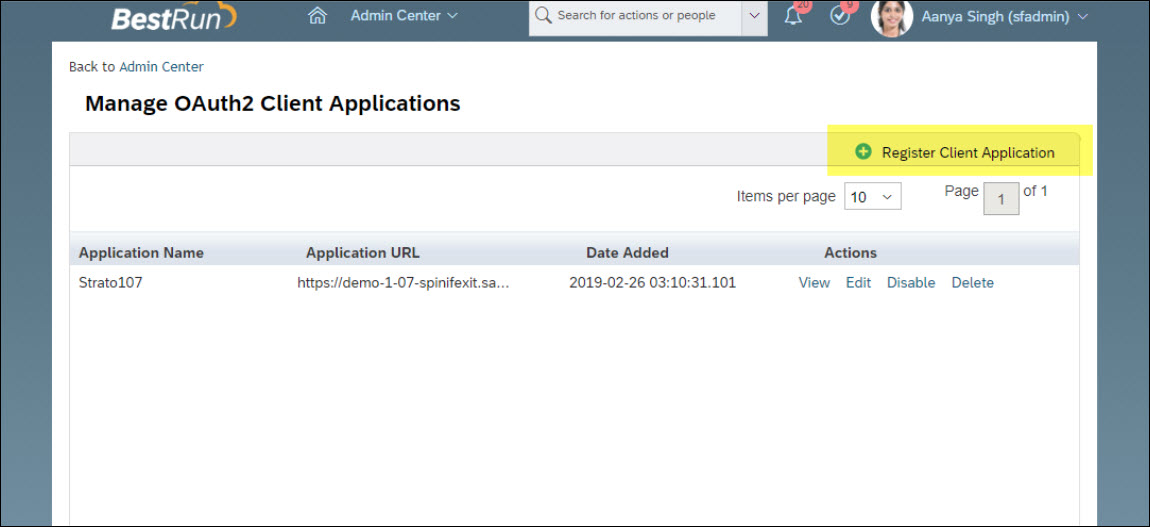
- Search for Manage OAuth2 Client Applications and then click it.
- Click Register Client Application
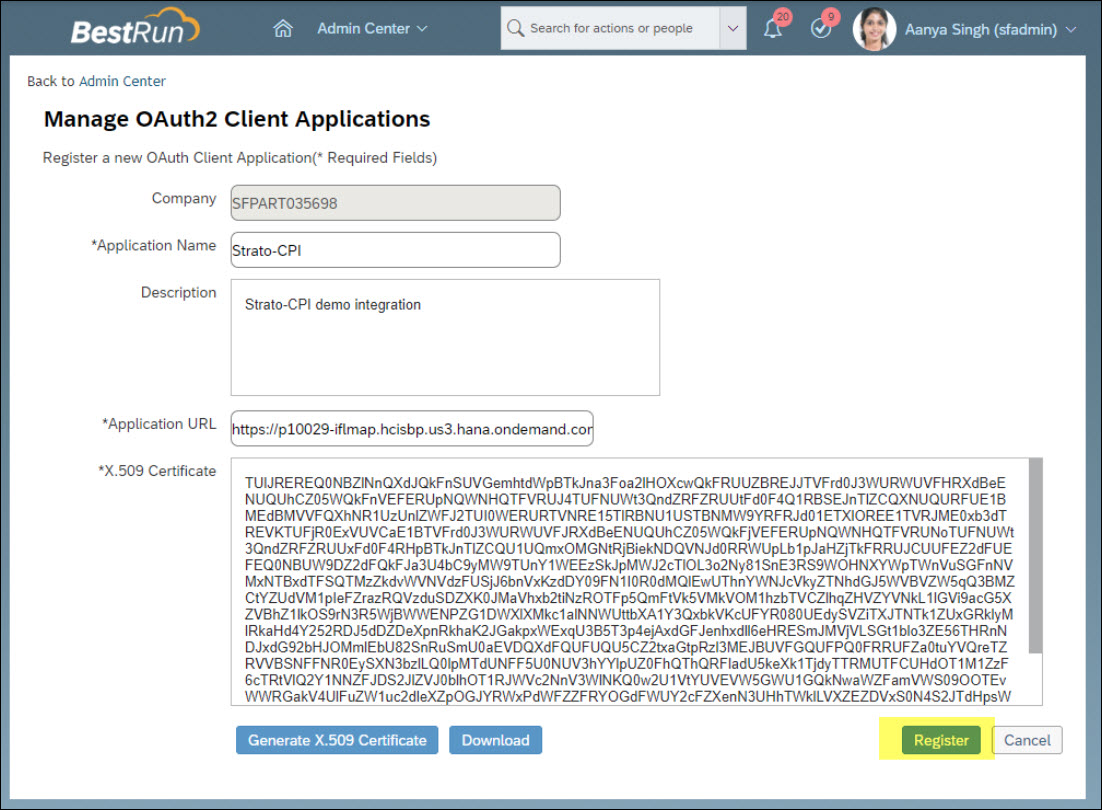
- Enter the following details and then click Generate X.509 Certificate:
- Application name: Strato-CPI
Description: (Any suitable description)
Application URL: your CPI runtime url (example: https://pxxxxx-iflmap.hcisbp.yyy.hana.ondemand.com)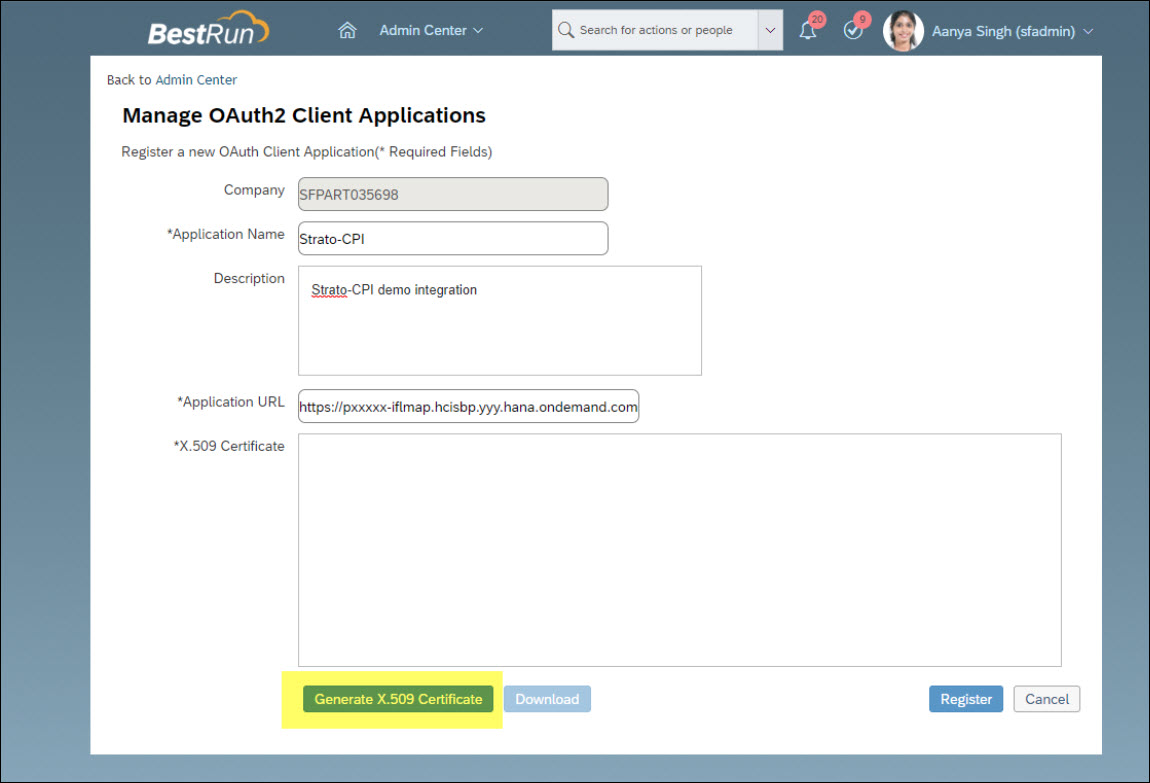
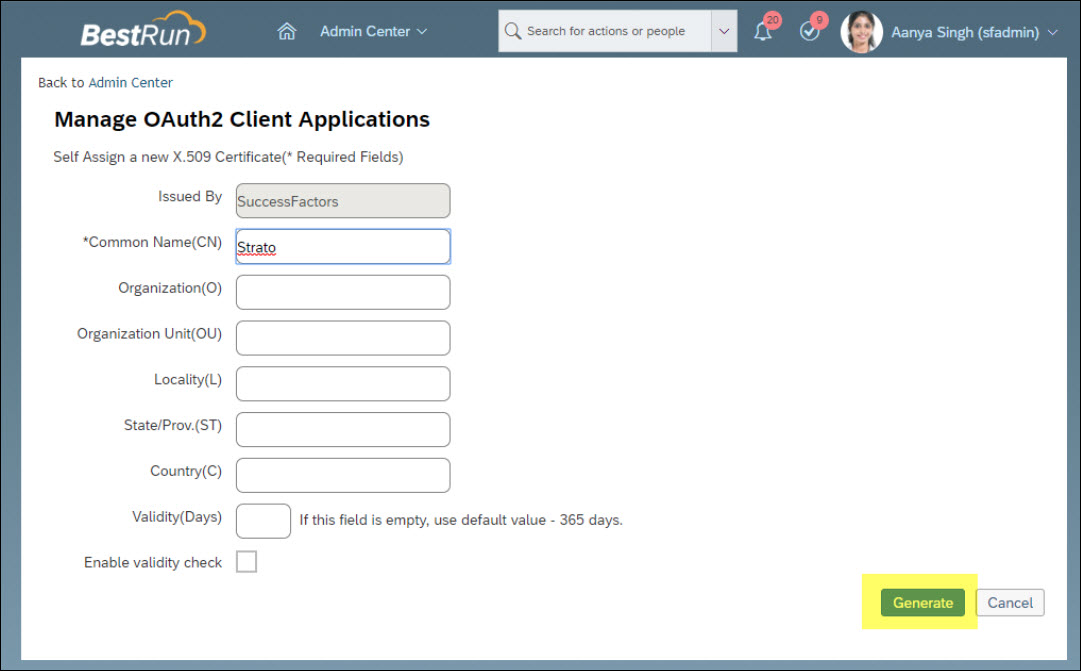
- On the next screen, enter Strato as the Common Name and enter 99999 in the Validity (Days) field, then select Generate.
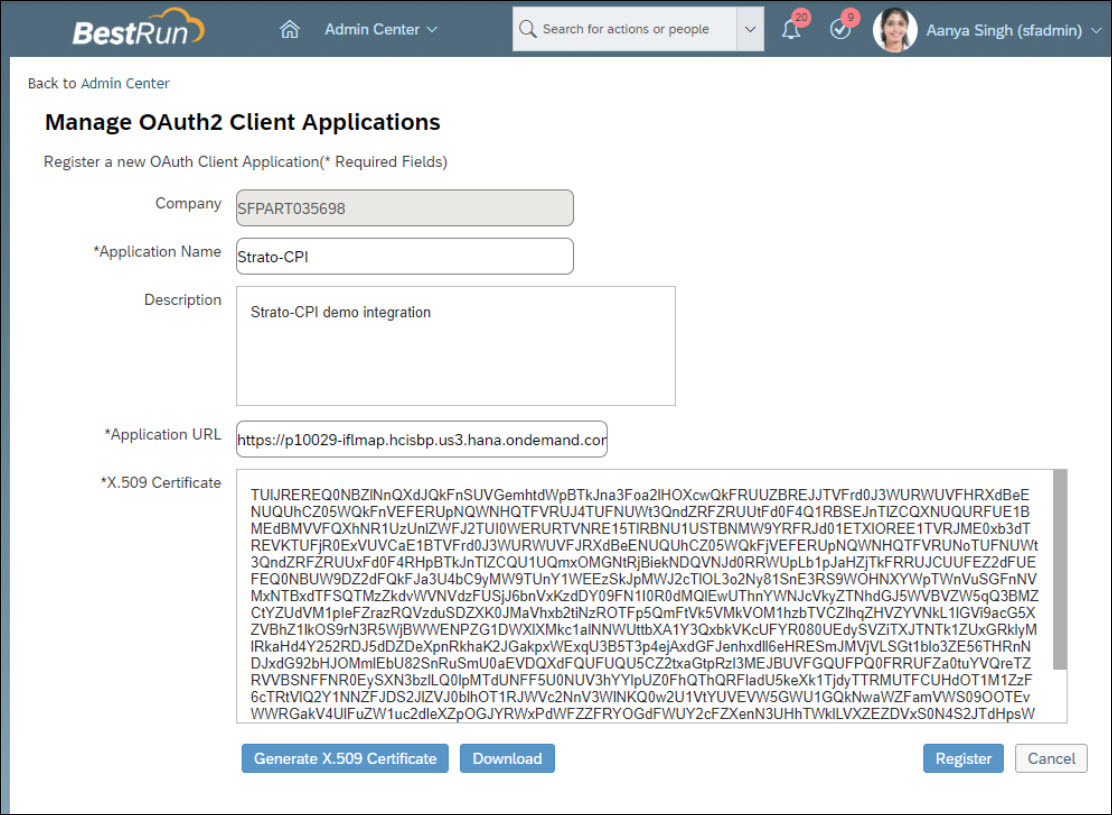
- You will see the X.509 Certificate. This string is the one that you will put in parameter CM_PrivateKey.
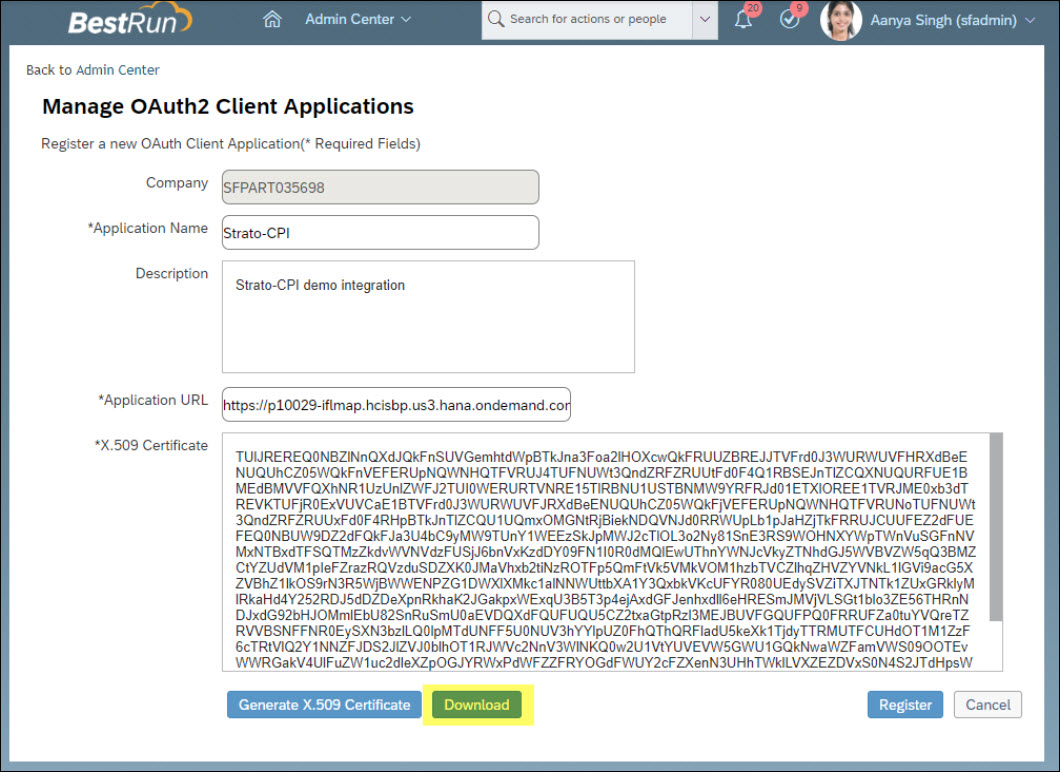
- Click download and open it in Notepad.
- Copy the Private Key string. This is placed between Begin Encrypted Private Key and End Encrypted Private Key.
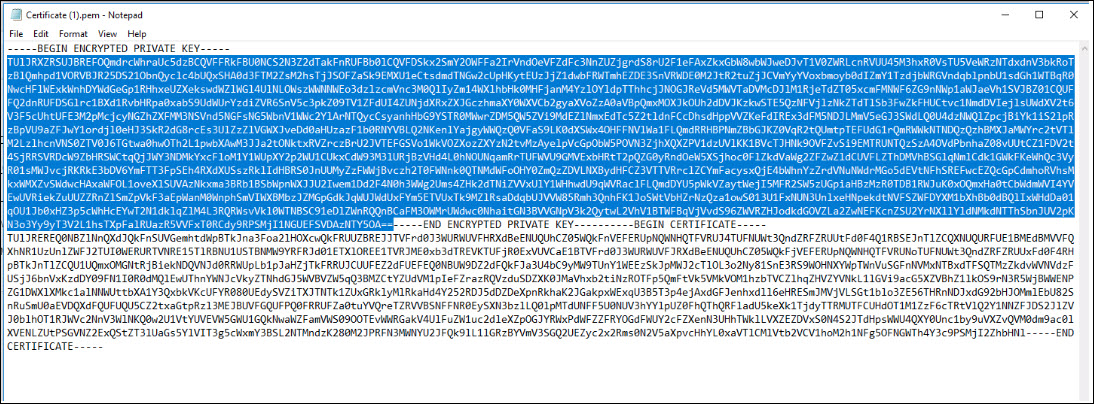
- Paste to parameter CM_PrivateKey.
- After the download, click Register.
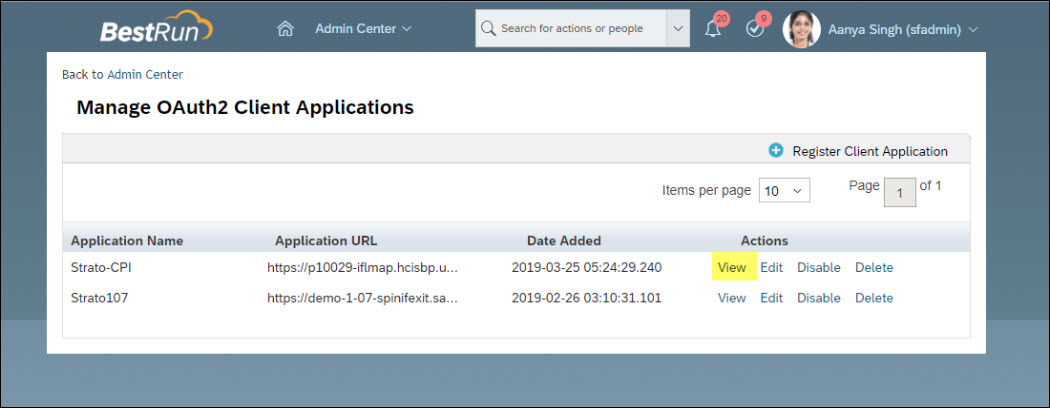
- The new Client Application (named Strato-CPI in this demo) is now created. Click View.
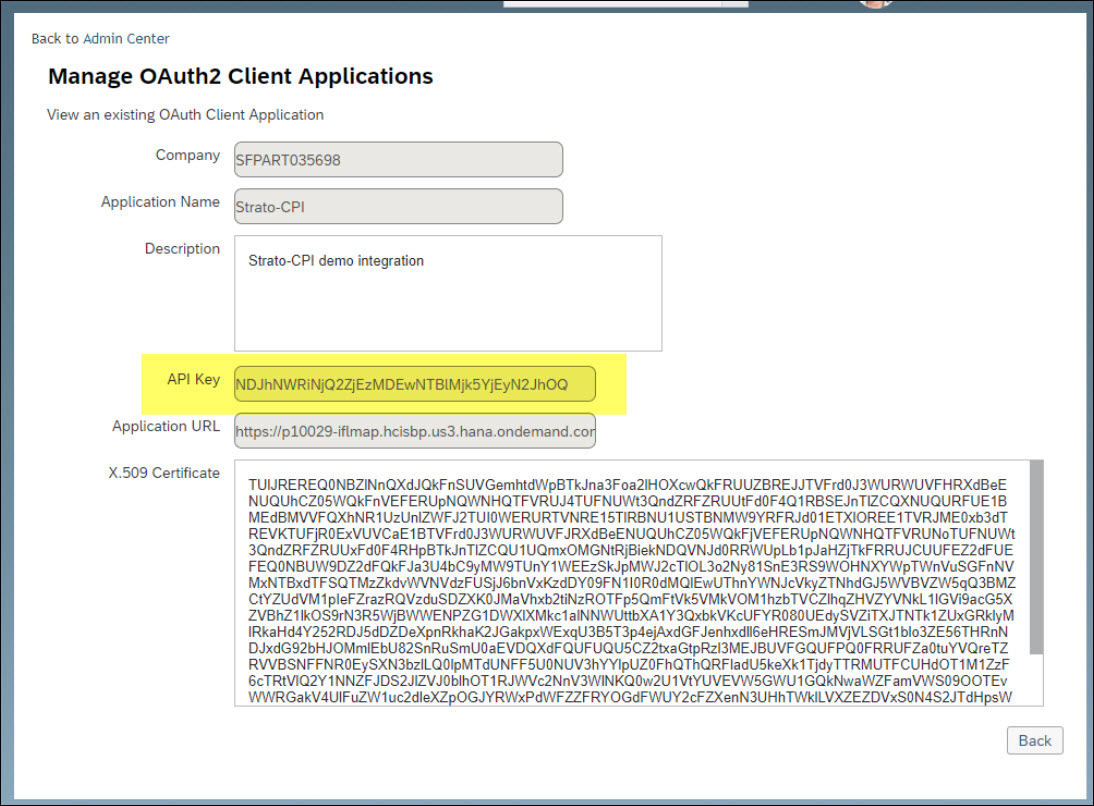
- When viewed, you will see now that there is an API Key. You will use this in CM_ClientId.
- When done, click Save and then click Deploy.