Access Uploaded Documents in SuccessFactors (Document Storage)
There are two primary methods to access documents stored in SuccessFactors, such as Letters of Offer. The method used often depends on whether the individual is an internal employee or an external candidate.
- Admin Approach: Used to check the raw data via the Manage Data tool.
- UI Approach: Used to display documents on the Employee/People Profile (requires configuration).
Requirements
Before accessing or configuring these views, ensure the following prerequisites are met:
- MDF Objects: For internal employees, an MDF (Metadata Framework) object must be created to store the contract against the Employee Central record.
External Candidates: For external candidates, the Application widget must be configured to hold the document against the Candidate’s record in Recruitment Management.
RCM Template IDs: The widget requires that the RCM template IDs used against the Job Requisitions for Job Offers be entered into the Widget.
Instructions
Method 1: Admin Approach (Manage Data)
This method allows administrators to view the stored object directly in the backend.
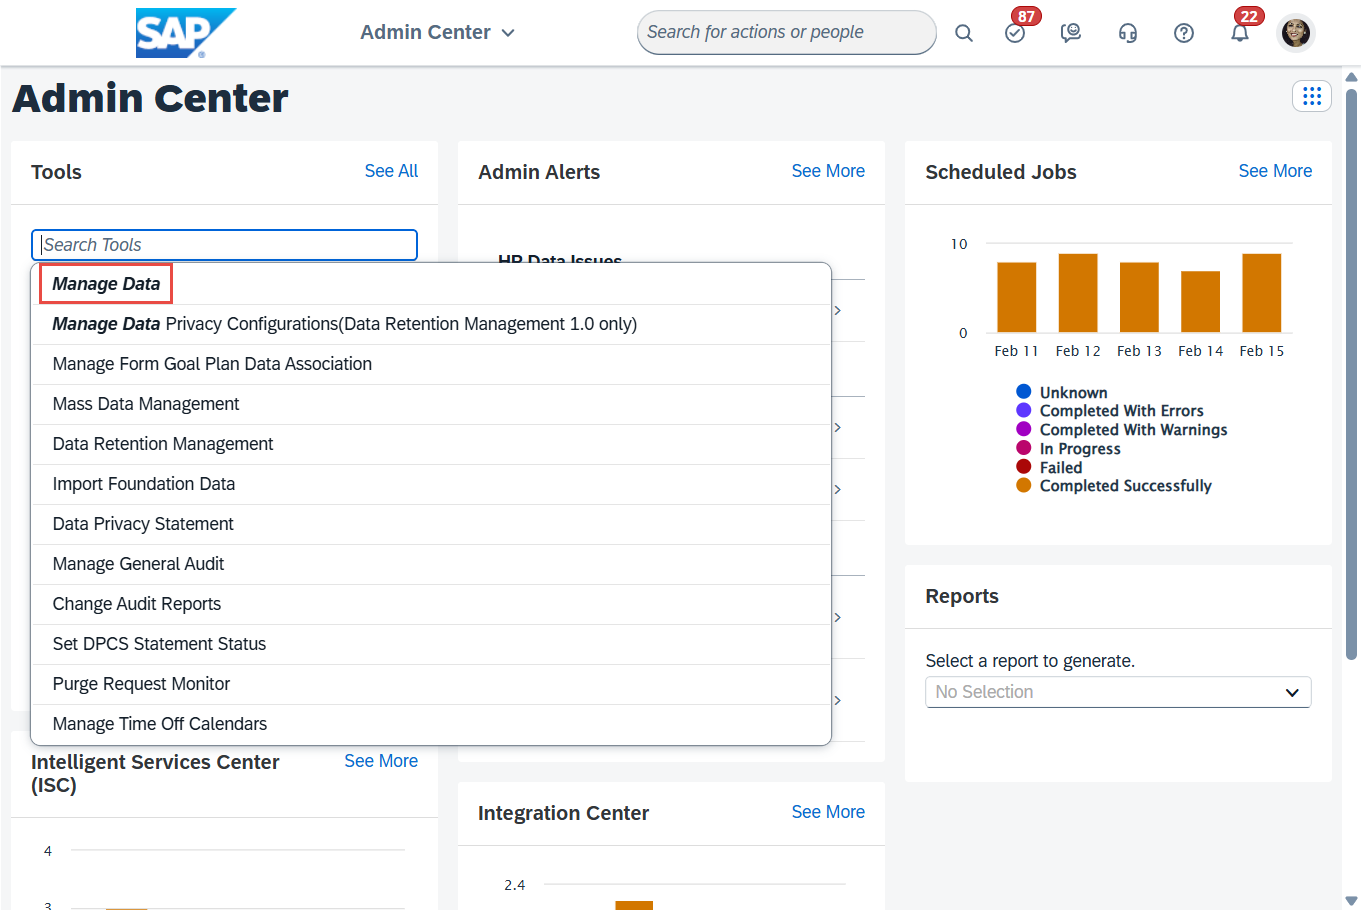
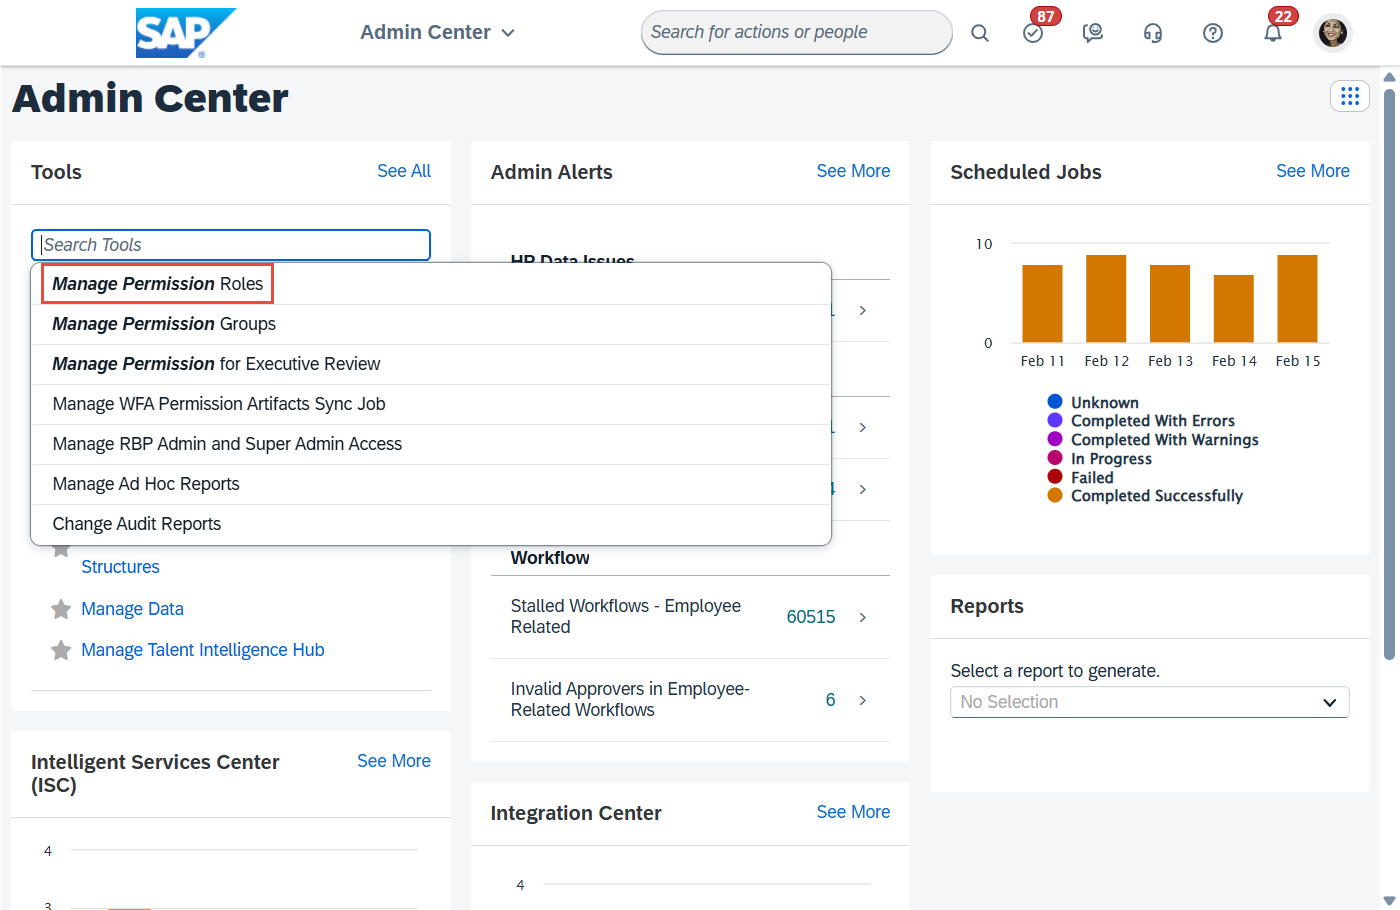
- Navigate to the Admin Center.
- In the Tool Search box, search for and select Manage Data.
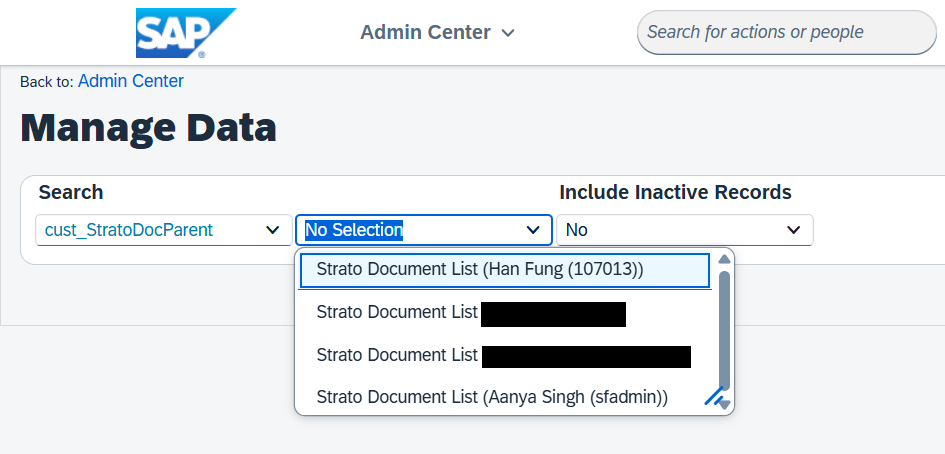
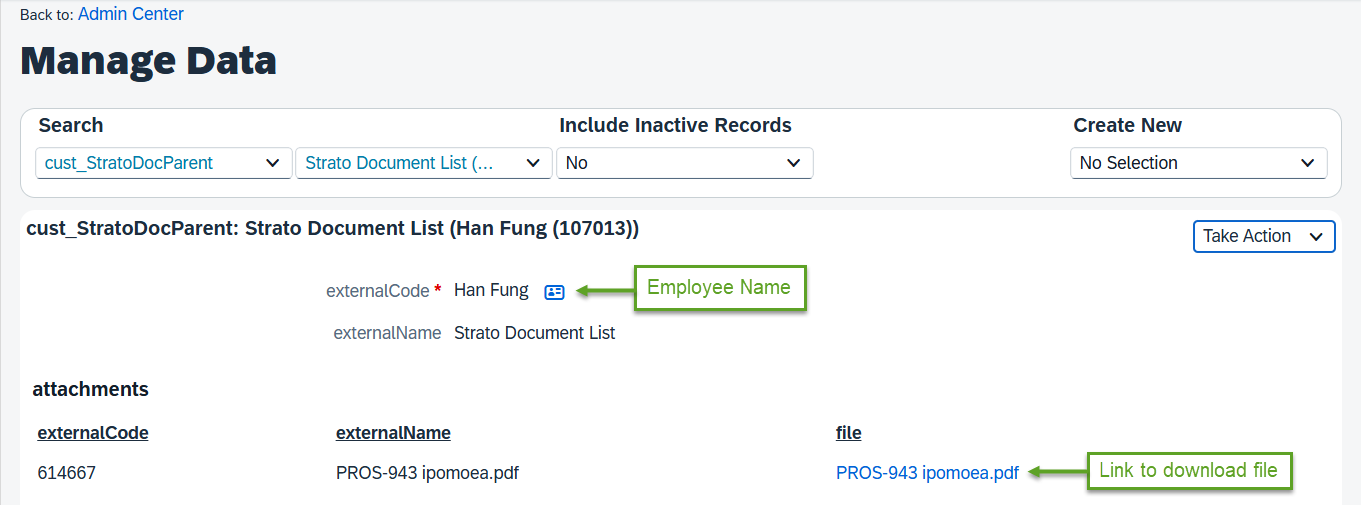
- Select one of the created objects.
- In the second search field, select one of the created objects to view the details.
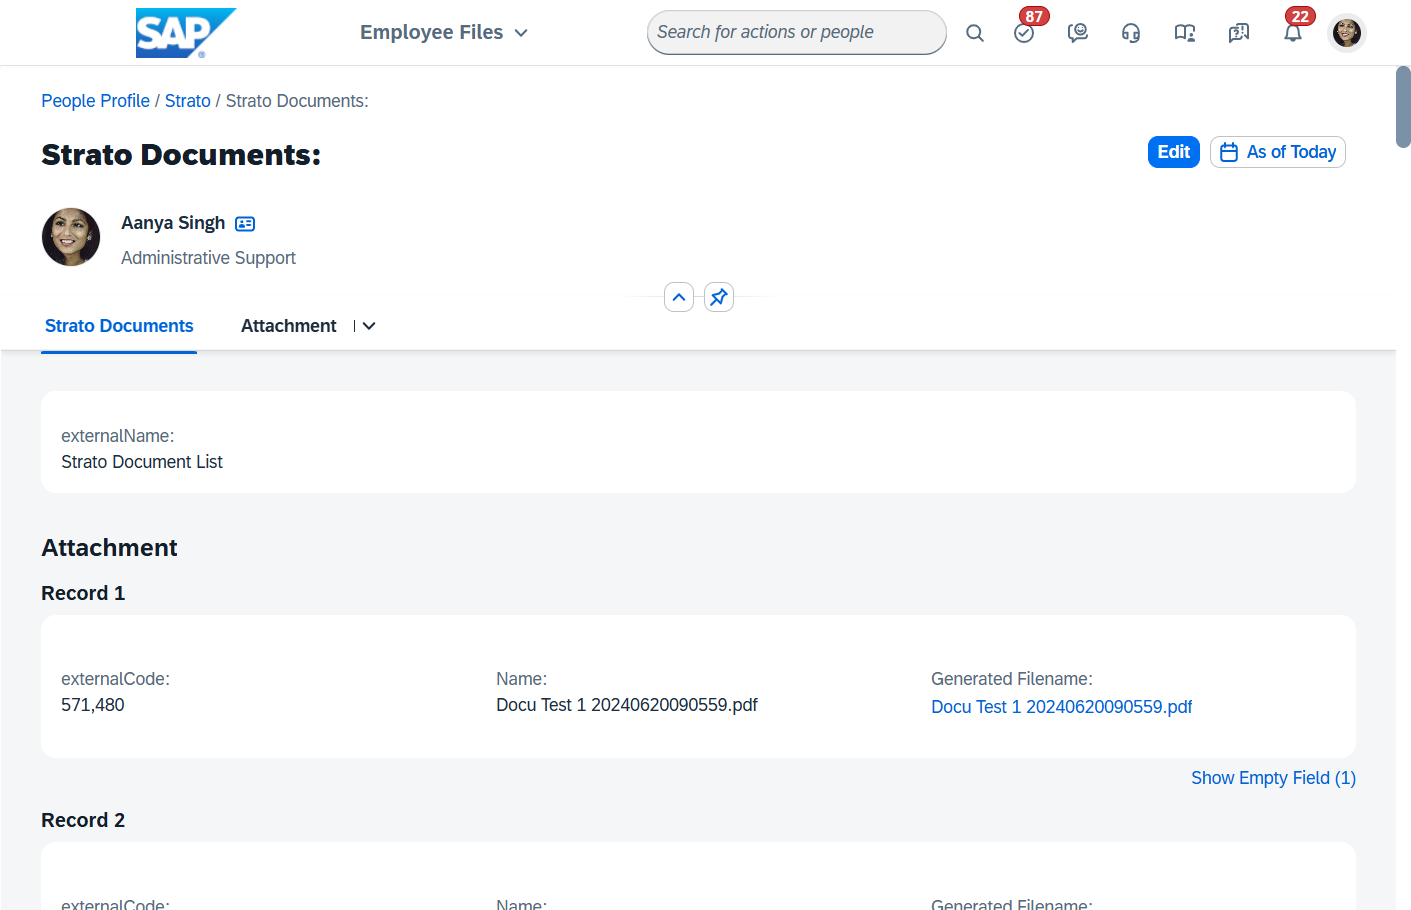
Method 2: UI Approach (People Profile)
To allow access via the People Profile, you must first create an MDF UI, link it to the profile, and grant the necessary permissions.
Part 1: Create the MDF UI
- Navigate to the Admin Center.
- In the Tool Search box, search for Manage Configuration UI.
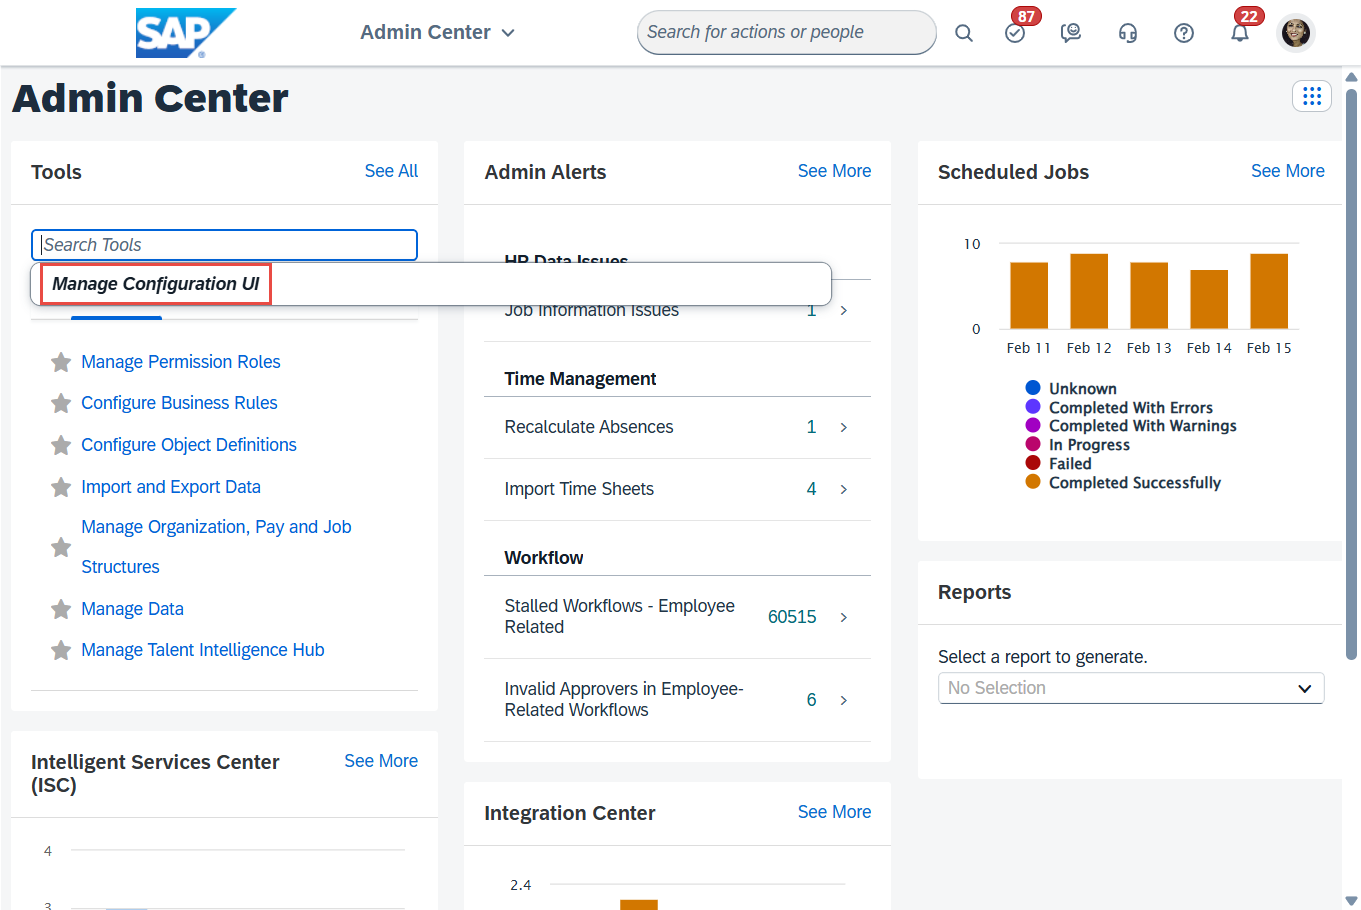
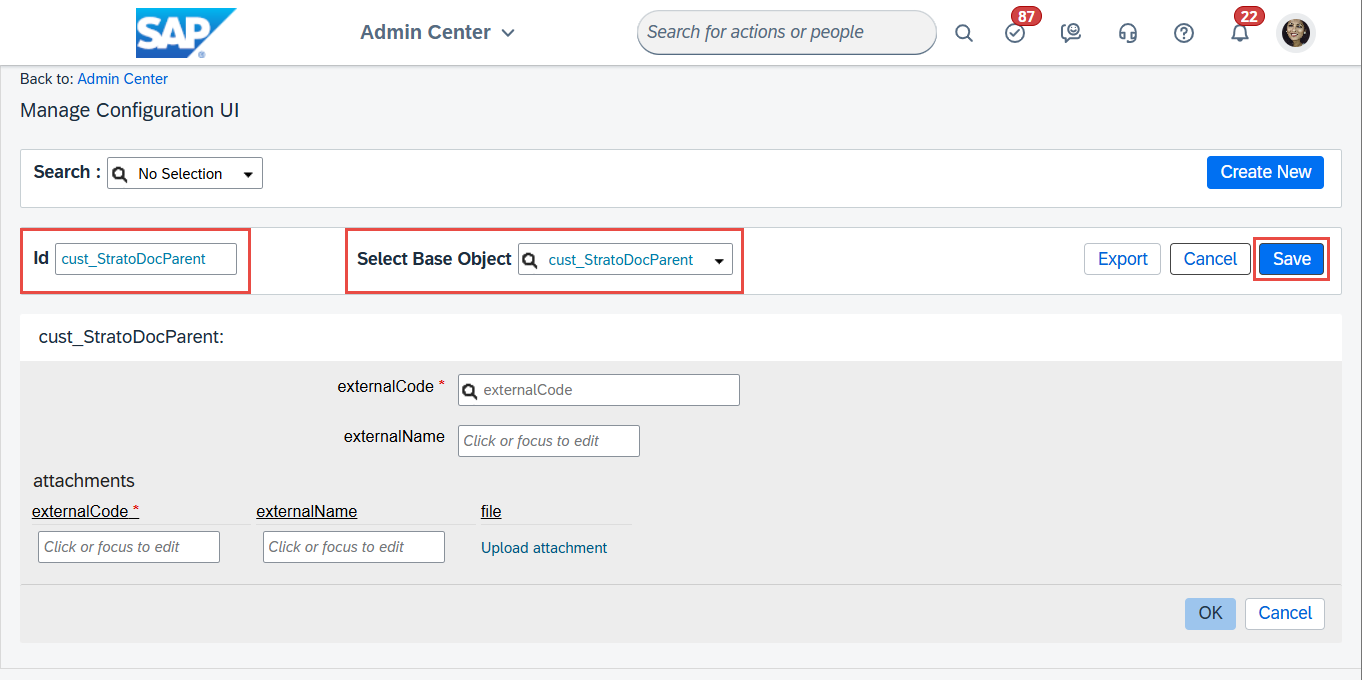
- Click Create New.
- Add an ID value (any unique string).
- Select the parent MDF object you created earlier.
- Click Save.
Part 2: Link to People Profile
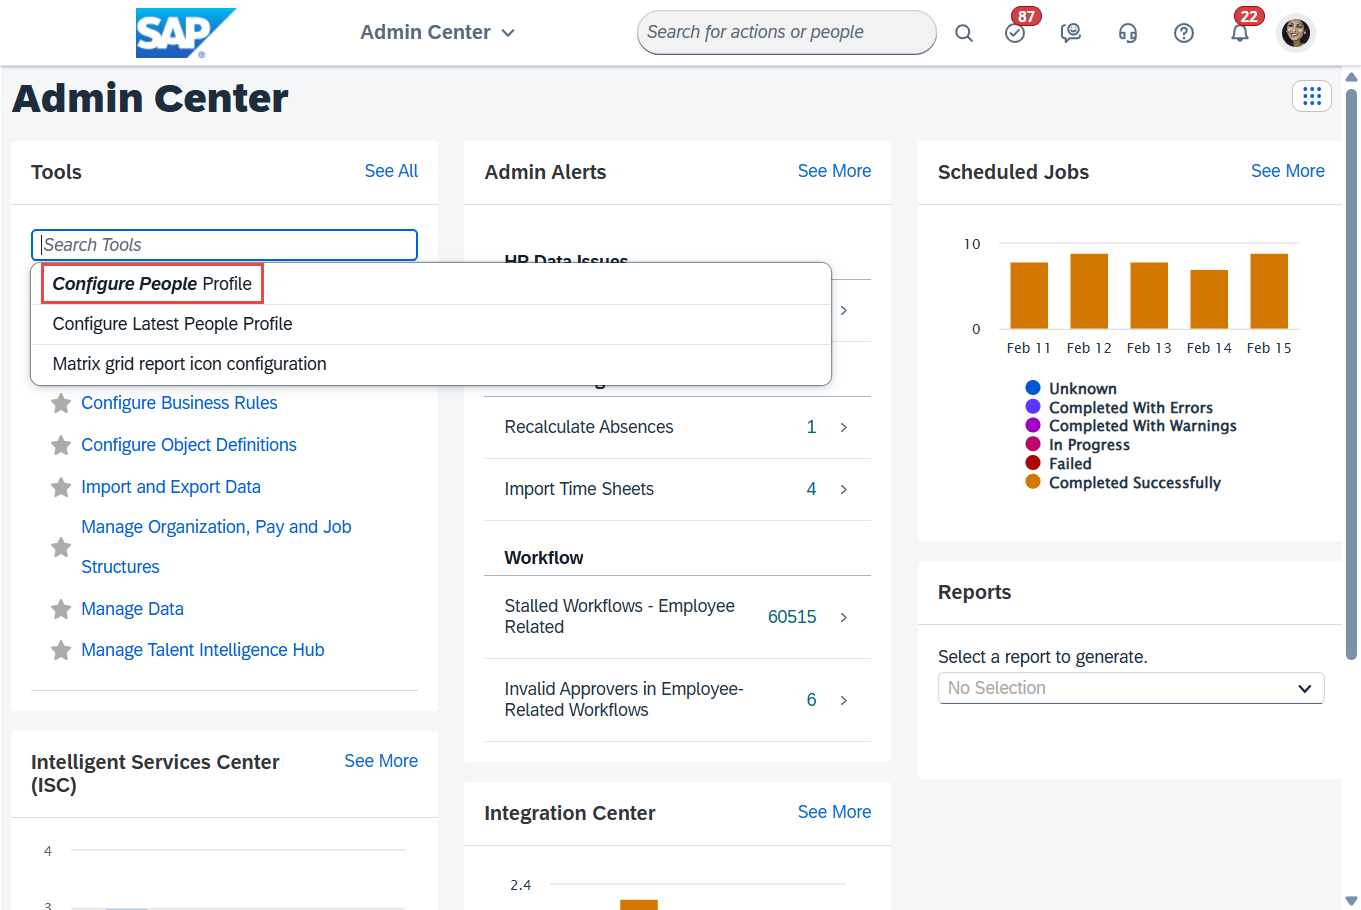
Navigate to the Admin Center.
In the Tool Search box, search for Configure People Profile.
On the right-hand panel, search for MDF.
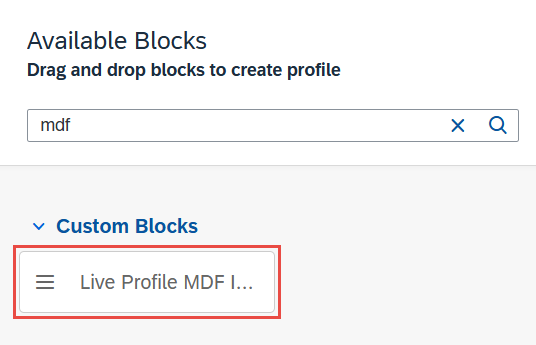
Drag the Live Profile MDF block to an available slot on the profile layout.
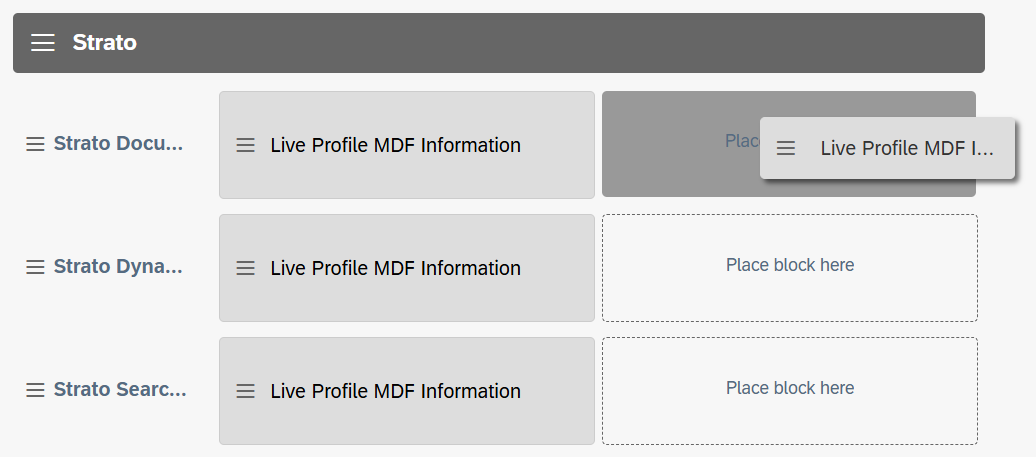
Click the block you just added to select it.
Select the MDF UI you created in Part 1.
Click Save.
Part 3: Grant Permissions
To ensure employees can view this section, you must update Role Based Permissions.
Navigate to the Admin Center.
- In the Tool Search box, search for Manage Permission Roles.
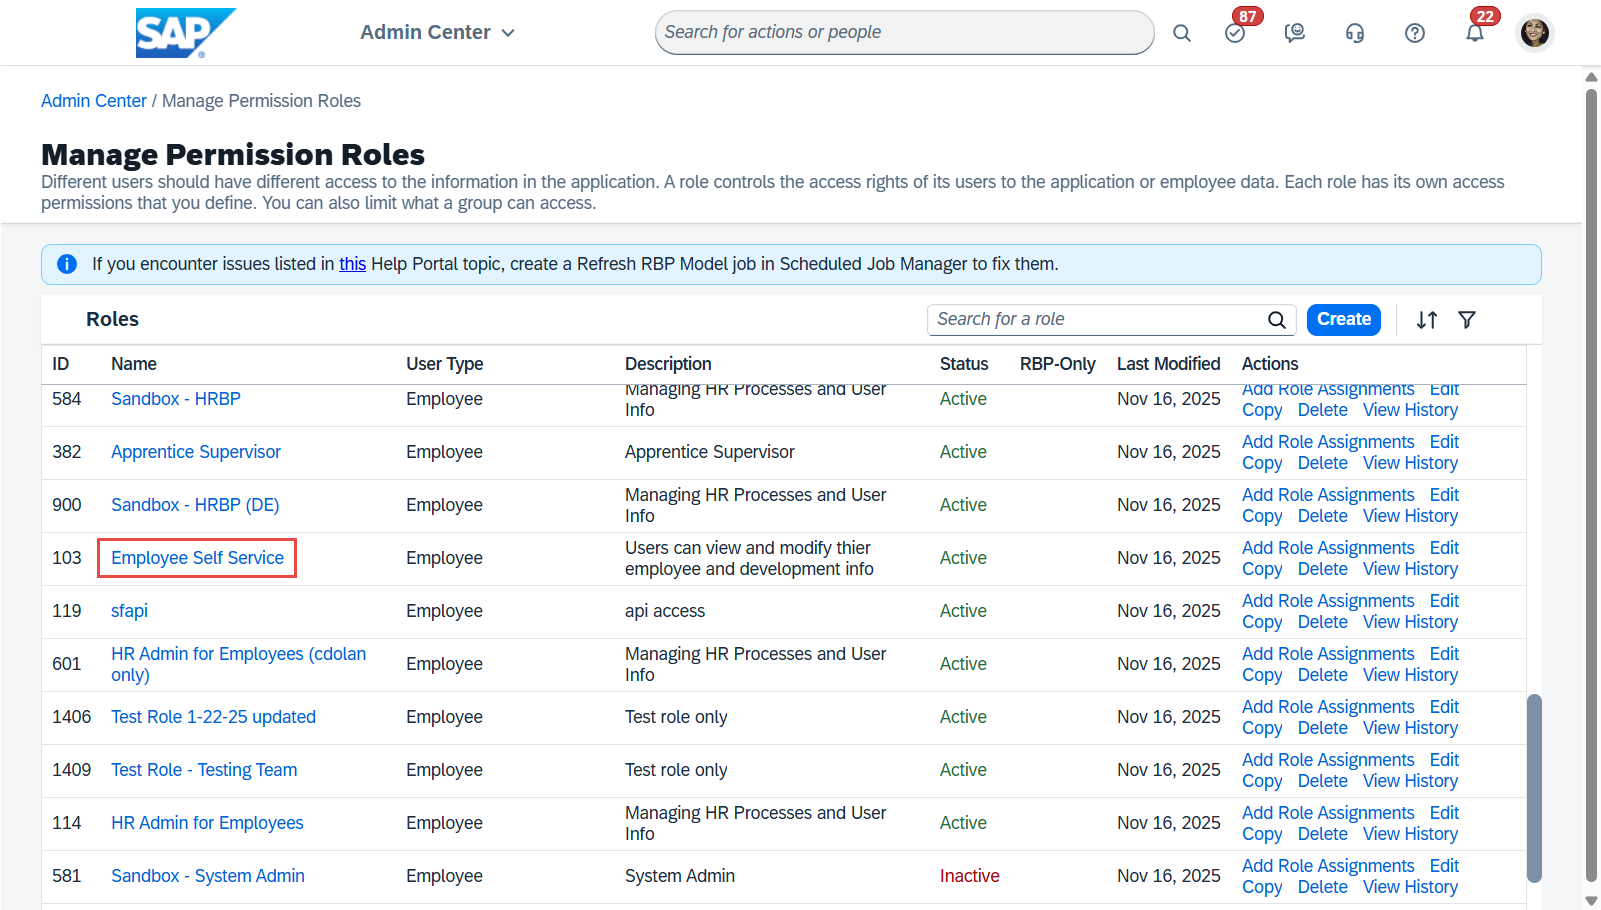
- Select the relevant role (e.g., Employee Self Service).
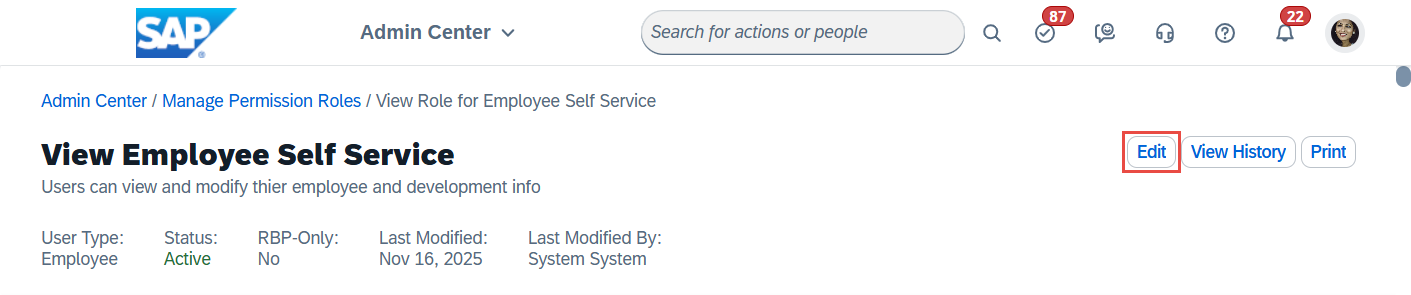
- Click the Edit button.
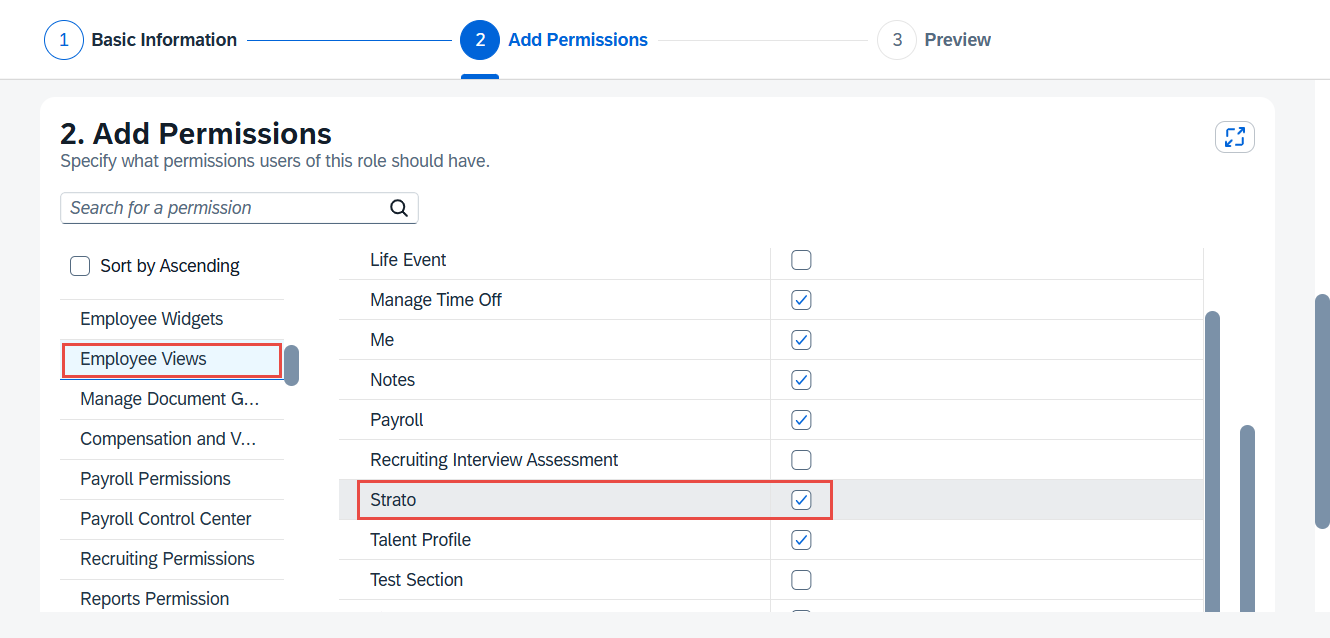
- In the Add Permissions section, scroll down to Employee Views.
- Check the box for the section where you added the MDF UI on the People Profile.
- Click Done, then click Save Changes.
You can verify the configuration by searching for your own name in the SuccessFactors search bar and viewing your Employee Profile.