How to Set E-signature Workflow in Application Widget
Users who enabled their DocuSign integration or AdobeSign integration may embed DocuSign or AdobeSign placeholders into their Document Template using Custom Fields. Once these fields are embedded into the Document Template, a user may send the Document to its intended Accomplice and recipient for e-signature by creating an Application widget.
See all E-signature that can be integrated in Strato here: E-signature Integrations in Strato
To define an e-signature workflow, follow the steps below:
- Go to Widget Settings and click Add Widget
 button. Select Application as the Widget Type.
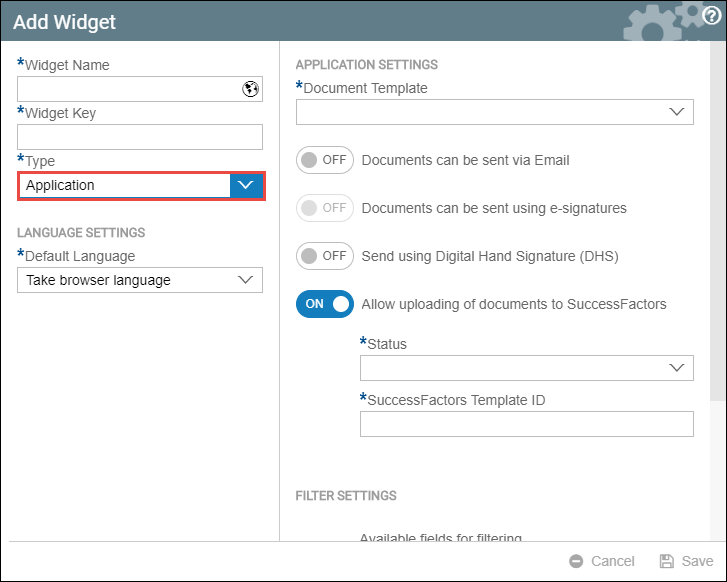
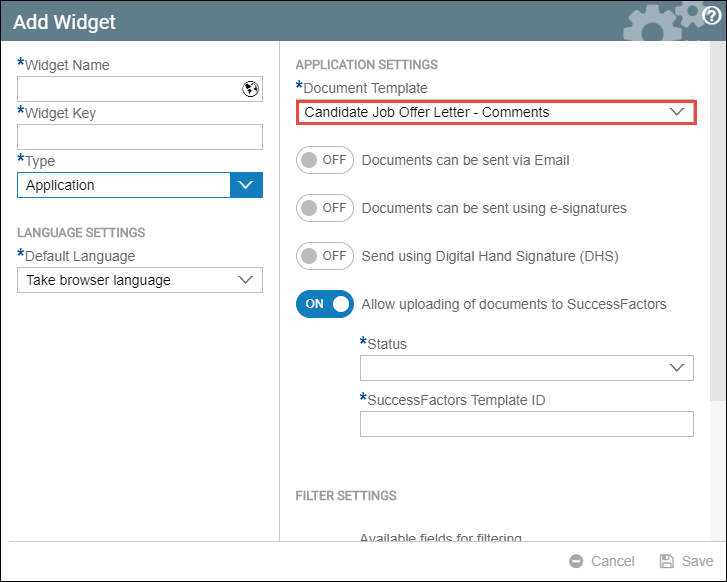
- Select the Document Template that you would like to use for this Application Widget.
- Turn on the Documents can be sent using e-signatures toggle. You will then see a Signatures Workflow section.
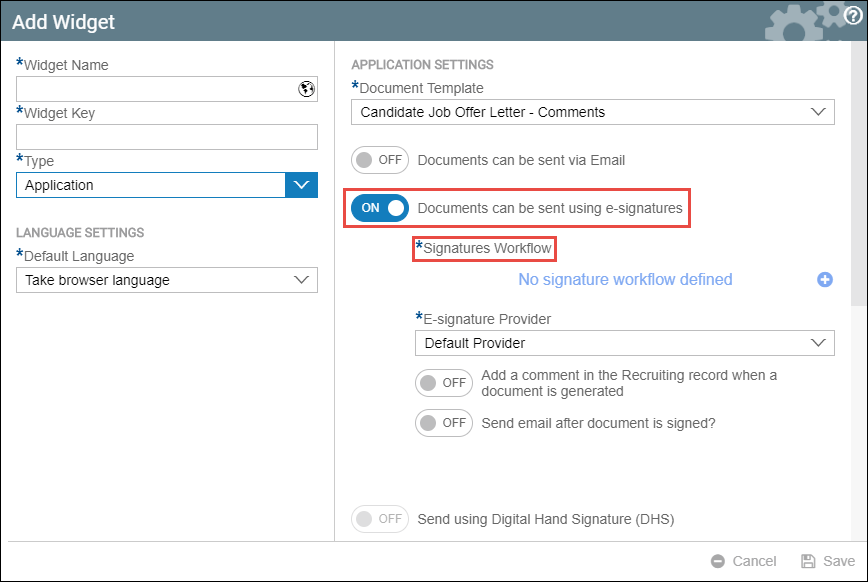
- Set a signature workflow. This will be the sequence in which the document will be sent to the people selected.
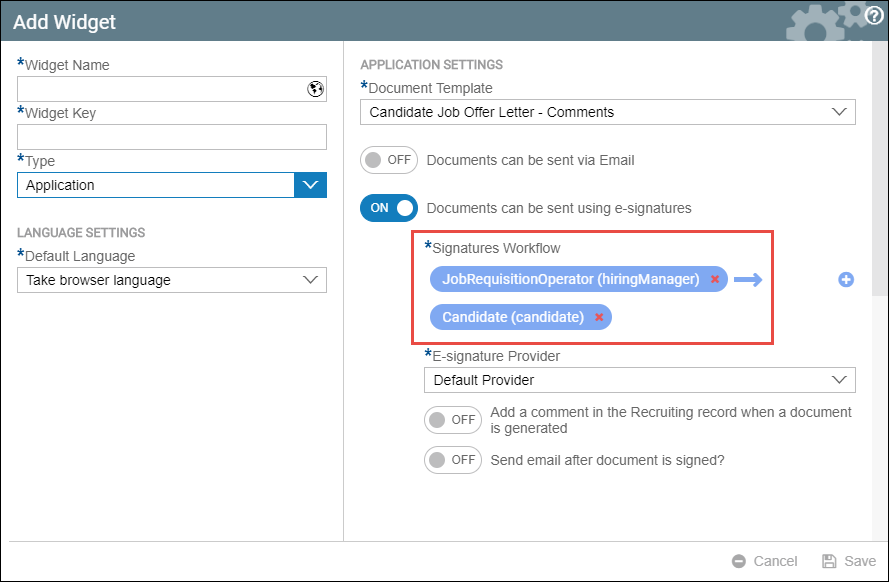
- The first recipient or signatory the User selects is considered the initial approver. In this case, the User would like to have the Hiring Manager as initial Approver, followed by the Candidate as the final Approver or Signatory. Once the User sends the Document via AdobeSign / DocuSign, a copy goes to the Hiring Manager first. Upon the Manager's approval, it routes to the Candidate. Should the Candidate accept, the digitally signed Job Offer letter will be sent back to the Recruiter's / User's e-mail.

Clicking Save will complete the widget creation process and will activate the approval / signature path above.
The default integration which Strato uses depends on which you set from the start.
For more information, click the article below.
Creating and Configuring Digital Signature Fields
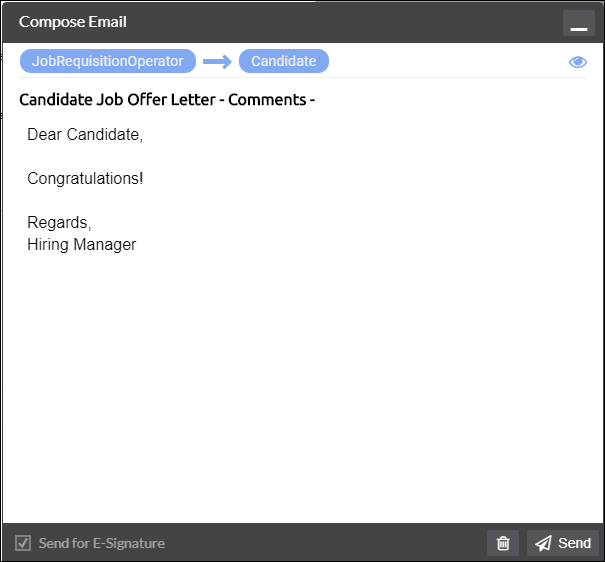
Here is a sample generated document from an Application Widget integrated with DocuSign / AdobeSign. At the bottom right corner, you will see the email icon.
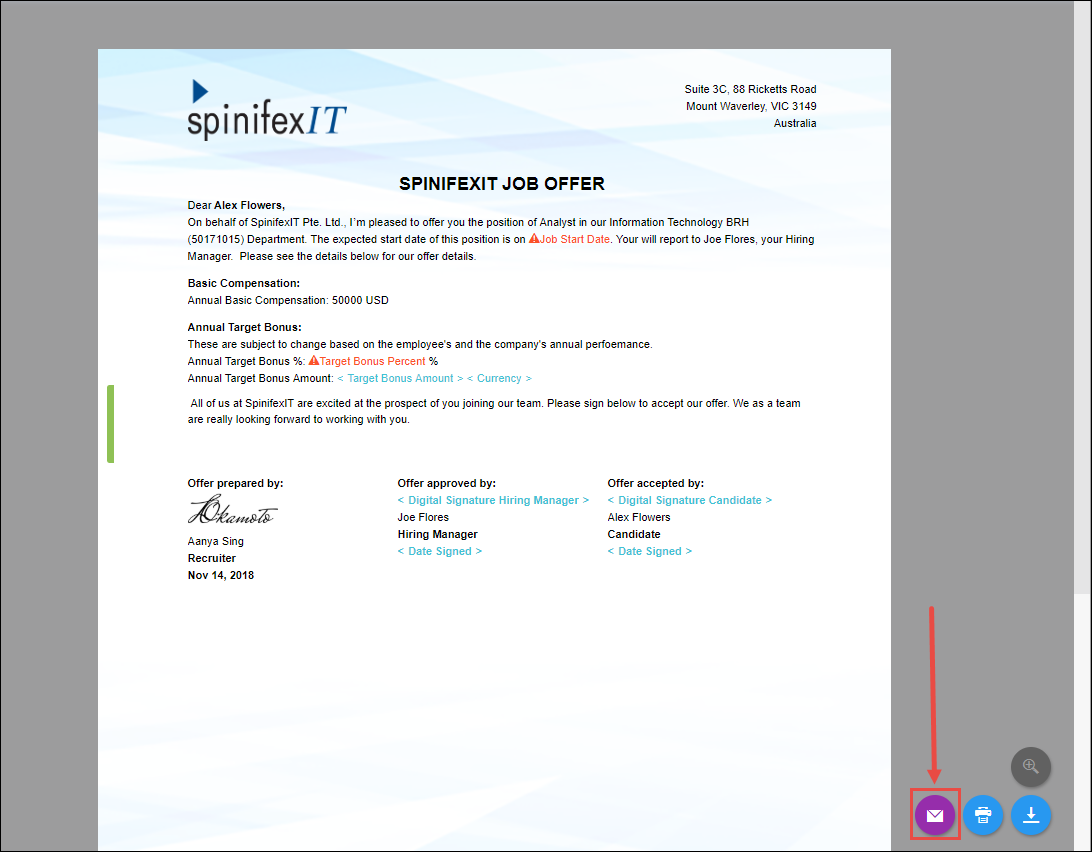
When the email button is clicked, this pop-up will be displayed. Only plain text can be entered in the contents of the email.