Adding/Configuring Workflow Report Card
The Workflow Report Card allows you to create different types of reports depending on the needs of your organization. You can create reports that track the number of workflow executions, the number of approved vs rejected offers, KPI reports, etc.
This also allows managers and recruiters a way to view which workflows are running and those that have been executed in the past. (read: Strato Workflow - Overview)
To have a brief overview of how the Workflow Report Card is used, read: Viewing Reports for Executed Workflows for Admins, Managers and Recruiters (Workflow Report Card)To create a Workflow Report Card, click the Add Button while in the edit mode of a Dashboard Widget. The following options will be displayed:
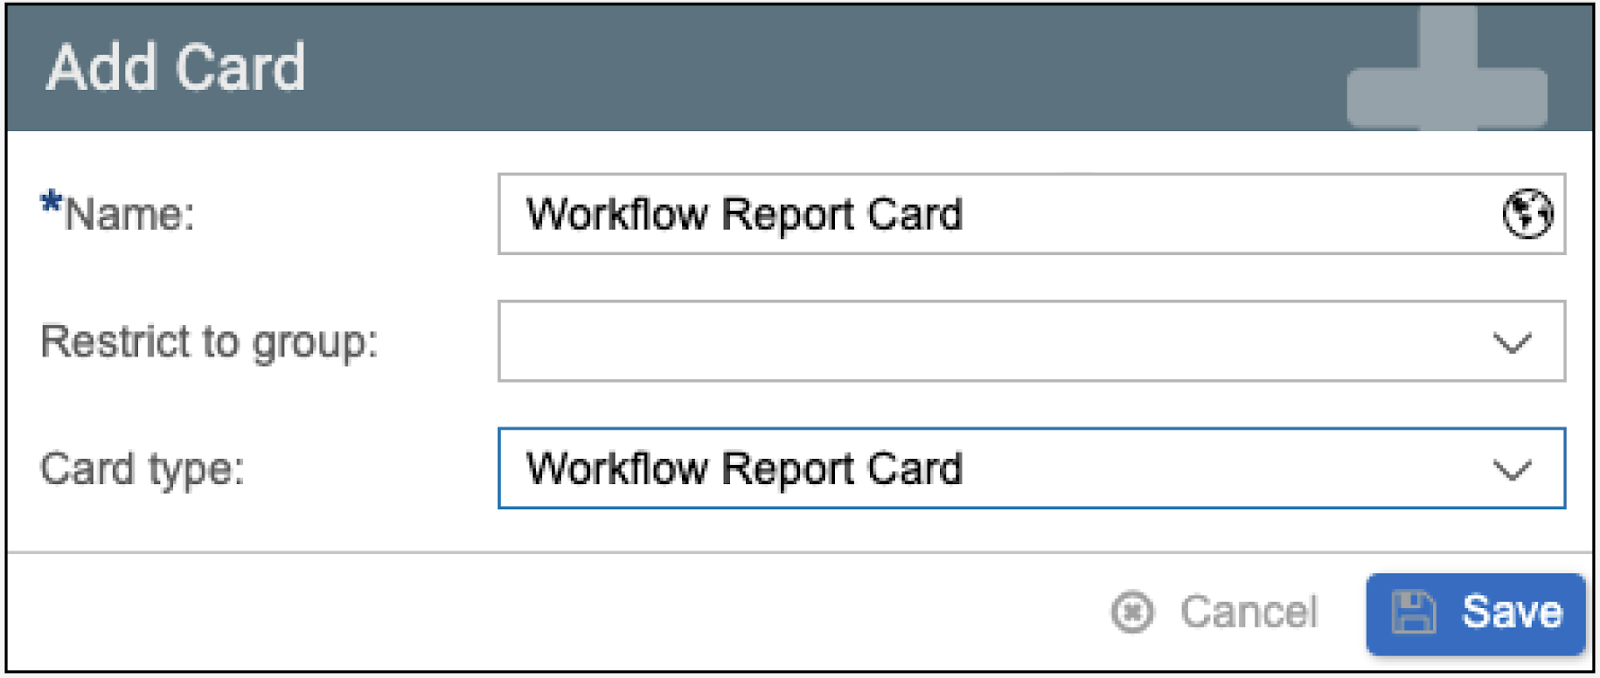
- Name - Enter a name for the Workflow Report Card.
- Restrict to group - select a group from your user management that this specific card will be available to. Only the users under that group will have access to this card.
- Card type - select Workflow Report Card.
Once saved, make sure to enable it by clicking the toggle in the upper right corner.

The Workflow Report Card should look like this:
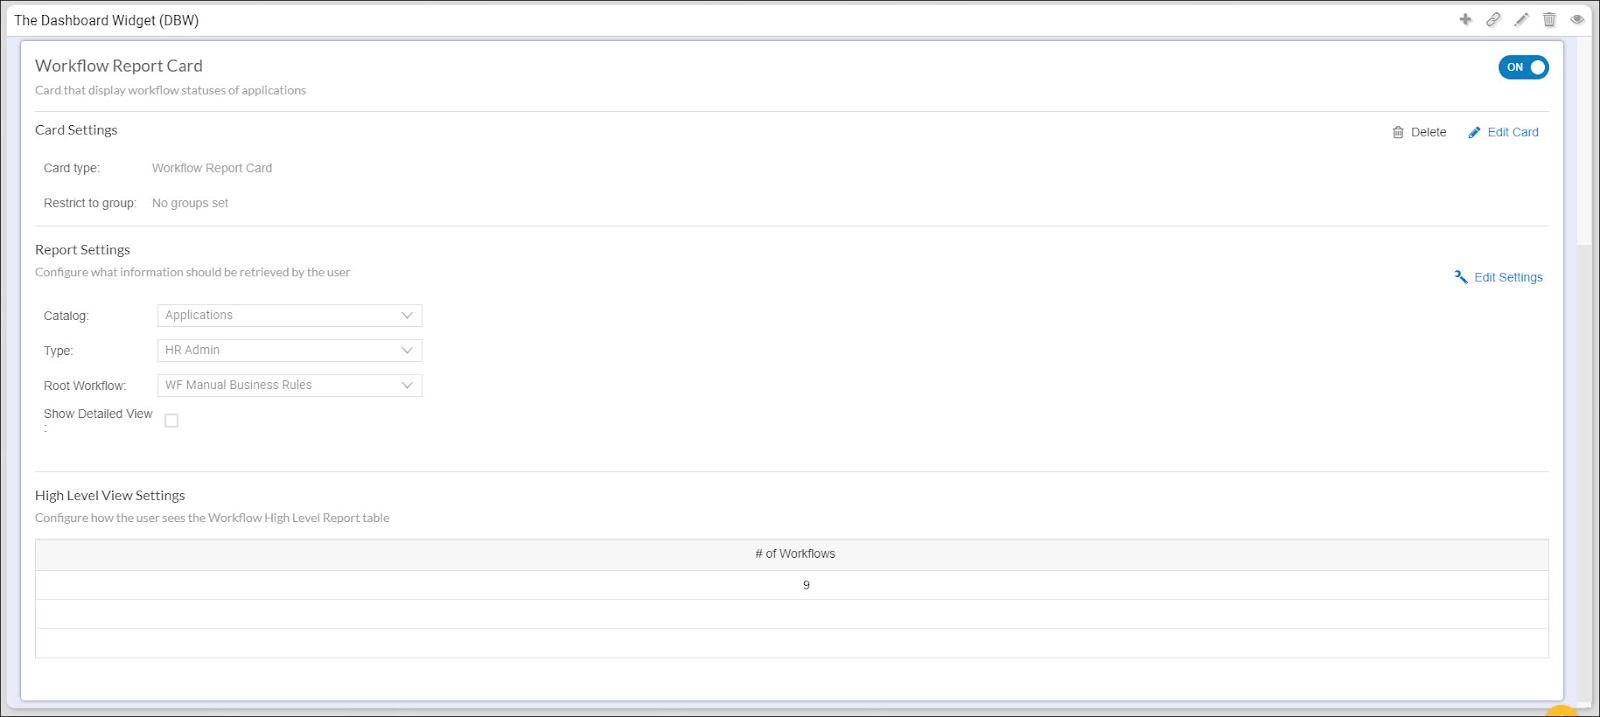
Card Settings
This section displays the settings of the Workflow Report Card when it was created.
- Card Type - Workflow Report Card
- Restrict to Group - this displays the selected group in User Management that this card will be restricted to. If there is none, it will display No groups set.
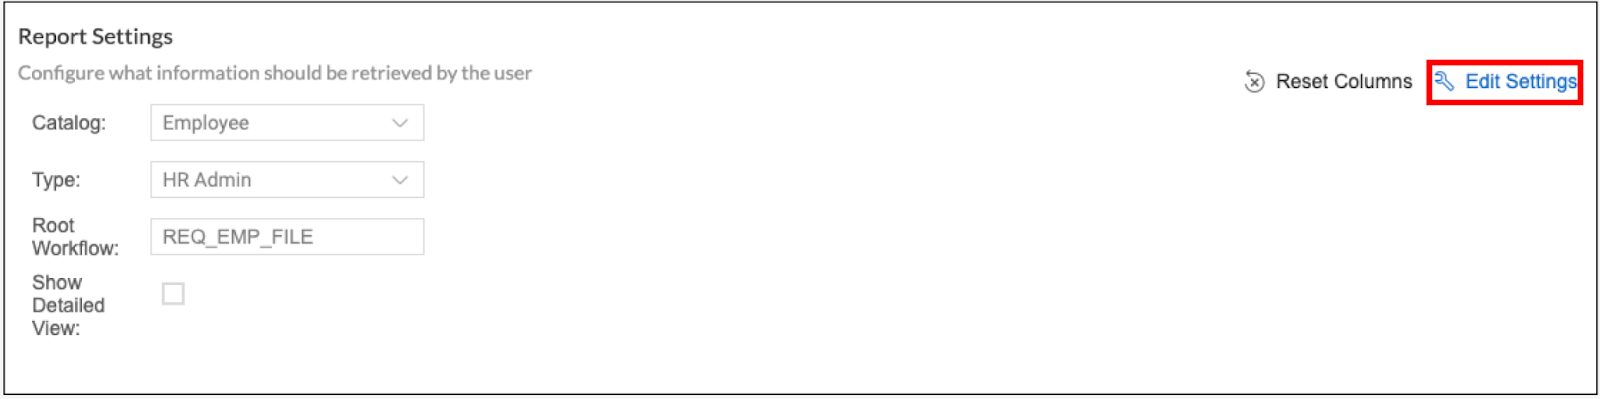
Report Settings
This section determines the columns and data that will be shown and reported in this card.
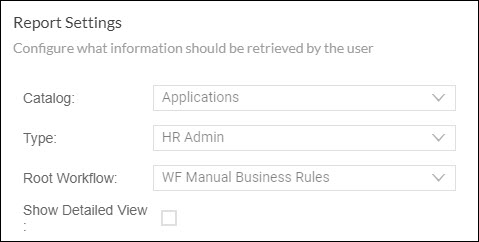
To edit these options, click the Edit Settings button.
- Catalog - select between Employee and Applications. Once selected, the fields that will be used as columns will come from the selected catalog.
- Note: There should be an executed workflow in the catalog for it to show in the report card configuration. For example, when creating a report for Applications Catalog - there should be an executed workflow with Applications Catalog, as only executed workflow catalogs will appear in the report card configuration.
- Type - select the type of report that will be created. If Application is selected as the catalog, the available types are HR Admin, Hiring Manager, and Recruiter. If Employee is the selected catalog, the available types are HR Admin and Hiring Manager. The selected type will indicate if this card is intended as Manager Self Service, Recruiter, or as an Admin.
- Root Workflow - Since reports are based on all executed workflows, it can sometimes lead to reports where a single employee or applicant would be treated as separate rows. To further customize this, Strato administrators can choose a “root” workflow where any executions made under that workflow is treated as a single entry in the report.
- Show Detailed View - when enabled, this will allow a more detailed view of your report. A view details button will be displayed on each row of the High Level report. Clicking this will display a popup showing the detailed report. This is used in cases where a high level report is needed at first glance. In cases where only a simple, single report is needed, then this checkbox will be disabled and all information will be added in the High Level report.
Once configured, it should display the settings that have been configured.
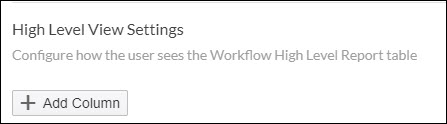
High Level View Settings
This is where the fields will be added as columns to your report.

Click the Add Column button to start adding columns to your report.
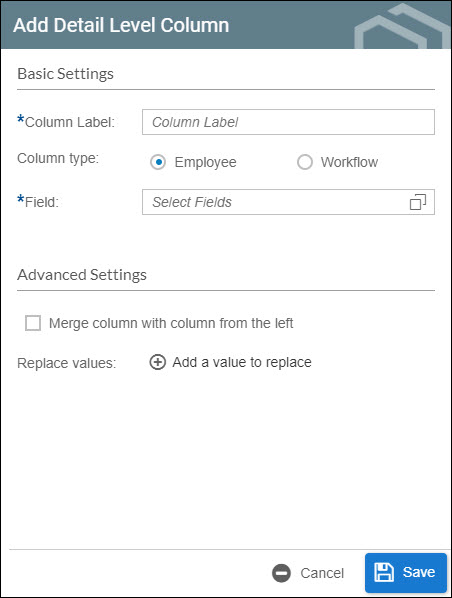
A small window called Add Detail Level Column will appear.
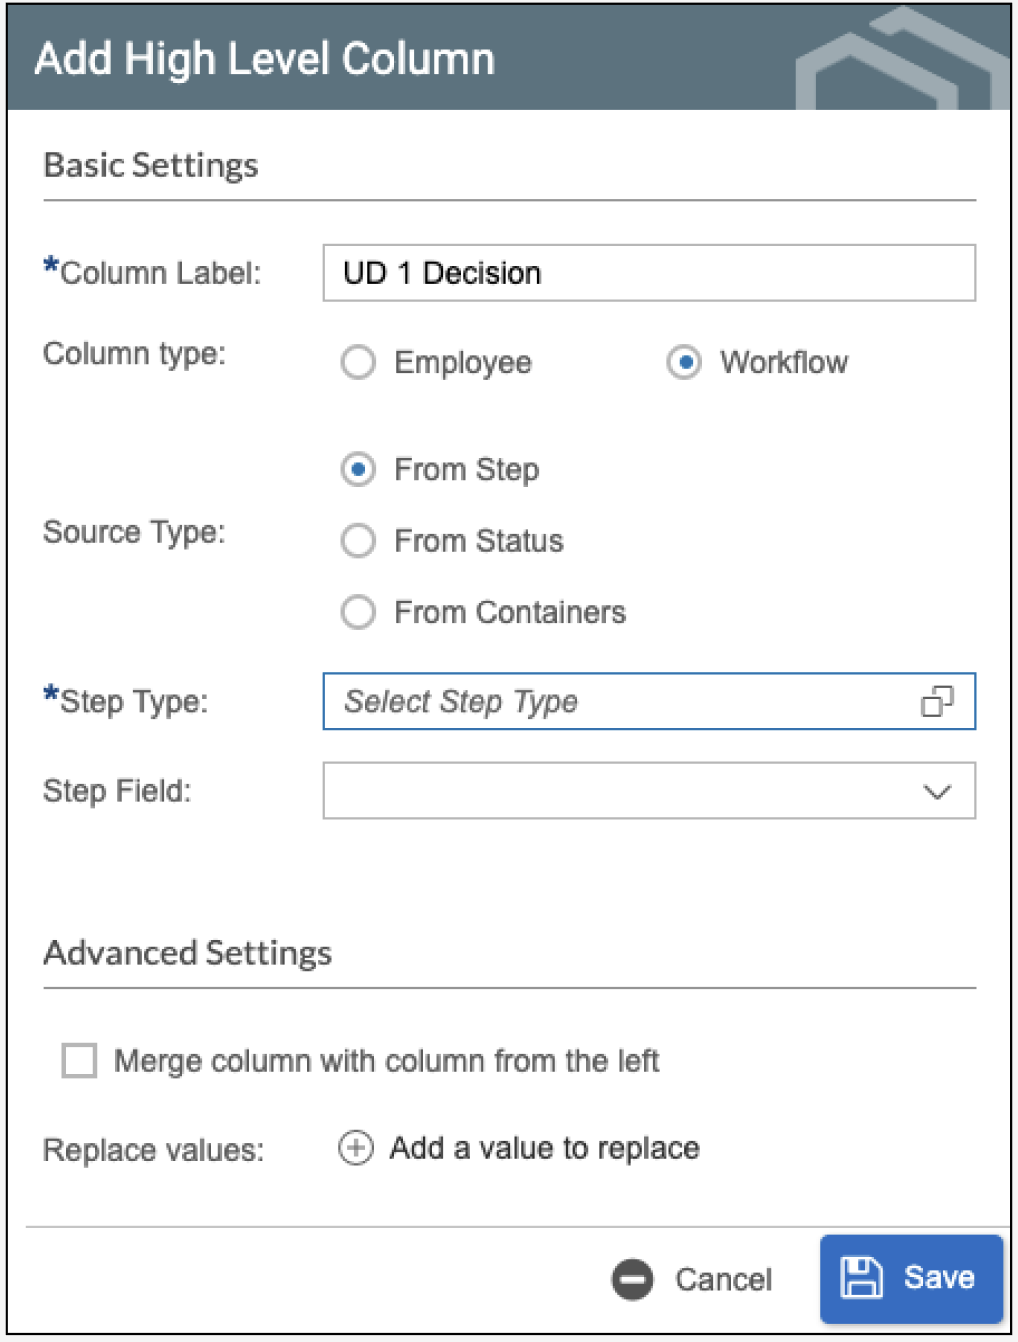
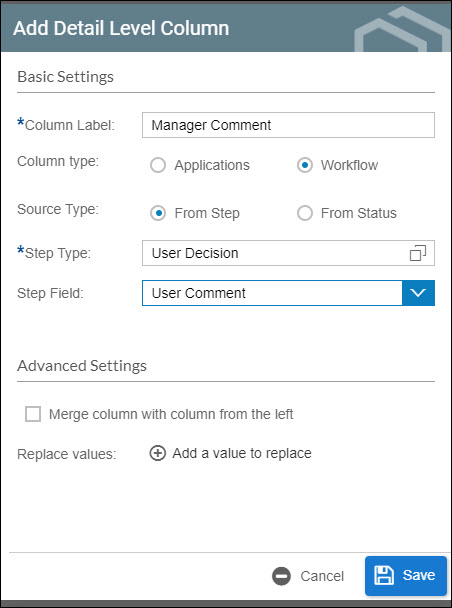
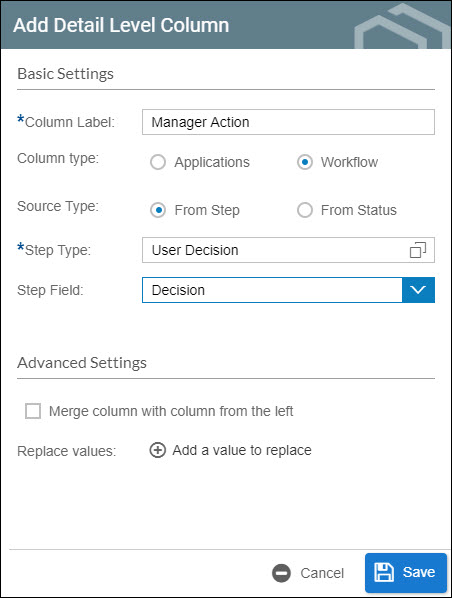
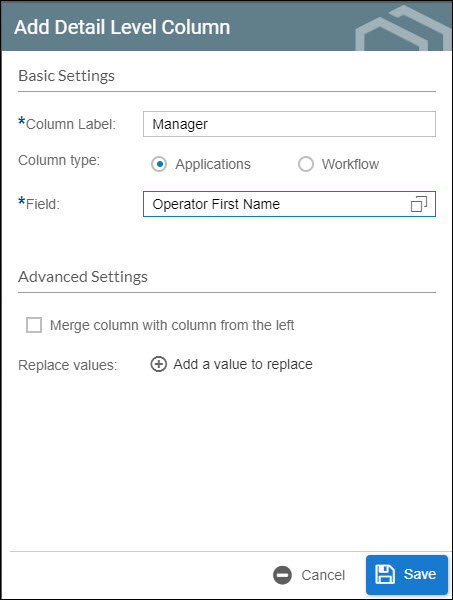
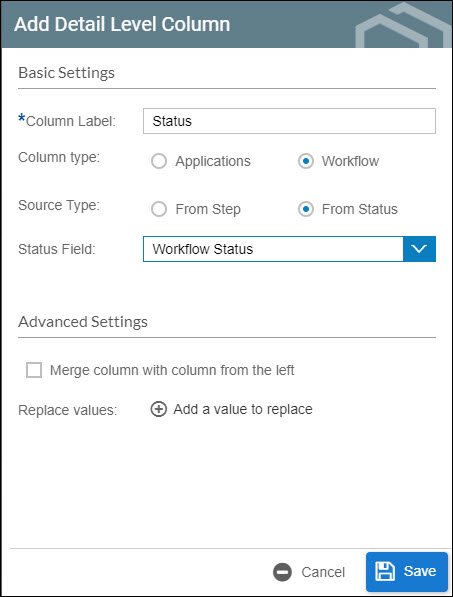
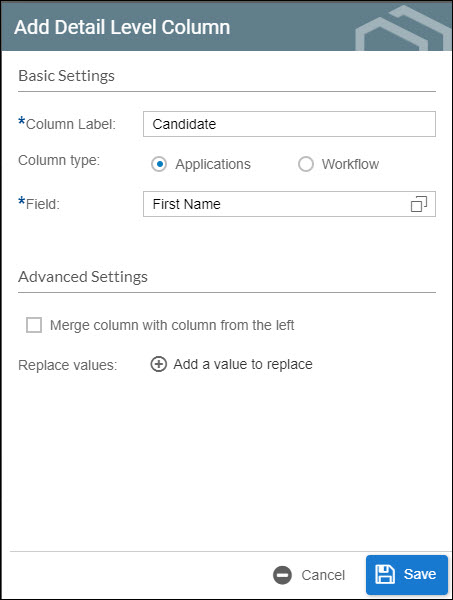
- Column Label - enter a name for the column that you will add.
- Column Type - this is a radio button where you will specify where the column data will come from. This will either show the selected catalog from the Report Settings or workflow.
- Application or Employee (depending on the catalog) means that the column for this report would be in the form of a field.
- Field - This will launch the field selector from the selected catalog.
- Workflow - this means that the column for this report would from data in a workflow execution
- Source Type - Workflow information can come from status information on the workflow or from one of the steps under it. This radio button allows the selection between these two options
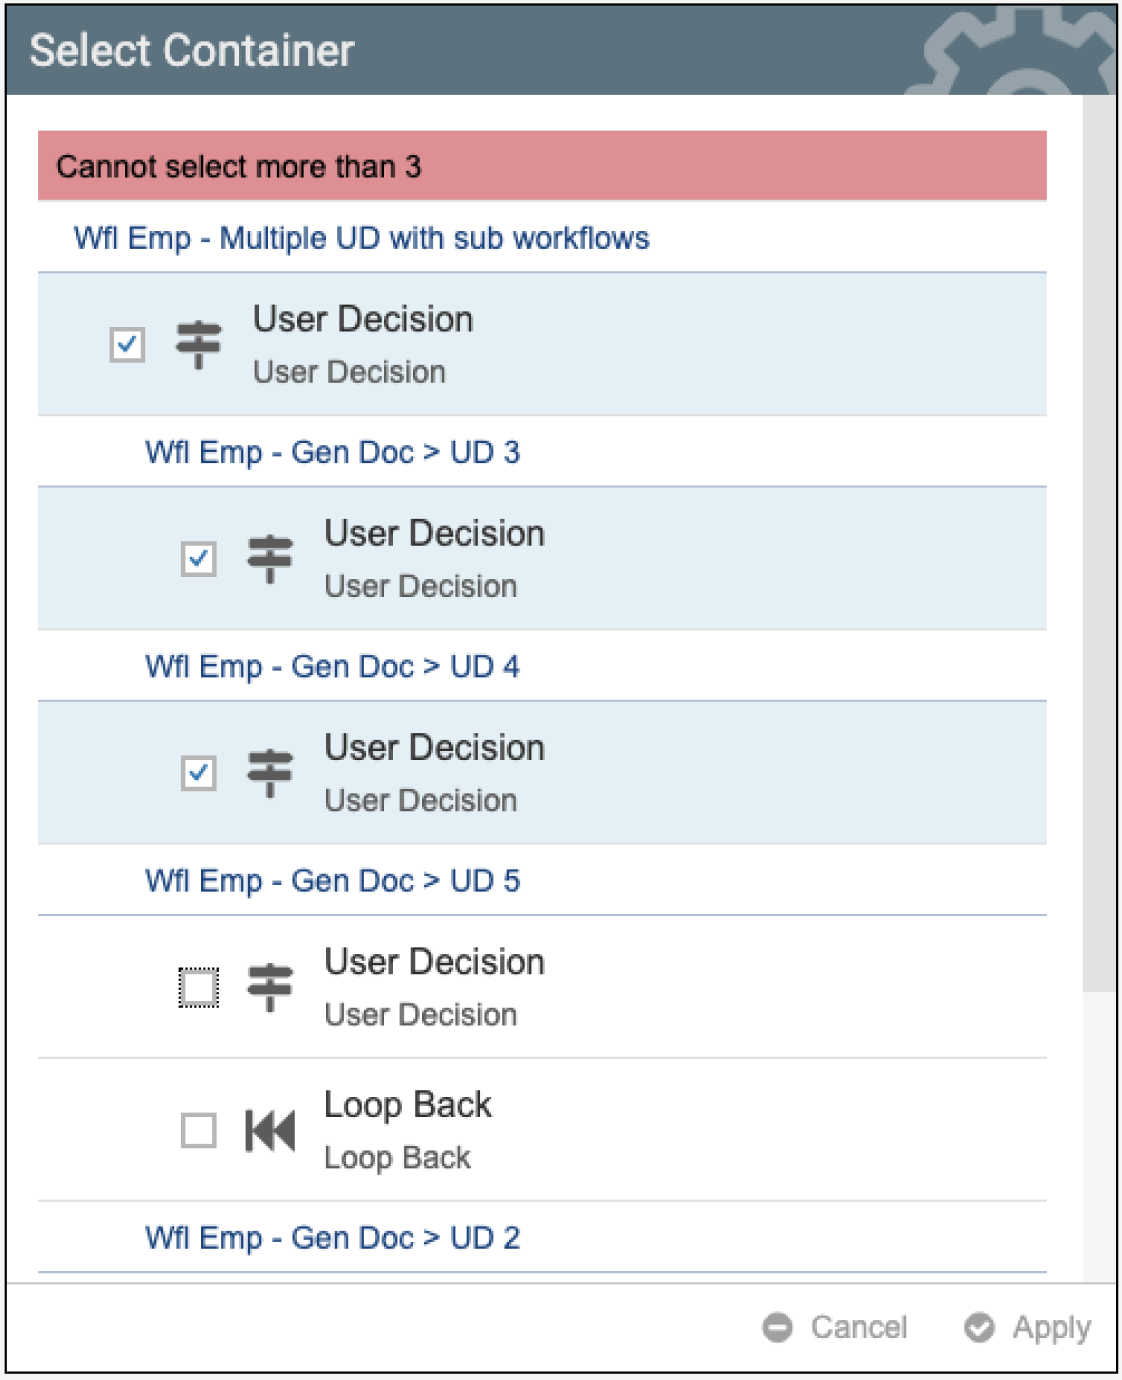
- From Step - when selected, a separate pop will be displayed allowing the selection of steps from one or more workflows. These steps should always be the same type (User Decision steps from two different workflow) The Step Field is a dropdown with predetermined values based on the step type of the Steps field.
- From Status - when selected, a dropdown will be displayed with predetermined values. The predetermined values are based on the workflow execution status like Date Executed, Status, etc.
- Merge column with column on the left - when enabled, then the value of this column will be displayed along with the column on the left. This is used to combine the values of two columns such as First name + last name and status + decision).
- Append - this is visible if Merge column with column on the left is turned on. When enabled, the values of this column and the column on the left will be appended (first name <space> last name)
- Replace Values - this allows you to customize what is displayed on the column. For example, only accepted or rejected will be displayed for values of the JobOffer field.
- Delete - this will delete the column.
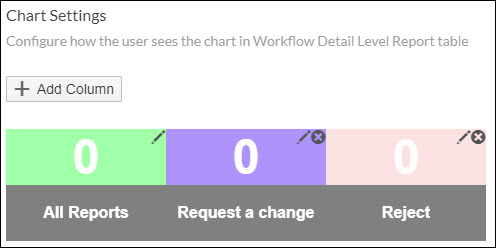
The label for the # of Workflows columns can be modified by clicking the edit button.

Adding columns may adjust the value based on the number of executed workflow using Application IDs under the selected columns. If columns such as Requisition ID and Job Title are added, then the number of workflows would be grouped to each entry of Requisition ID and Job Title.
If the Personnel Area column is added, the workflow will be adjusted based on the number of Application IDs that were executed that have the same Personnel Area.
Follow the example below to create a report card.
- In your Dashboard Widget, create a workflow report by clicking on the add card icon
 and use the sample image below as a guide.
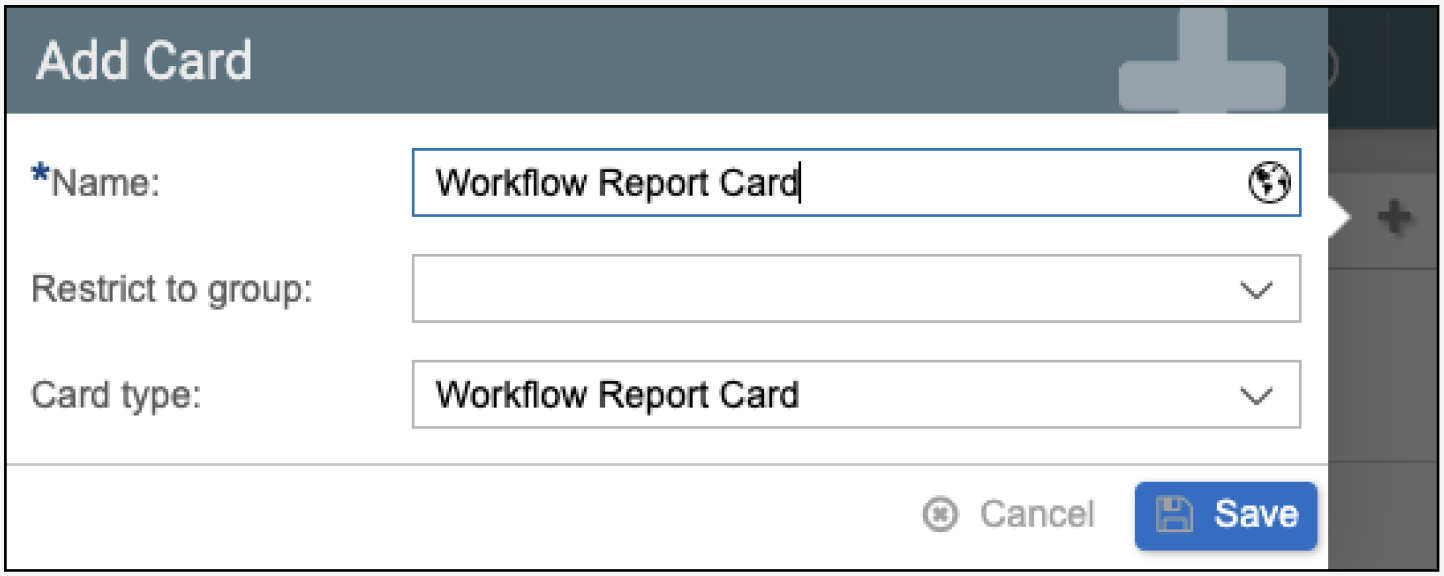
- The report card will be displayed.

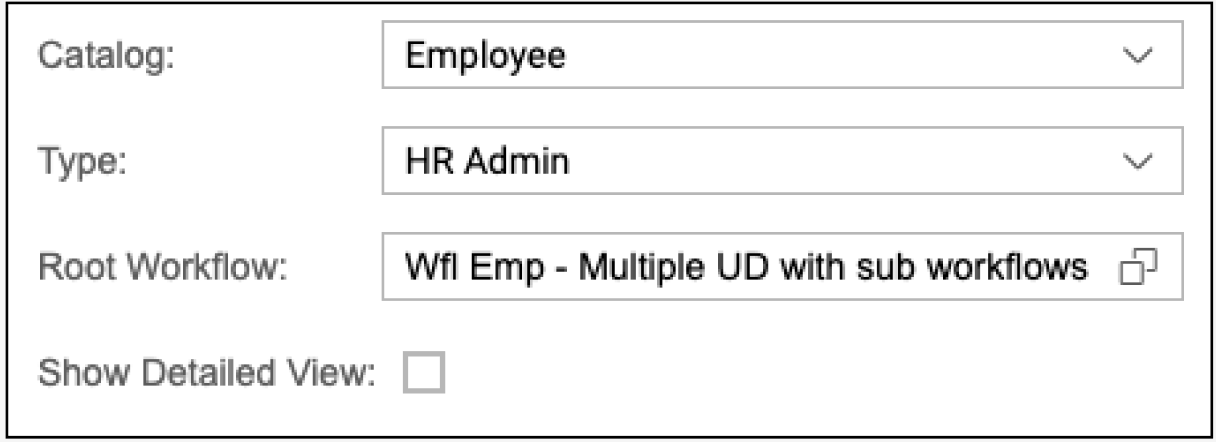
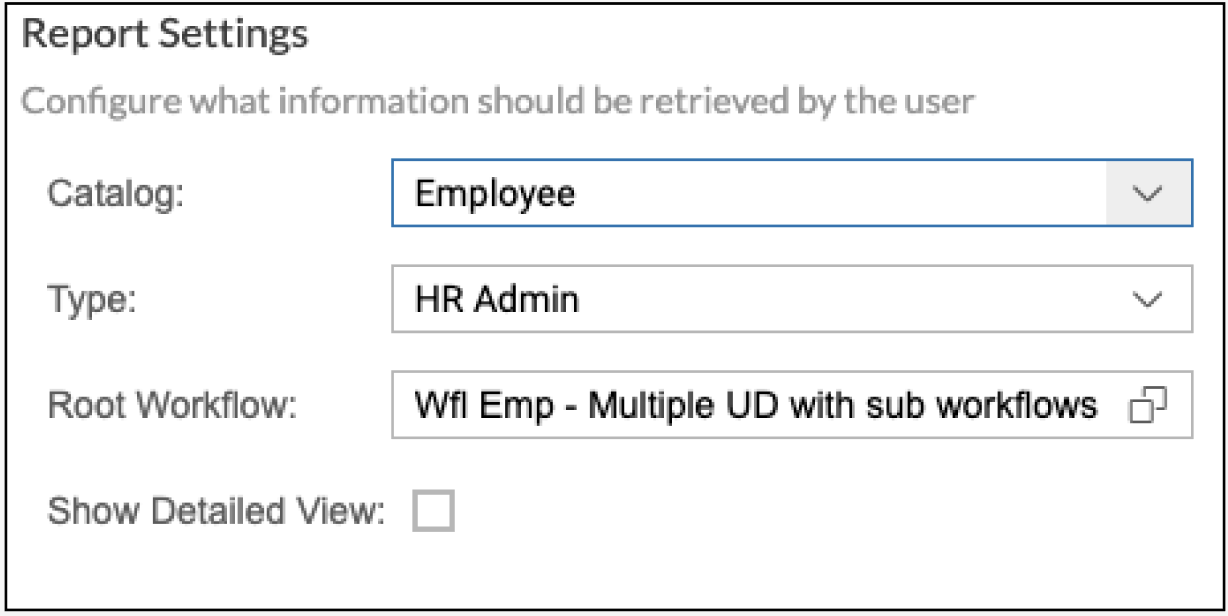
- Click the Edit Settings button under the Report Settings to modify the succeeding options.
- Here, the workflow was changed and the detailed view was enabled.
- You can start creating columns for the High Level view settings.
- Add the columns requires. Refer to the example below for adding a column.
Select the required Step Type.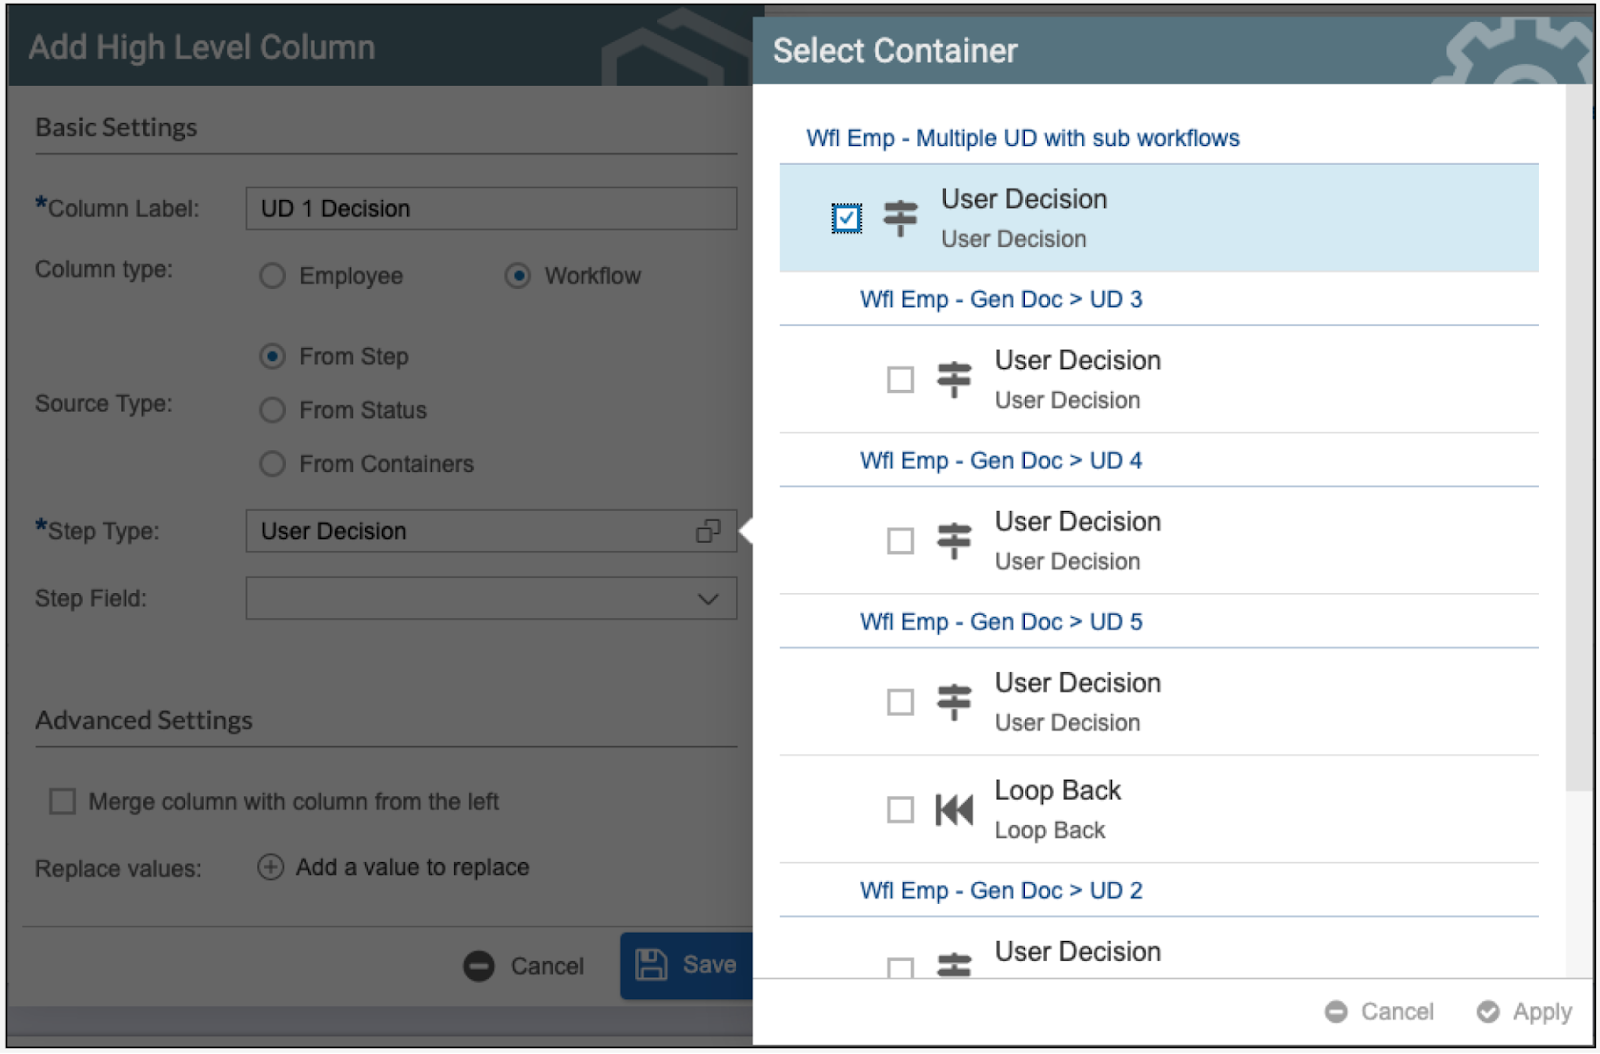
- ⚠️
- Once all the columns are added, the High Level View Settings should look like this.

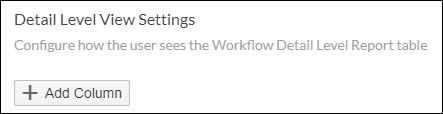
- Next, add columns to the Detail Level View Settings.
- Use the series of sample images below as a guide.


- Rearrange the columns as needed by using the left and right arrows in the column name. When done, it should look like this.

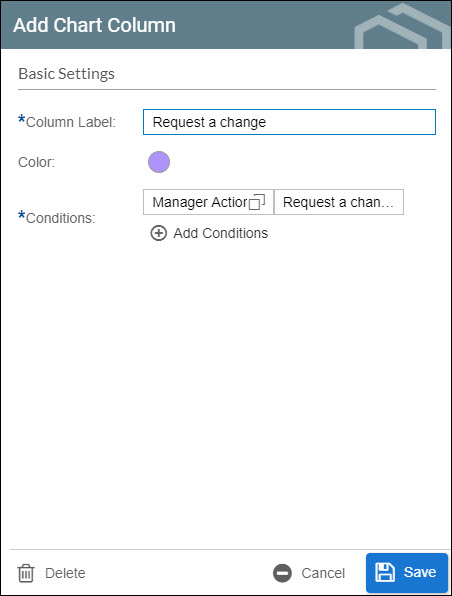
- Now you can add Columns for your chart.
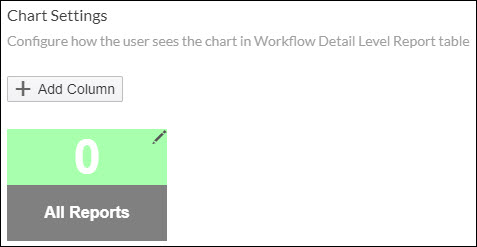
- Use the two sample images below as a guide.

When done it should look like this.