Create a New Strato System
Creating a System
Once you have received a confirmation email following your Strato registration, you may log back in the provisioning system using your registered credentials. To begin, the first thing you have to do is to create a System.
A System is the environment where a company can run Strato. Through this System, you will be able to link multiple instances of SuccessFactors, such as its test or production system, to their Strato account.
To configure this, you only need to enter your desired system's name and Strato will generate your system's special link automatically for you.
Upon completing this step, you will be able to get the link you can use to access Strato. However, to be able to log-in and reflect the information from SuccessFactors in your Strato account, you will still need to do several steps to proceed with the configuration.
You can create one system for your company. You may also create multiple systems for an additional cost. For example, a company may have two separate systems - one for their Human Resources Team, and the other for their Recruitment Team.
Log in to the Strato Administration panel using your credentials.
Your dashboard will show you your company's name. You may modify your company's displayed name and contact details by selecting the edit (pencil) icon beside it.
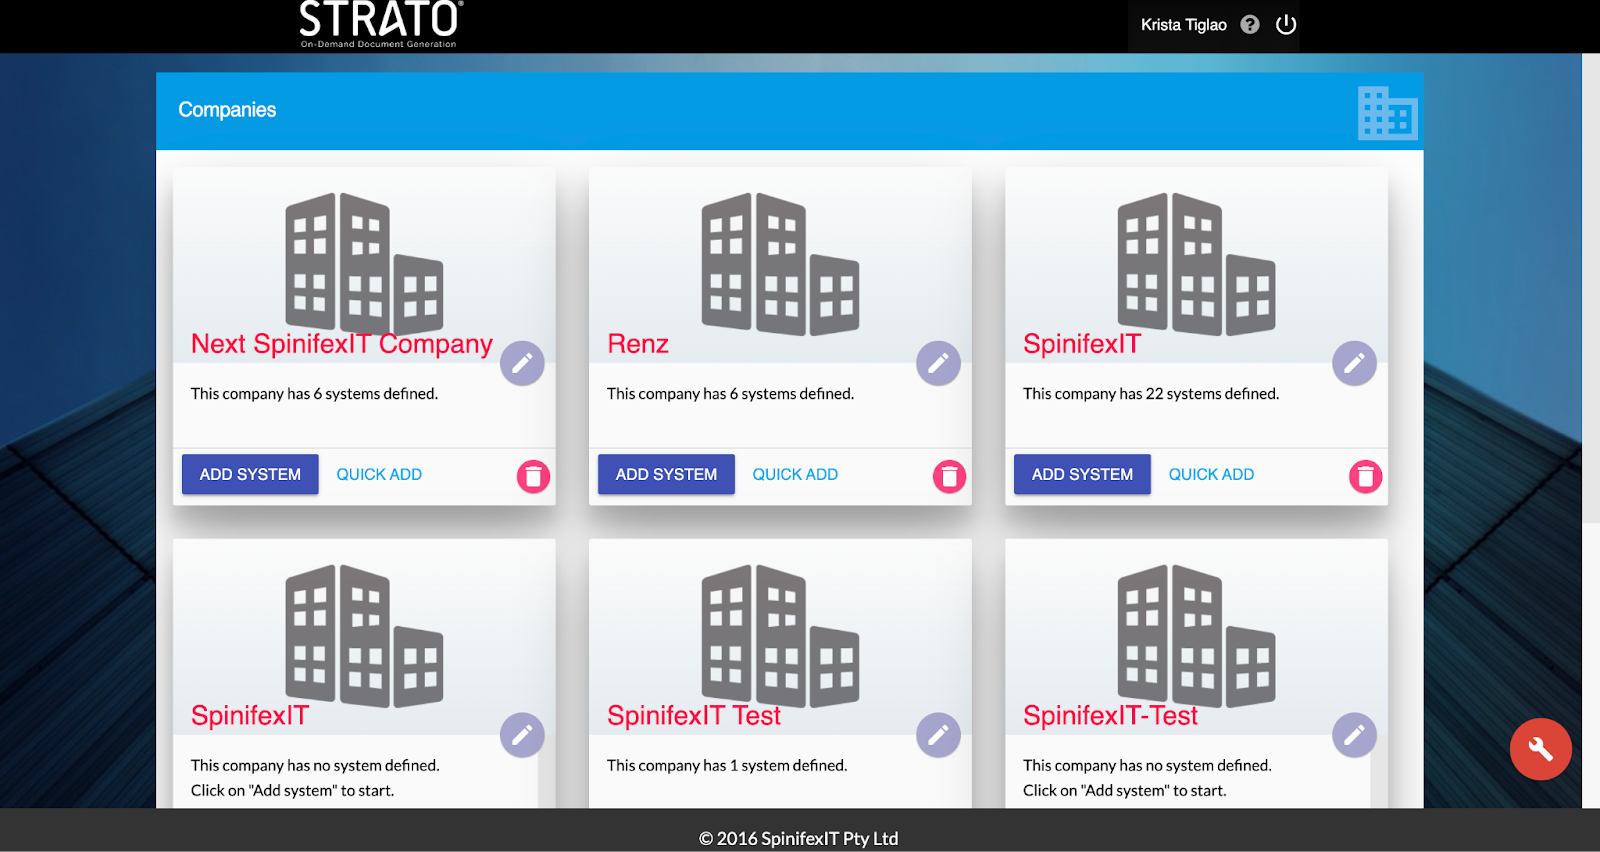
Click Add System to proceed. You will need to fill each field by entering several information and required links.
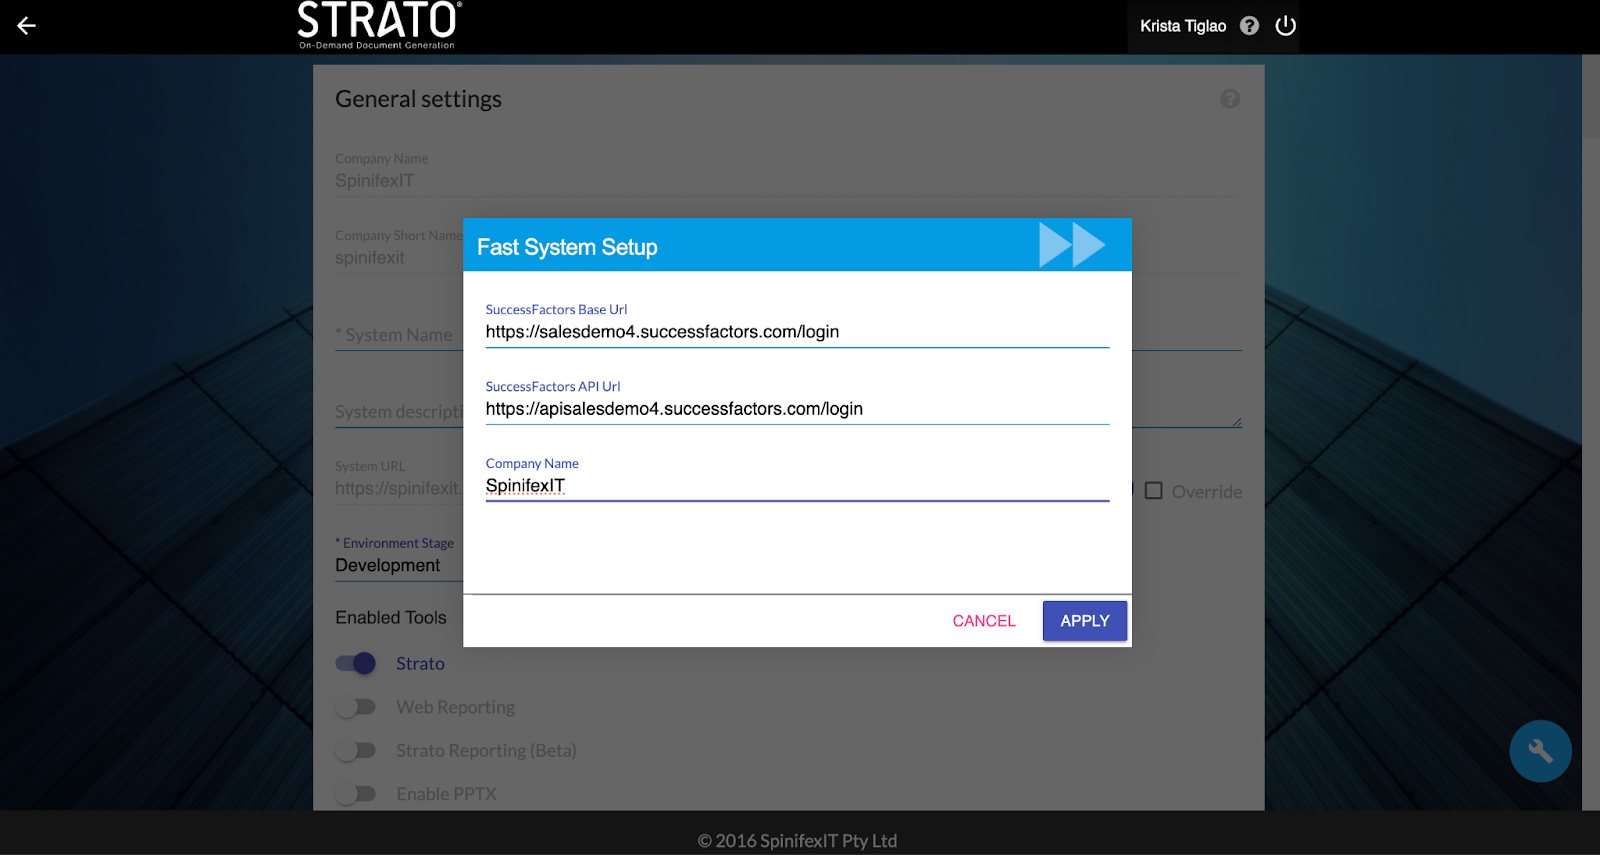
Alternatively, select Quick Add to help you pre-fill the fields which will be required throughout the process. Input your SuccessFactors link, SF API Link and Company Name to start getting fast tracked.
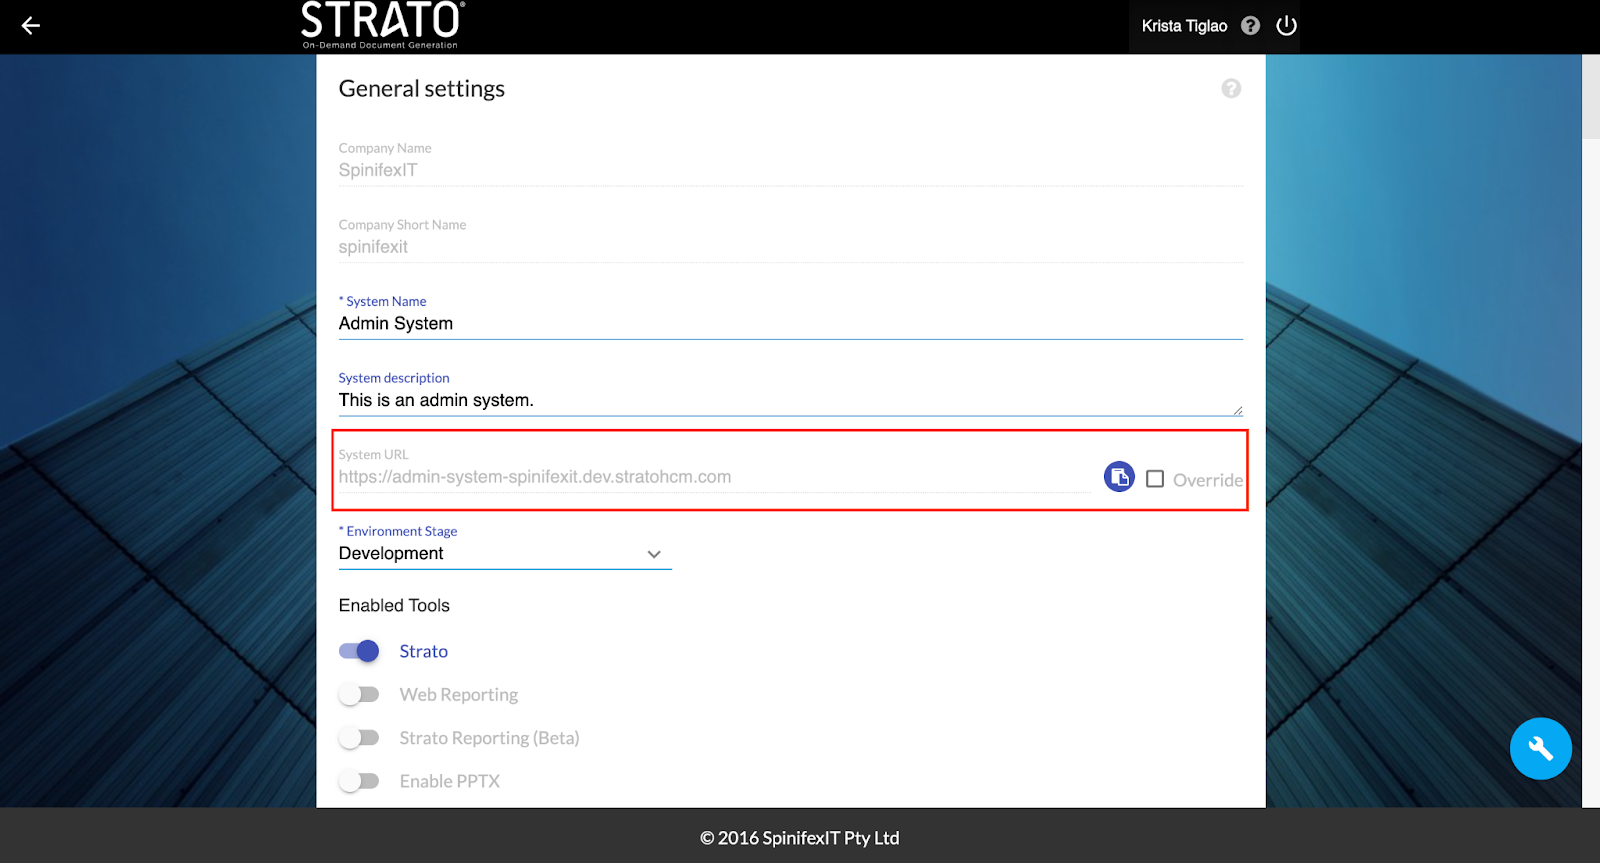
Enter the name of the System you are creating under Short Name, and add a description.
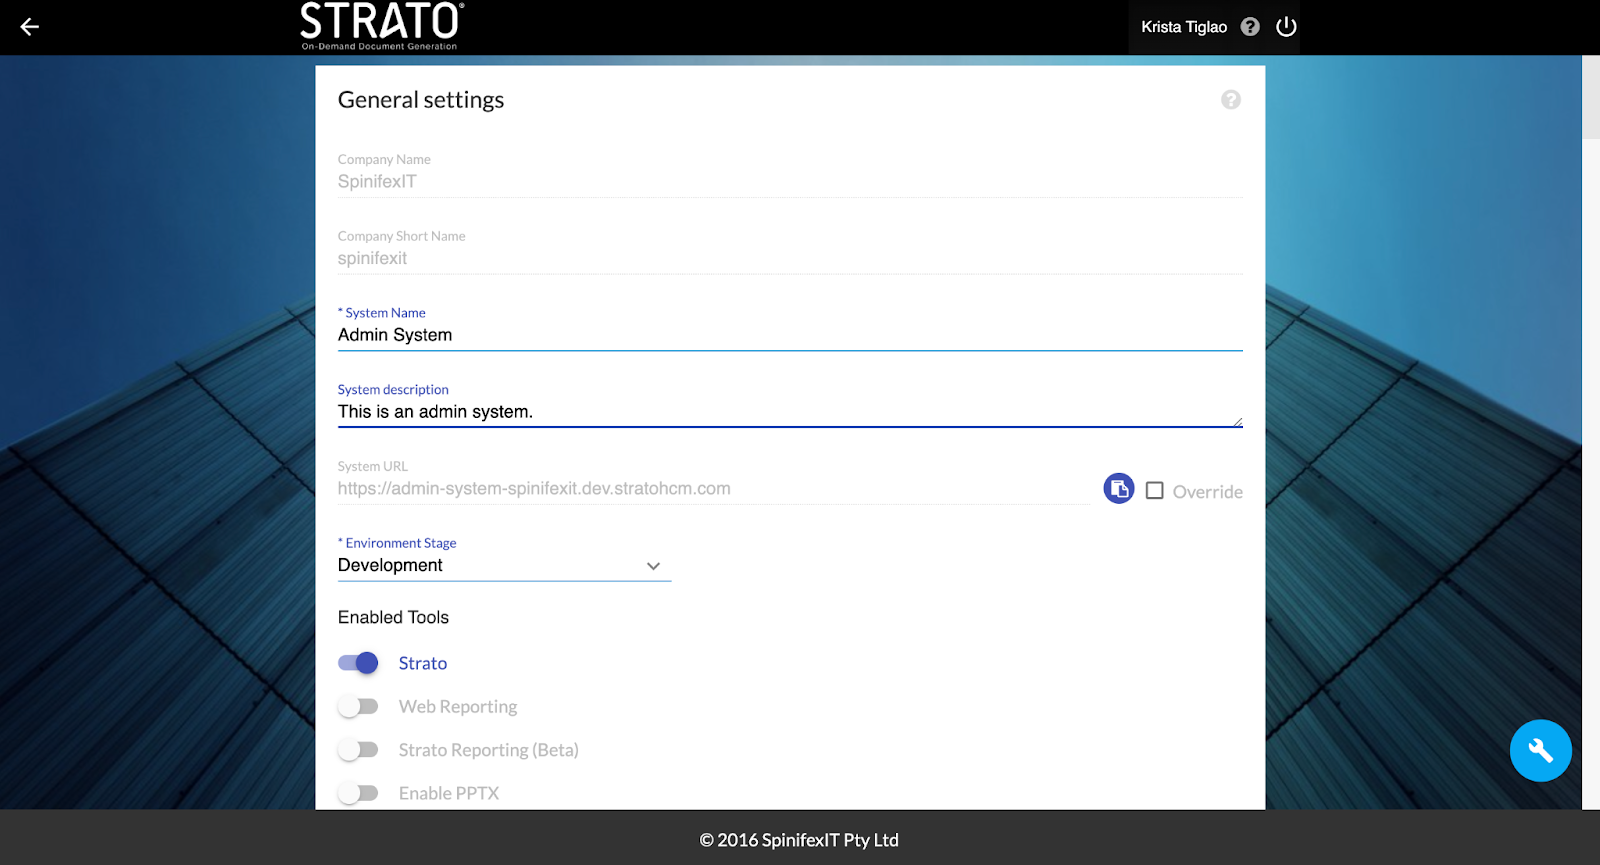
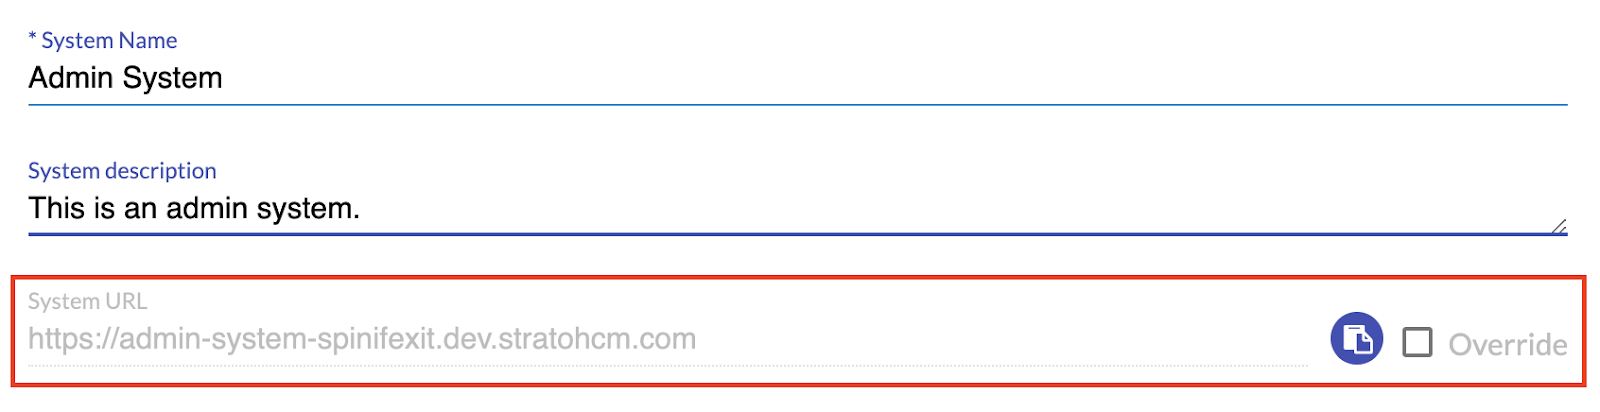
Once enabled, you can key in your preferred custom name for your System URL.
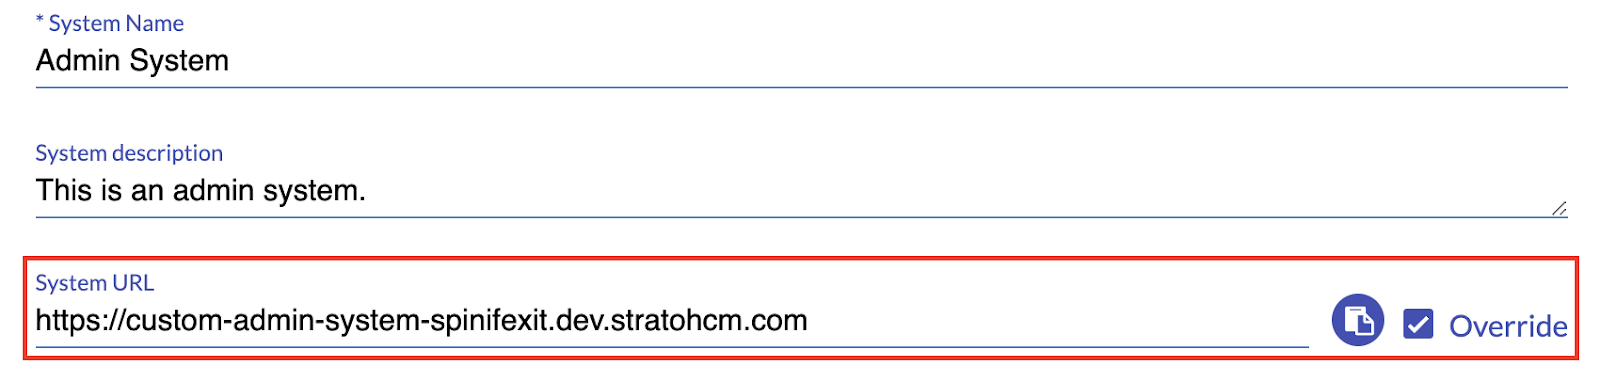
Keep your system name and URL handy as it will be required for the rest of the installation process. Anytime the System Link is requested, you may select the copy icon to have the link stored in your clipboard, ready for pasting.
Accessing a System After Registration
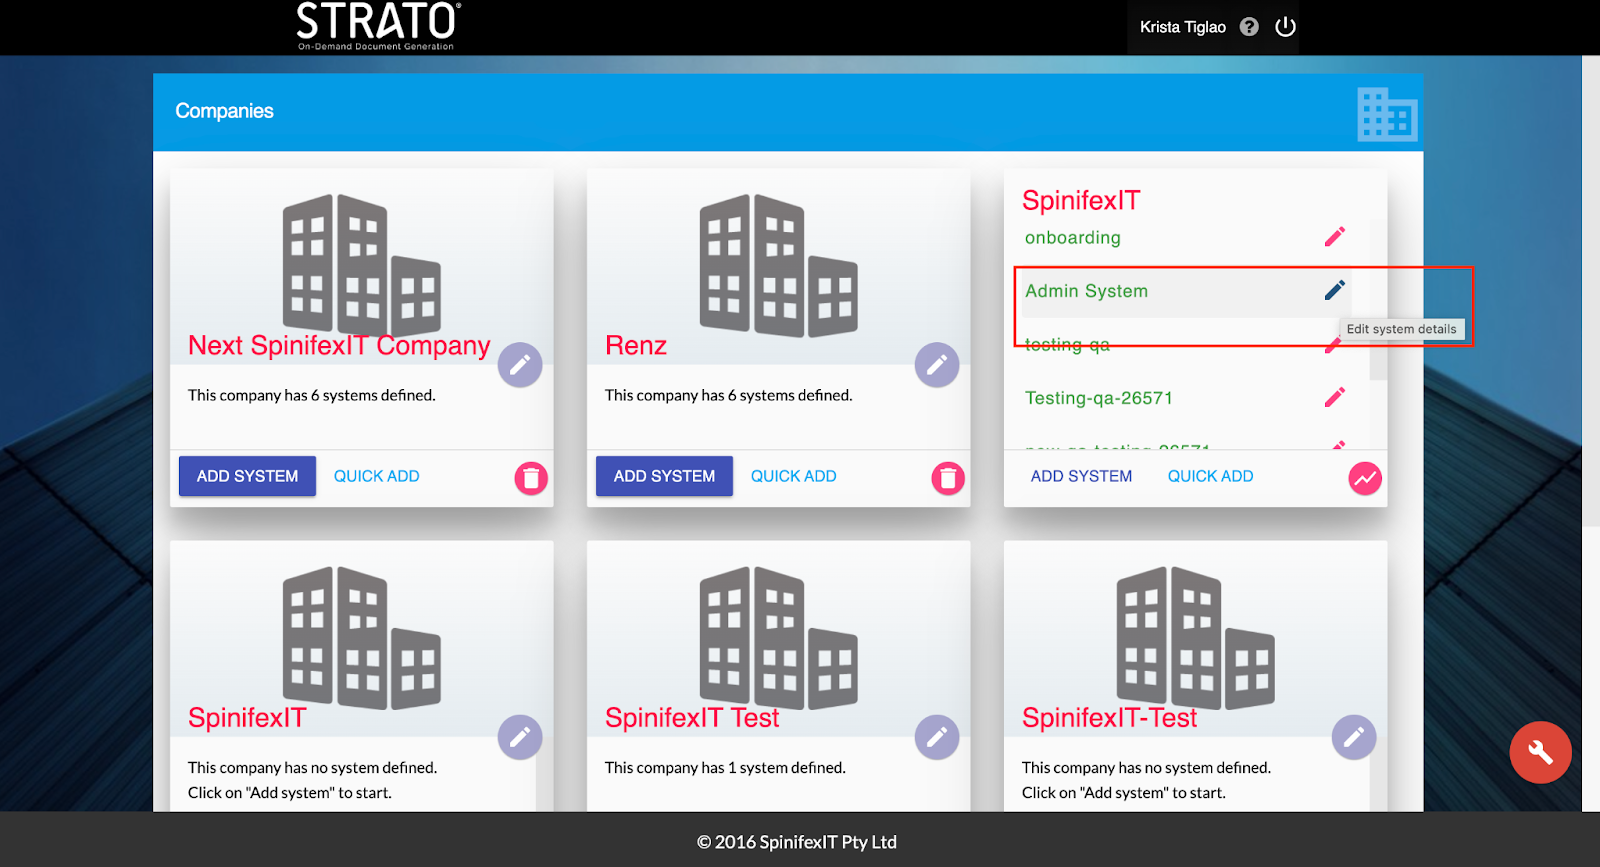
To access a System from your dashboard, all you have to do is select the Company that contains the System, then hover over the system you would like to access.
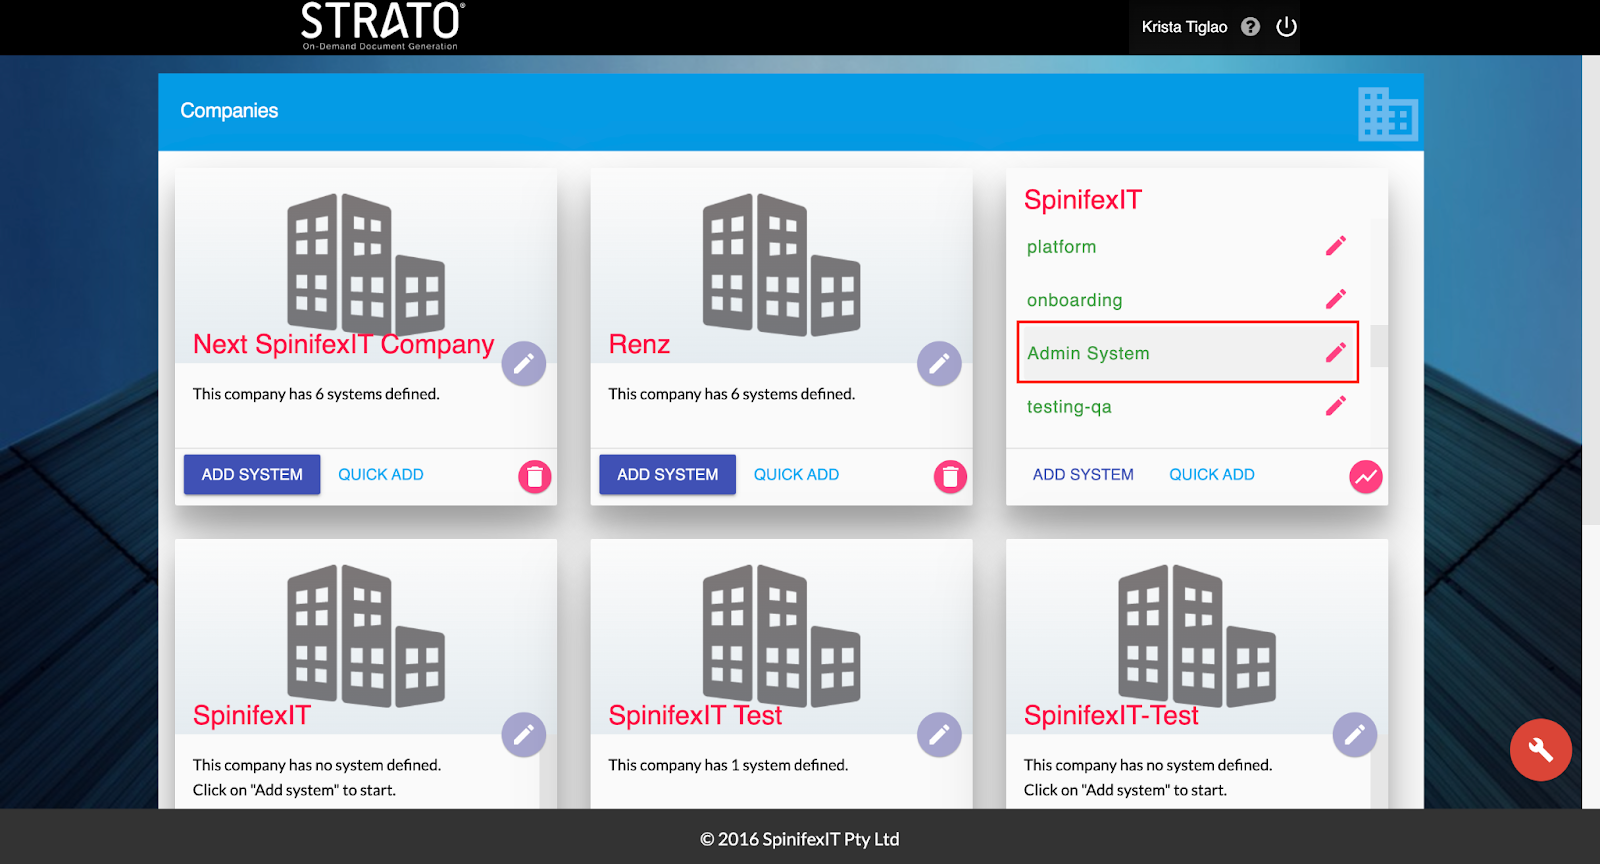
Click Edit System Details to view your system's link and/or edit your system details.
Copy System URL to your browser and select enter to start using Strato.
For the IDP system, you will have to log in to a GMail account to start using Strato. Once you login to your g-mail account, you will see this screen. Non-IDP systems will redirect you to Strato immediately without this prompt.
Click Allow then start using Strato.