Manage Files in Strato Document Management
Strato Document Management enables users to organize, access, and manage their files efficiently. This article serves as a guide on how to manage files using the different actions available, including editing file information, file viewing and previewing, and file uploading and downloading.
This article contains the following sections:
Requirements
Make sure that New Design - Strato Storage is installed in the Upgrade Center.
View File Information
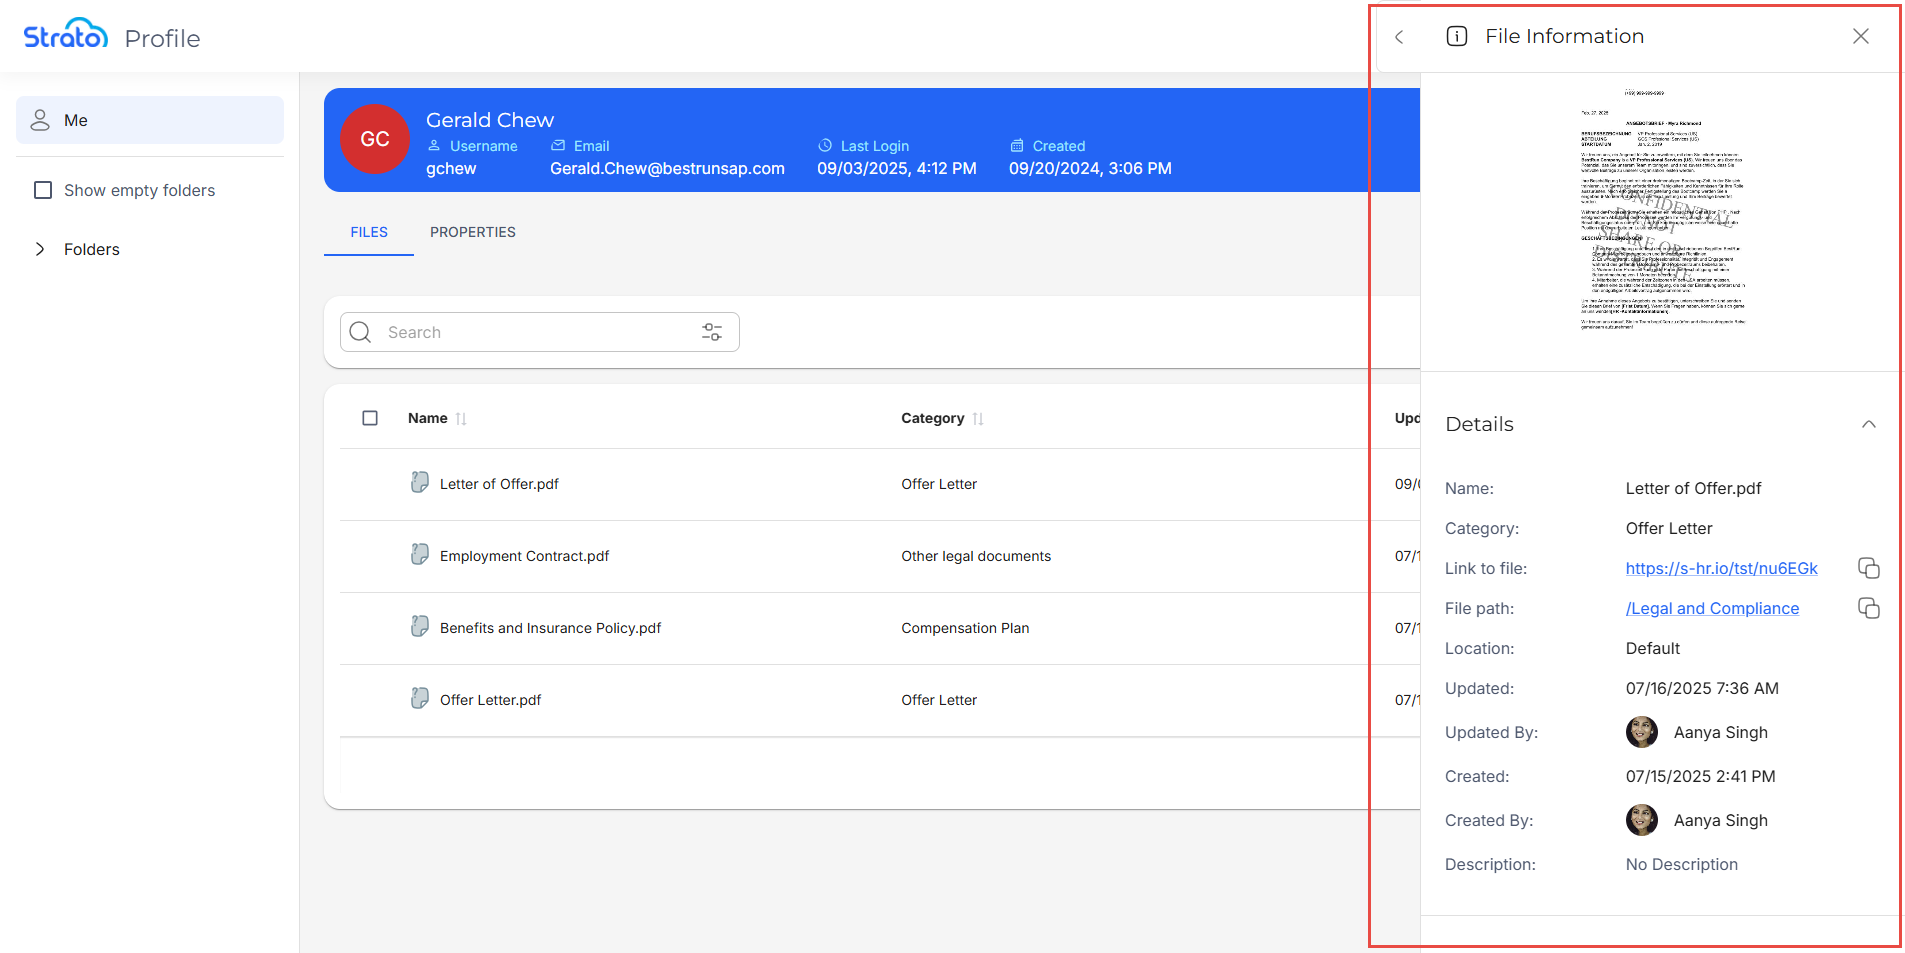
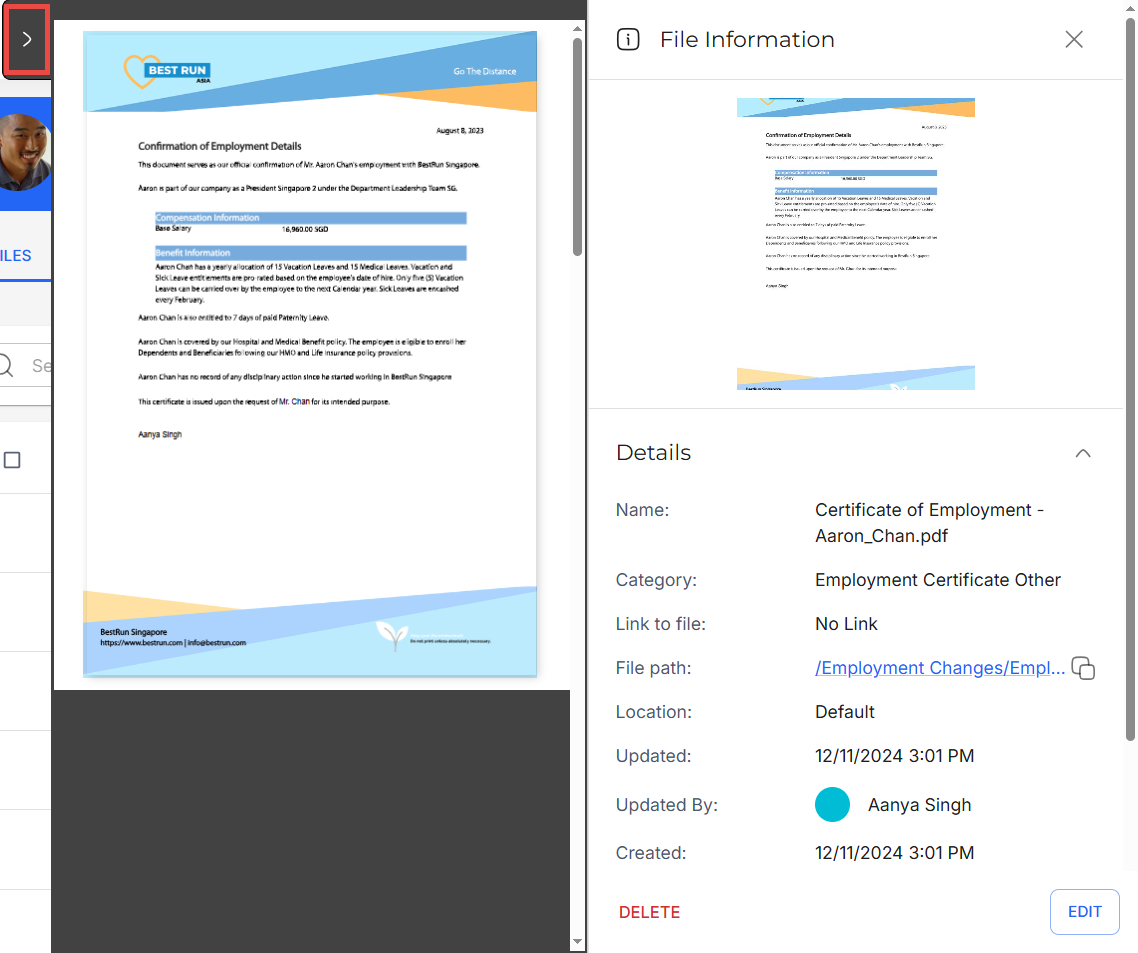
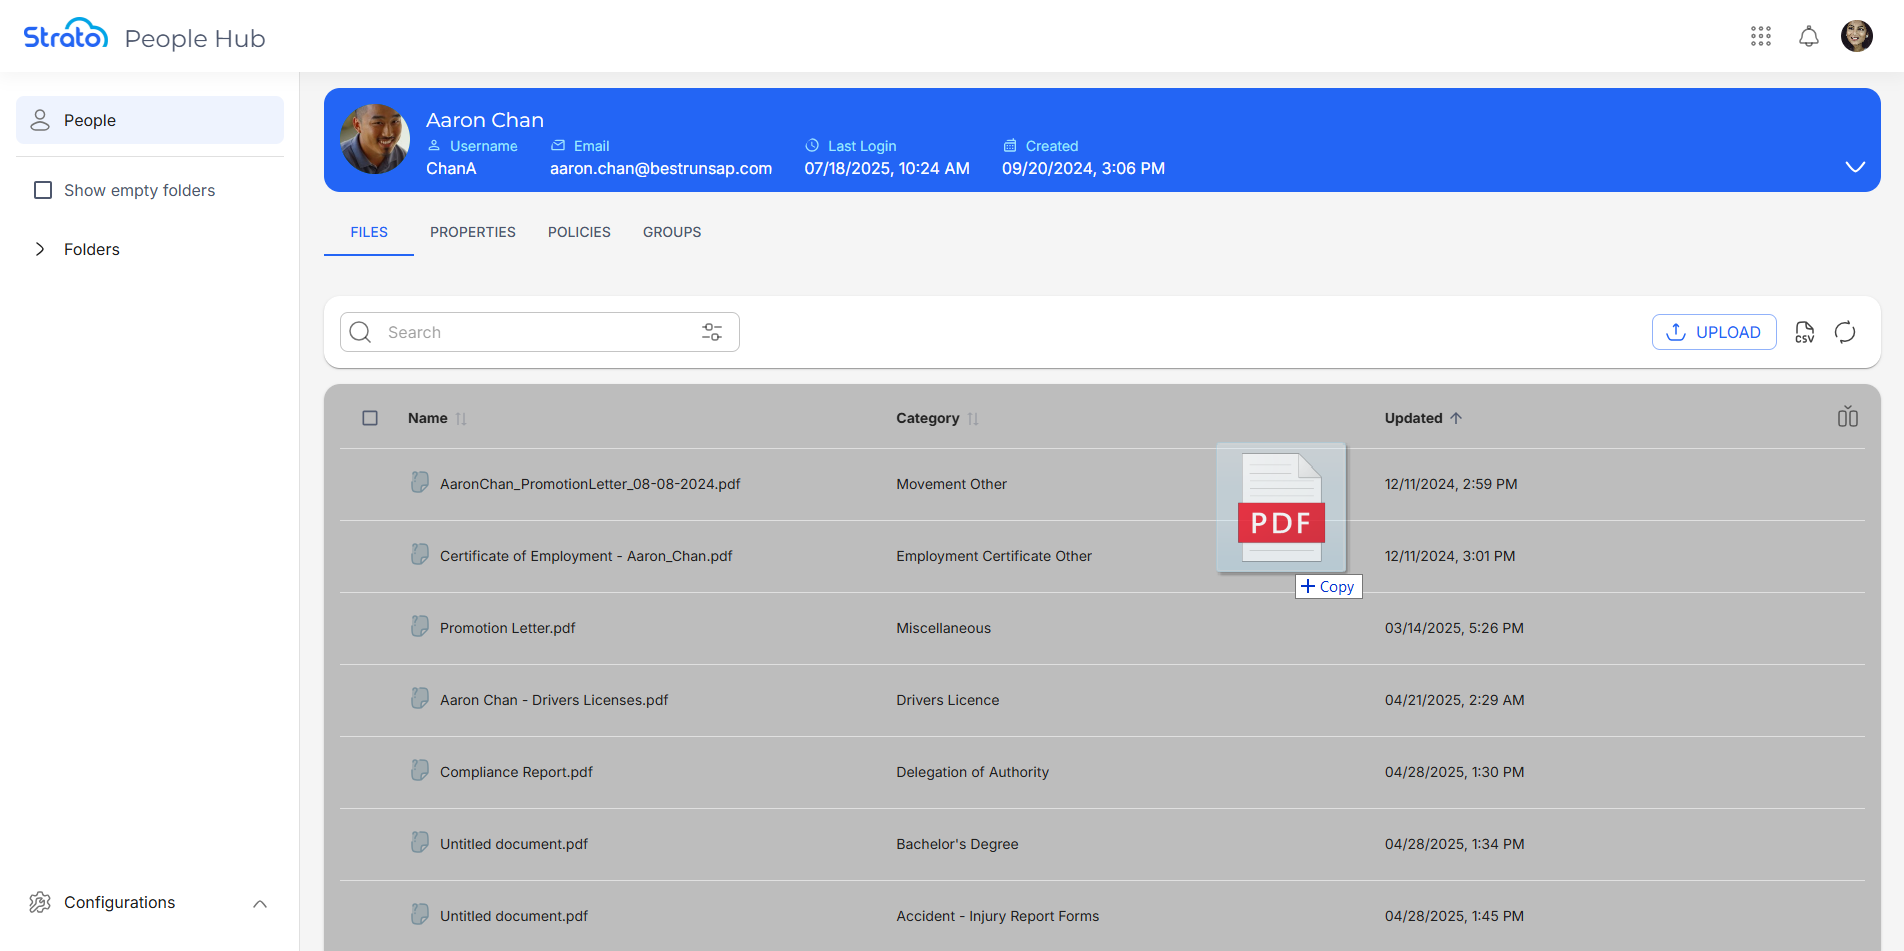
With Strato Document Management, you can access the relevant details of a file using the File Information side panel.
The File Information side panel provides a comprehensive view of a file’s details. From here, you can view and edit the Details and Status of a file, as well as its Properties and contents.
The File Information side panel includes the following tabs:
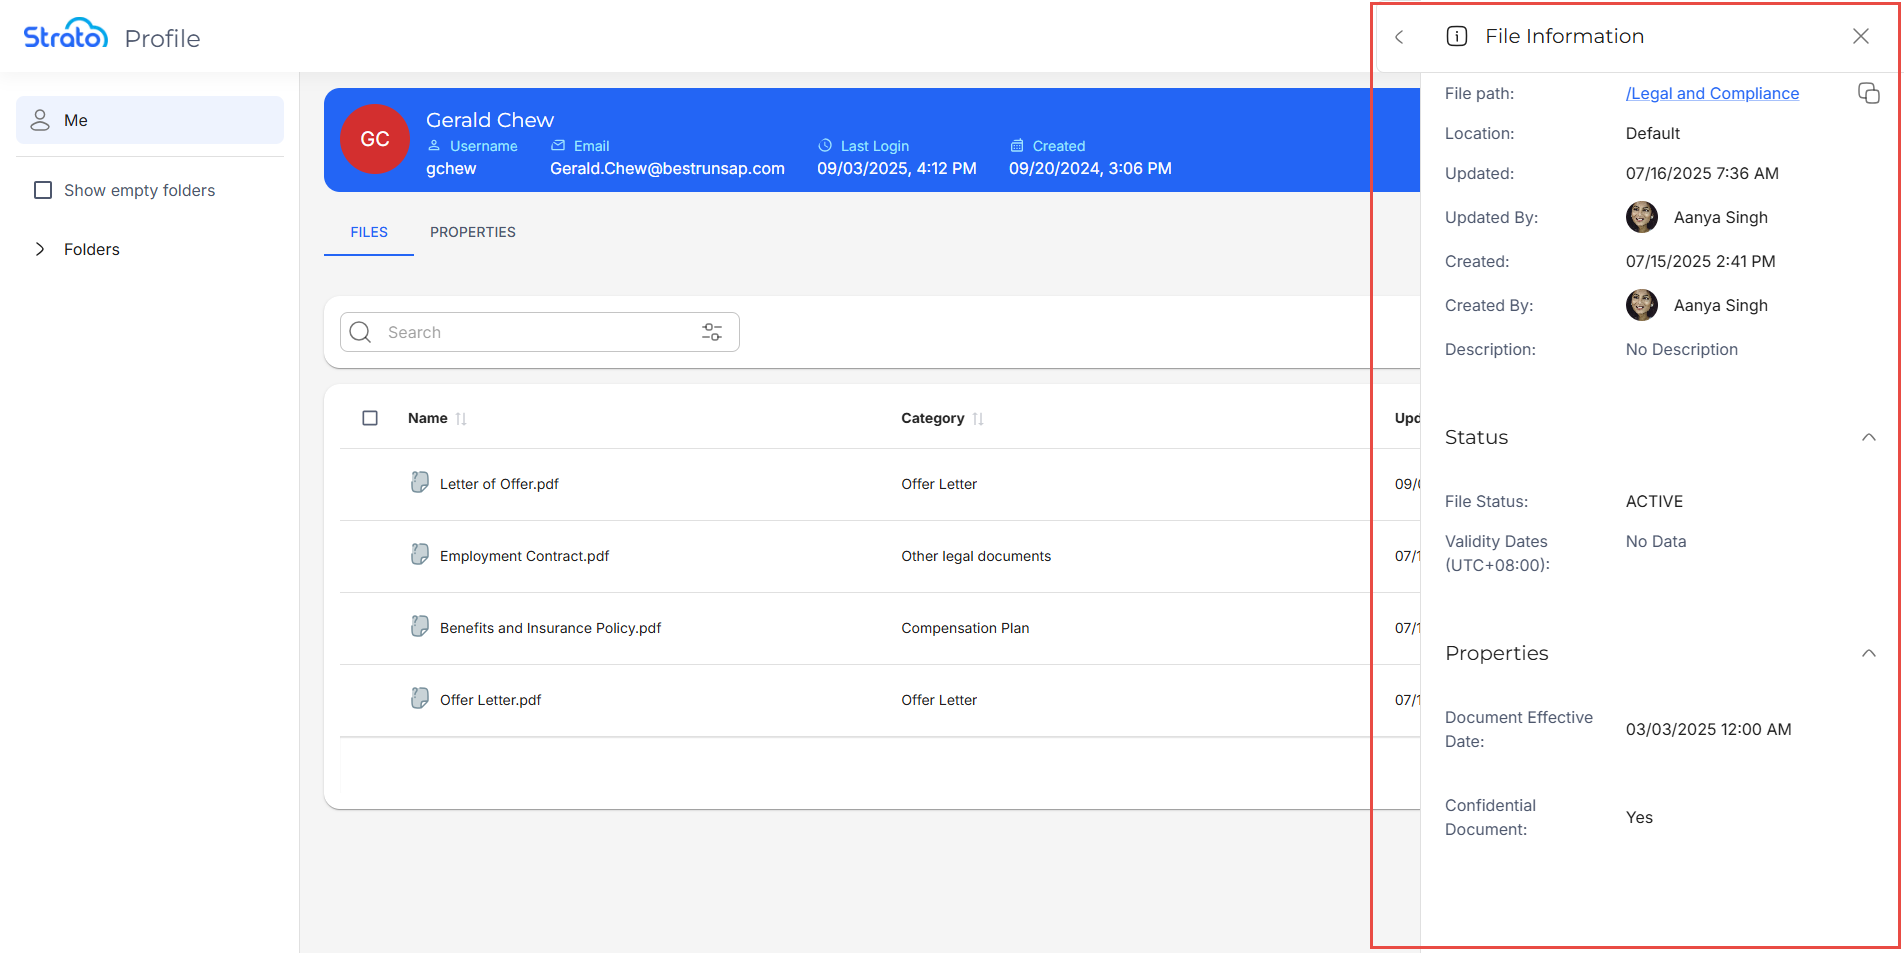
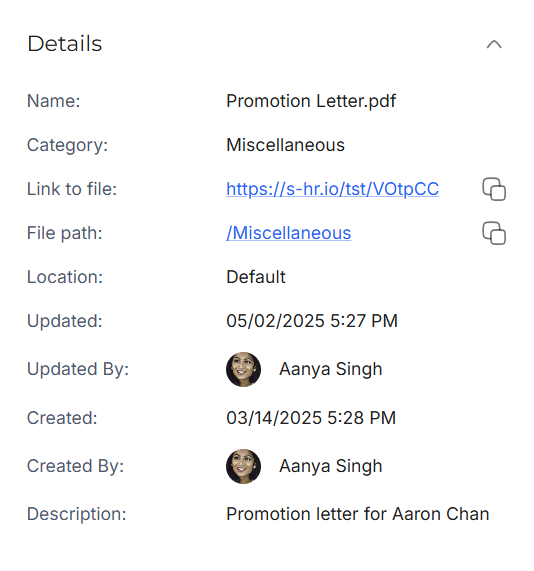
- Details: These include the Filename, the file’s Category, its File Path, the Link to file, the file’s Location, when the file was last Updated, who it was Updated By and Created By, the Created date, and the file’s Description.
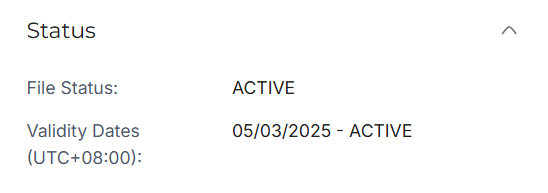
- Status: This includes the File Status and Validity Dates.
- Properties: These include the Properties specific to the file.
There are two ways to access the File Information side panel:
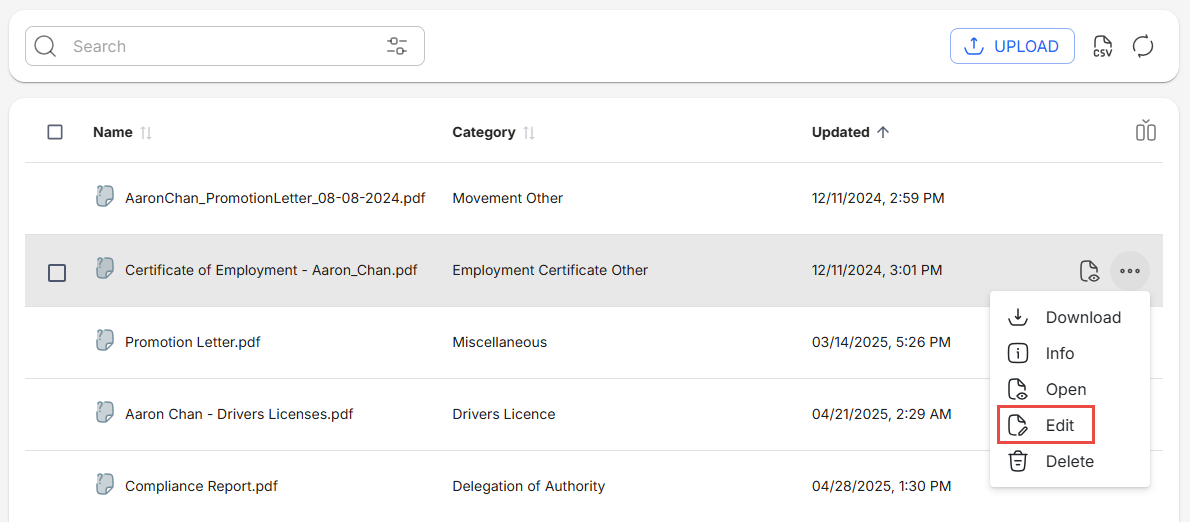
- Select a file using the checkbox, then click the Info button.
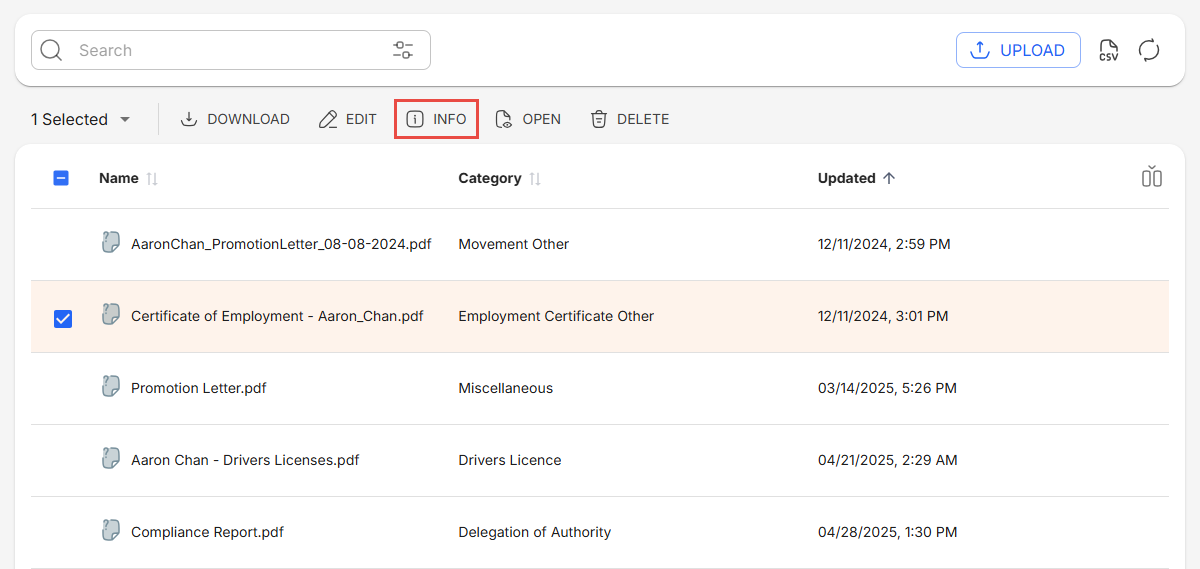
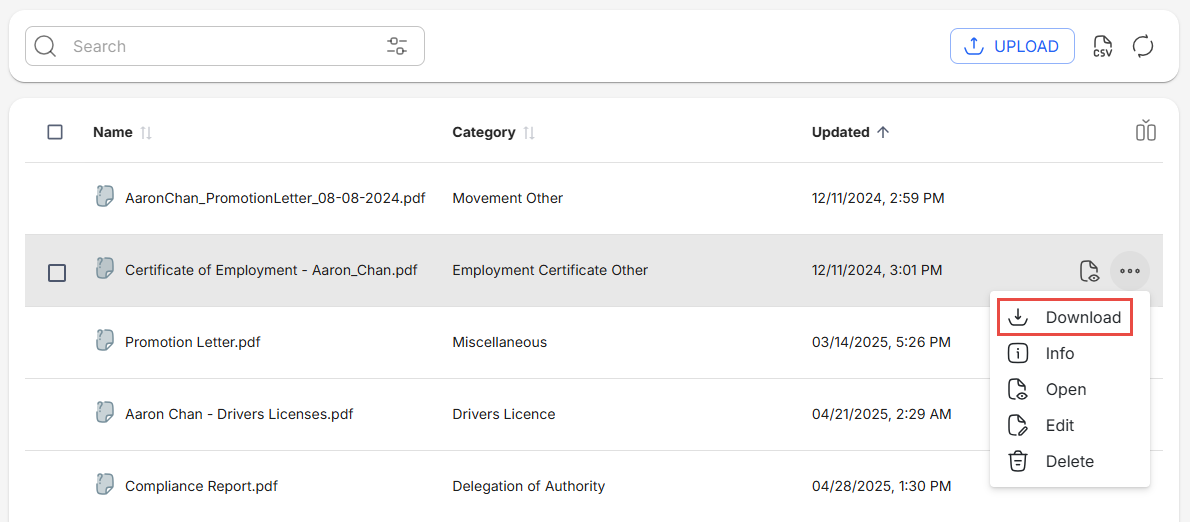
- Click the More button, then click Info.

Edit File Information
You have two ways to access the Edit side panel, where you can edit a file's information:
- Click the Edit button in the File Information side panel.
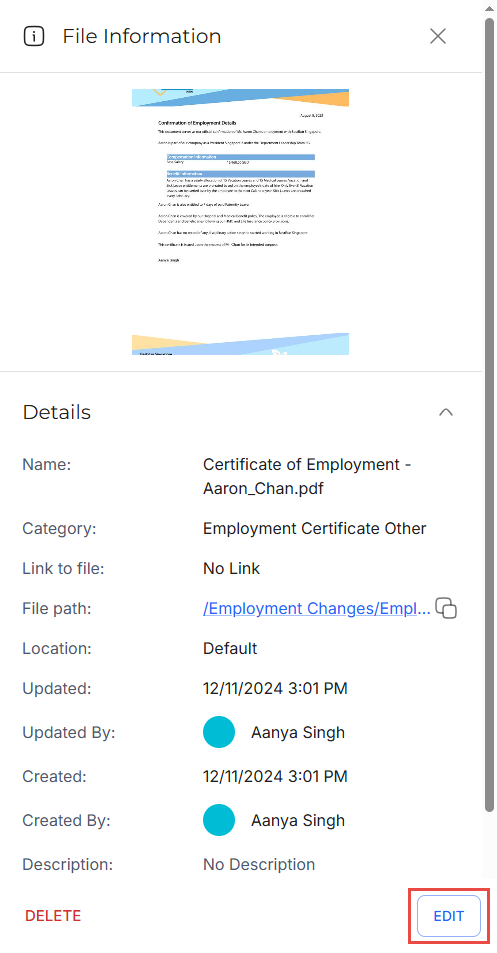
- Click the More button, then click Edit.
These open the Edit side panel. In this panel, you can edit the fields in the Details and Status tabs, as well as replace the file.
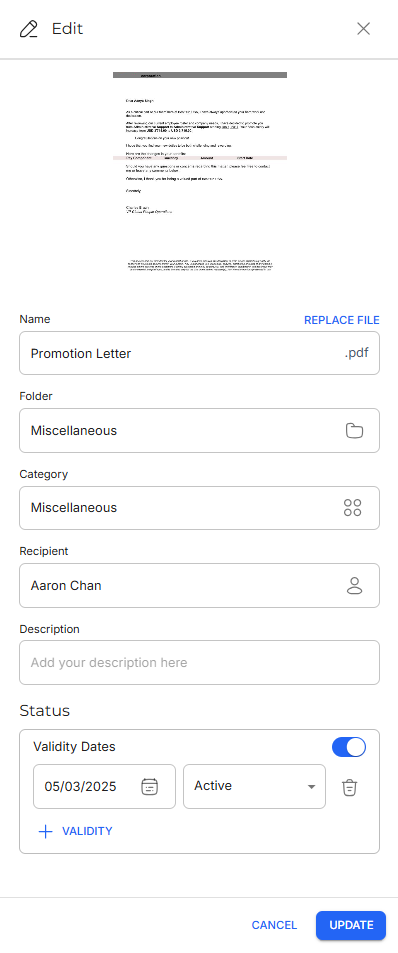
Replace File
You can replace the selected file with another file by clicking the Replace File button located on top of the Name field. This opens up the upload pop-up window where you can drag and drop or browse for a file to replace the old file.


The uploaded file will overwrite the actual file and its name (including the extension, if applicable), and show File replaced under the preview window. However, these changes are not automatically applied to the file. Click Update on the bottom right corner of the Edit side panel to apply the changes.

Details Tab
For the Details tab, note that not all of the fields are editable.
You can edit the following fields:
- Name: The name of the file. Note that you cannot edit the file extension, and that the field can accept up to 250 characters.
- Folder: The folder in which the file is stored.
- Category: The Category assigned to the file.
- Recipient: The user who owns the file.
- Description: Text to clarify the purpose of the file.
Status Tab
For the Status tab, you can set validity dates, which will update the file’s status on those specified dates.
You can set validity dates for the following statuses:
- Active: The default status of a file when created or uploaded. The file is accessible to the user.
- Expired: The file may no longer be legally valid, but will still be accessible within the user’s files. Accessibility of the file may depend on the organization’s rules for storing expired documents.
- Archived: The file is no longer available to the user to access, but will still be in their records.
- Deleted: The file is no longer available to the user to access, and will no longer be in their records.
Properties
Currently, the Properties tab reflects the file Properties configured in Strato V1. This will be expanded in future versions.
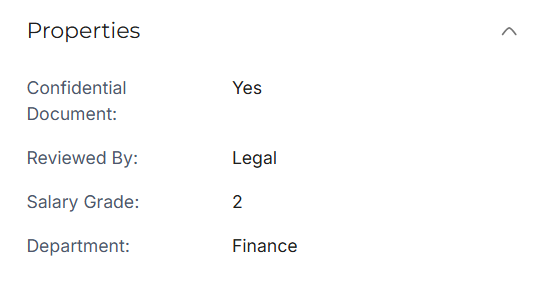
File properties mapped to SuccessFactors Picklists will show as readable labels, such as “Employee” or “Consultant”.

If a label cannot be retrieved, a blank output will be displayed.
Preview File Content
From the File Information side panel, you can preview the contents of a file, without having to navigate to another page.
To show the File Preview, click the Expand button, or click the Preview button which appears when you hover over the file’s thumbnail.
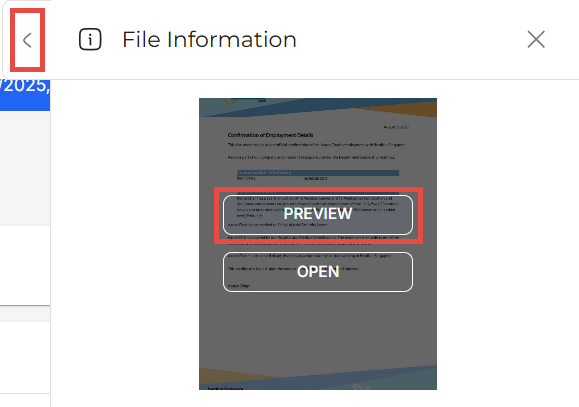
To close the File Preview, click the Collapse button.
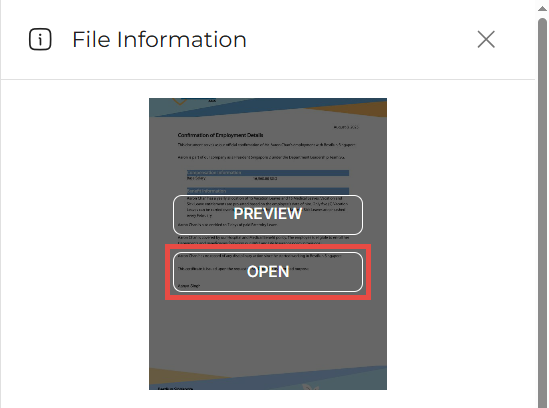
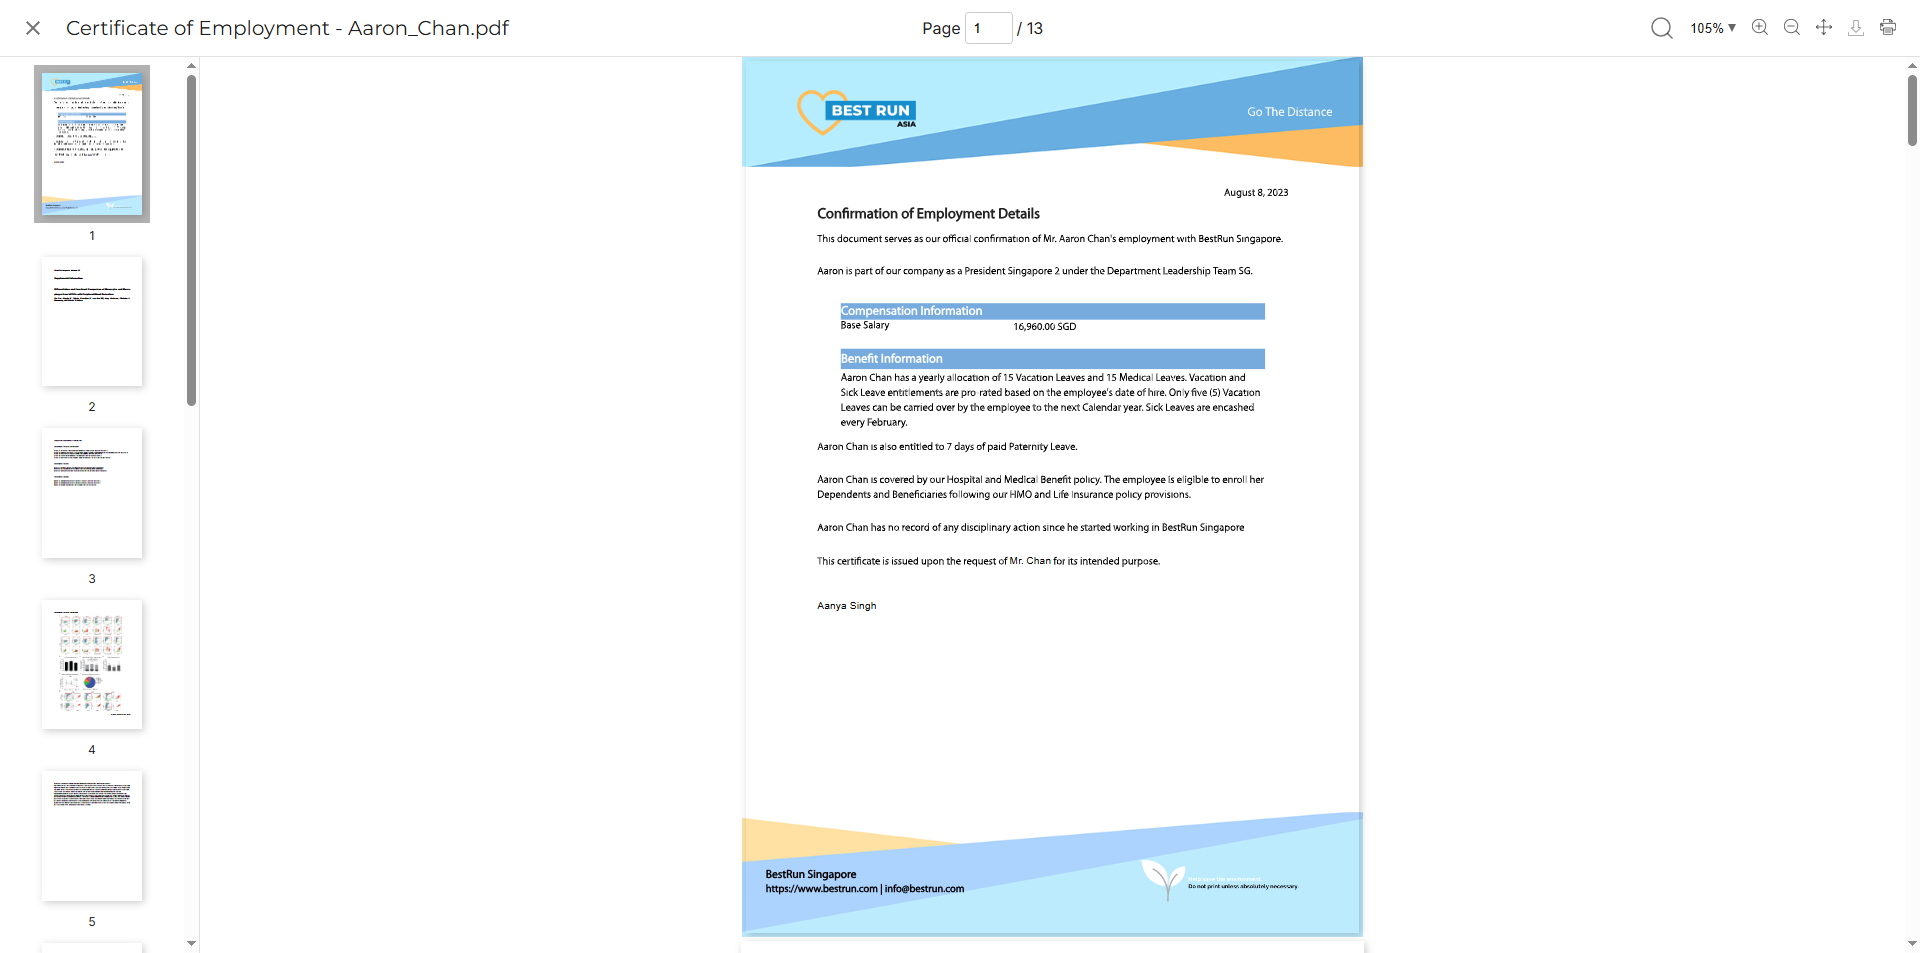
View File Content
You can open the contents of a file in a File Viewer to view it in more detail.
There are four ways to access the File Viewer:
- From the File Information side panel, click the Open button.
- Click the Open icon that appears when you hover over a file.

- Click the More button , then click Open.
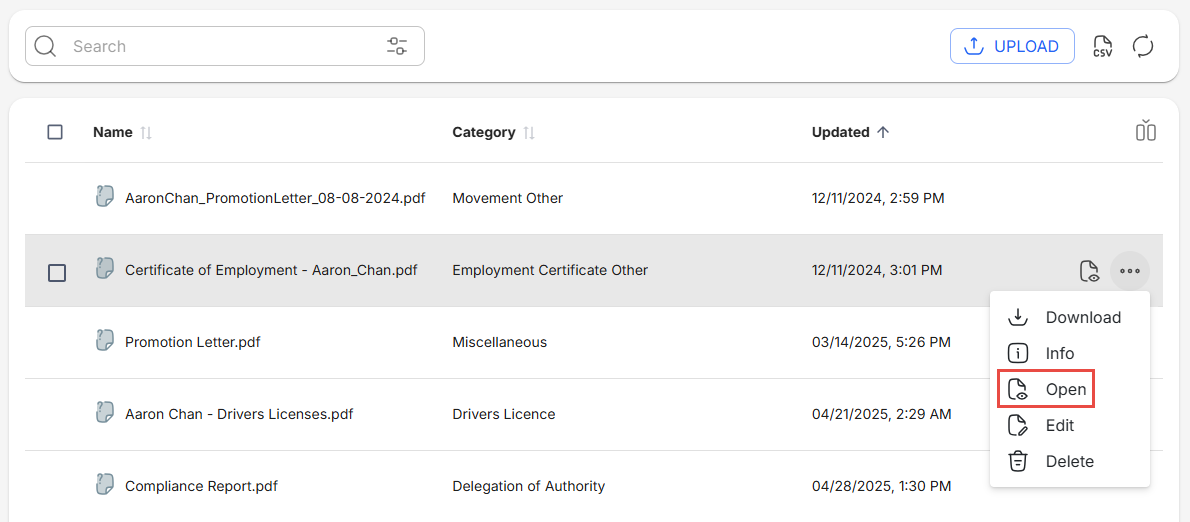
- Select a file using the checkbox, then click the Open button.
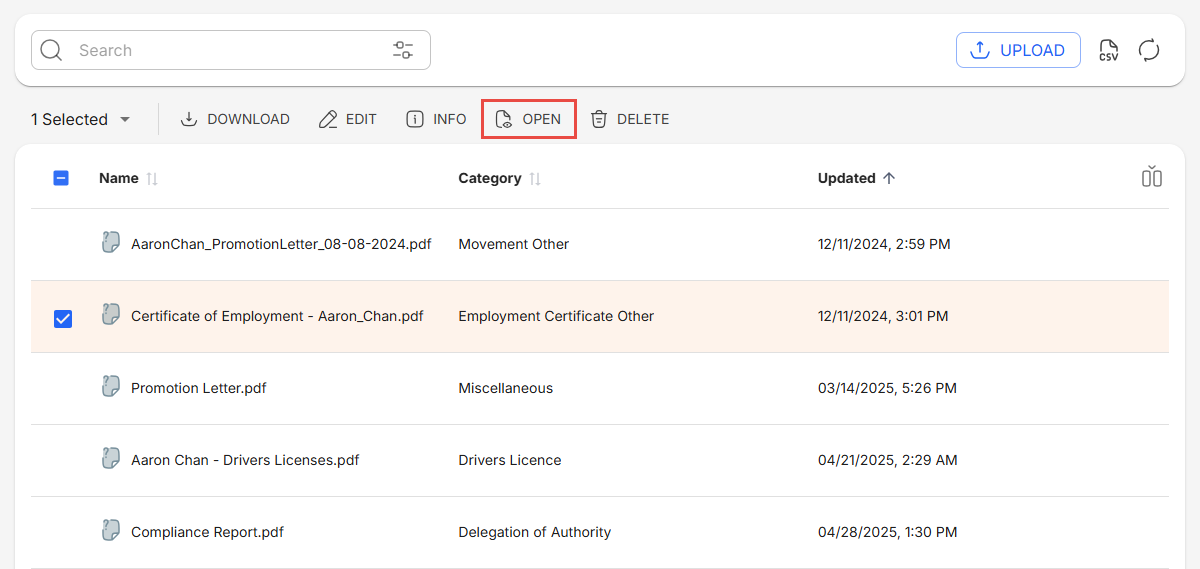
These open the File Viewer, which lets you zoom in and out, and print the file.
Upload Files
The Upload button allows you to upload a new file. This will open a pop-up window where you can browse or drop files to upload.
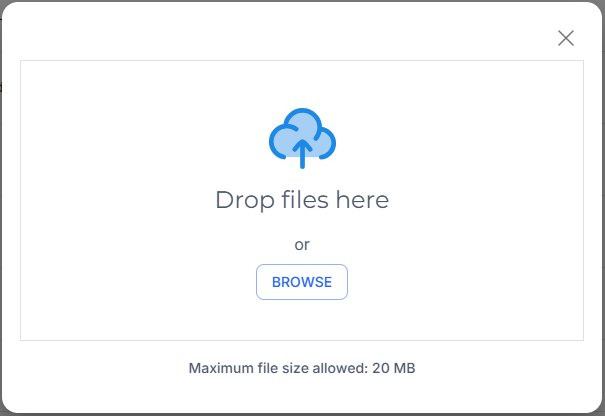
You can also drag-and-drop files from your computer’s file browser to the highlighted area.
These open the Upload Files panel. From here, you can select the file’s assigned Category and Destination Folder.

Note that selecting a Category filters the destination folders to only show folders that allow that selected Category. Similarly, selecting a destination folder filters the Categories to only show Categories that are applicable to the selected folder.
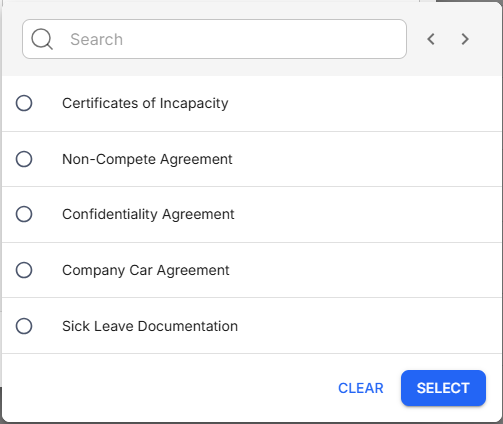
To select the Category or destination folder, click its name, then click Select. To clear the current selection, click Clear. Note that clearing the selection for either the Category or destination folder will not reset the filter for the other. For example, clearing the current selected folder will still retain the filter for the Categories. Each value must be individually cleared to reset both filters.
Download Files
You can download a single file or multiple files at once. There are two ways to download a file:
- Click the More button, then click Download.
- Select a file using the checkbox, then click the Download button.

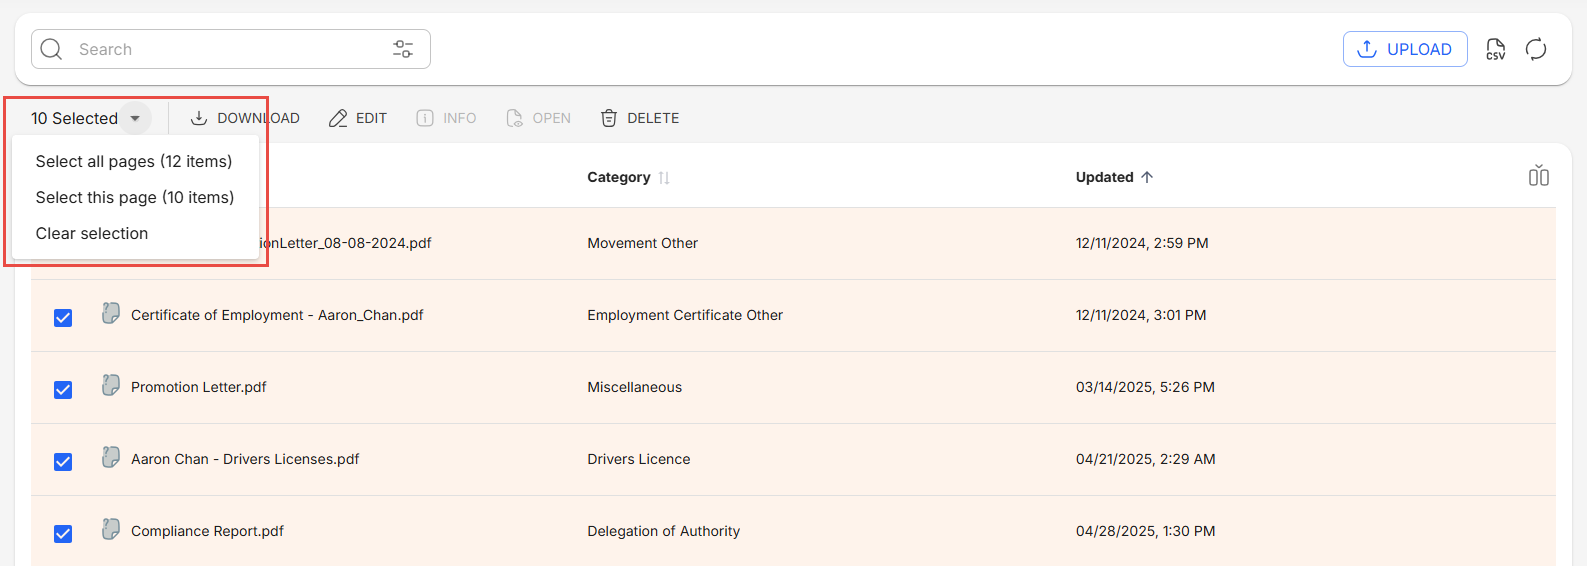
To download multiple files at once, select the files using their respective checkboxes, or use the dropdown selection to Select all pages or Select this page.
Related articles
- New Design - Strato Document Management
- Navigate the Profile Page
- Navigate the Files Tab
- Navigate the All Files Page