Upload and Download Files in File Management and Storage Management
Upload Files
Uploading static files in both File Management and Storage Management is applicable with proper authorizations set in a folder.
File Management - Upload File
Users have two options for uploading files in File Management. Either through the Upload File action button or utilize the Drag & Drop functionality.
Uploading File in File Management via the 'Upload File' Button
- To upload a file or multiple files in File Management, click on the Upload File button.
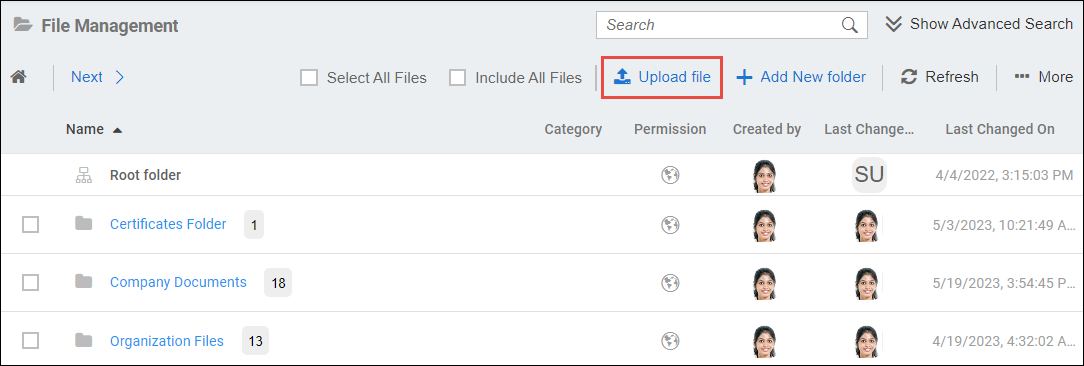
- This will lead to a pop-up screen to upload file/s by dragging and dropping or clicking to upload.
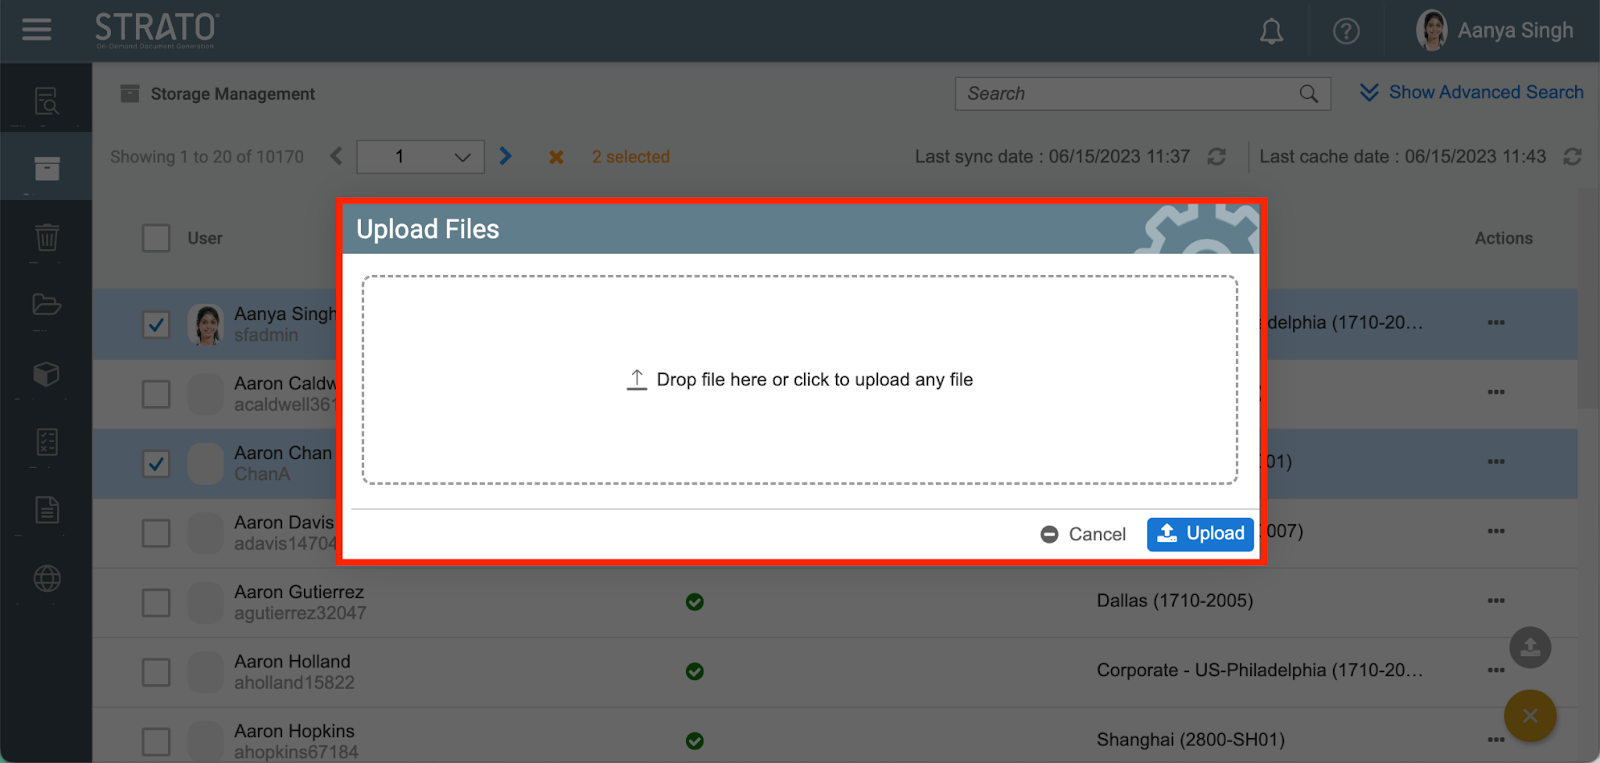
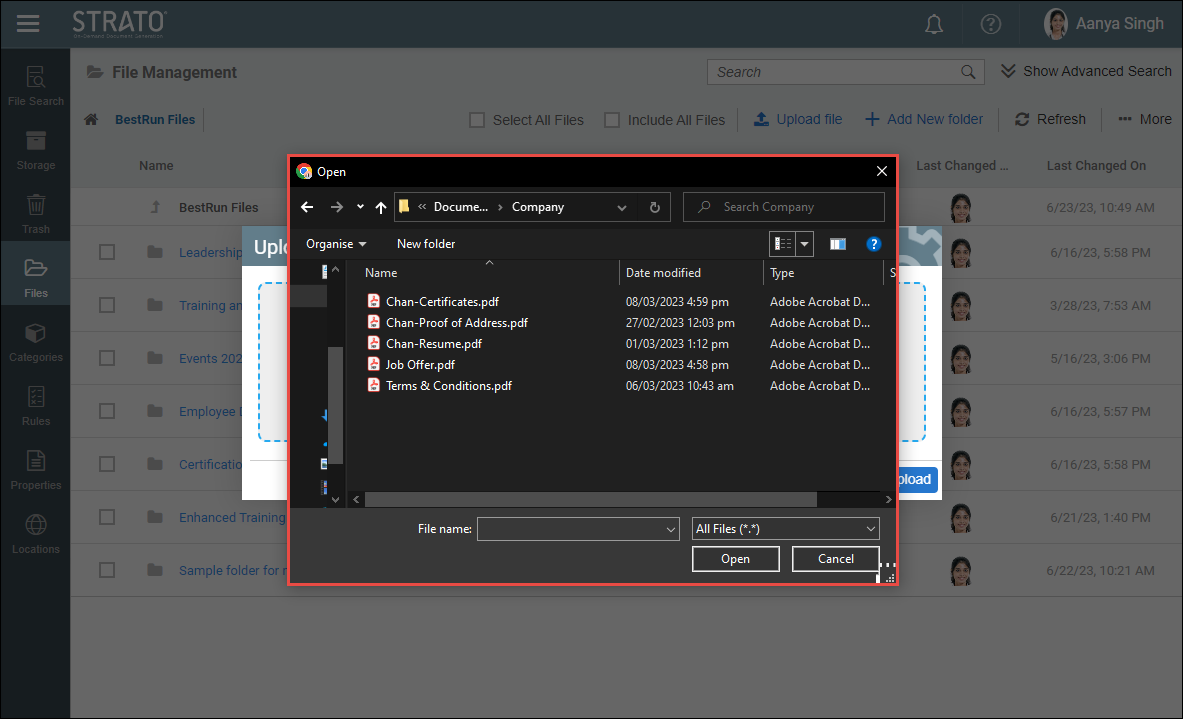
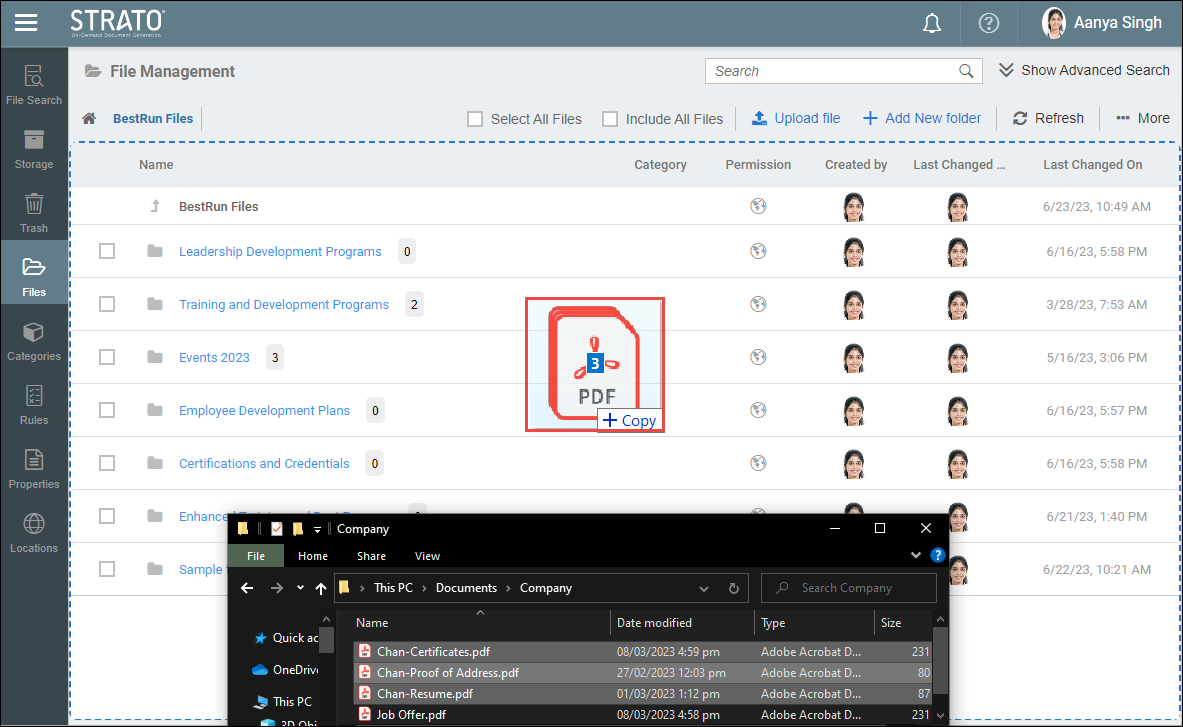
- The click to upload option will open a file browser window. Navigate to the location of the file needed to be uploaded from the computer. Select the file to upload, and then click on the open button or equivalent to start.
- The drop file option will require the user to click and hold the file/s from the file browser, then drag and drop it to the pop-up window.
This will lead to a pop-up screen to upload file/s by dragging and dropping or clicking to upload.
- The files will begin uploading shortly in the Upload Files pop-up screen, the user may modify the Name, Categories, and Validity Date through the Advanced Settings. Navigation of Upload Files pop-up screen is further discussed in Single File/s Upload for File Management and Storage Management and Multiple File/s Upload for File Management and Storage Management.
Uploading File in File Management via ‘Drag & Drop’ Functionality
- To upload file/s using the Drag-and-Drop feature, navigate to the location of the file needed to be uploaded from the computer. Select and hold the file to upload to Strato Storage. A blue dotted line will appear around the designated drop area, indicating where the user can release the file/s.
- The file/s will begin uploading shortly in the Upload Files pop-up screen, the user may modify the Name, Categories, and Validity Date through the Advanced Settings. Navigation of Upload Files pop-up screen is further discussed in Single File/s Upload for File Management and Storage Management and Multiple File/s Upload for File Management and Storage Management.
Storage Management - Upload File
Three Ways to Upload files in Storage Management
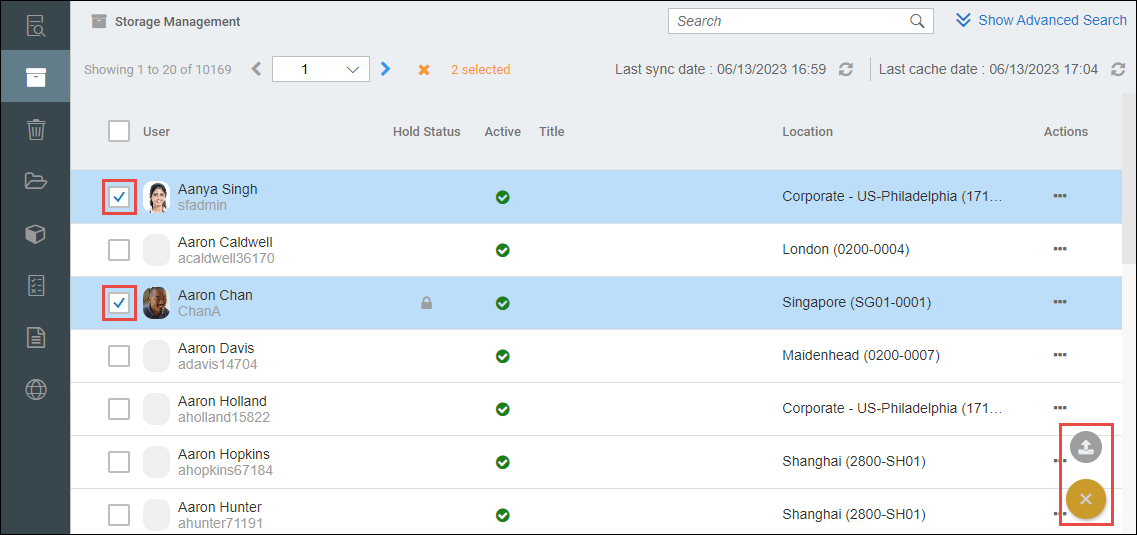
- Floating Action ButtonThe user can upload file/s for user/s by ticking the checkbox to the left of the user thumbnail and is selecting the upload button from the floating action button (FAB).
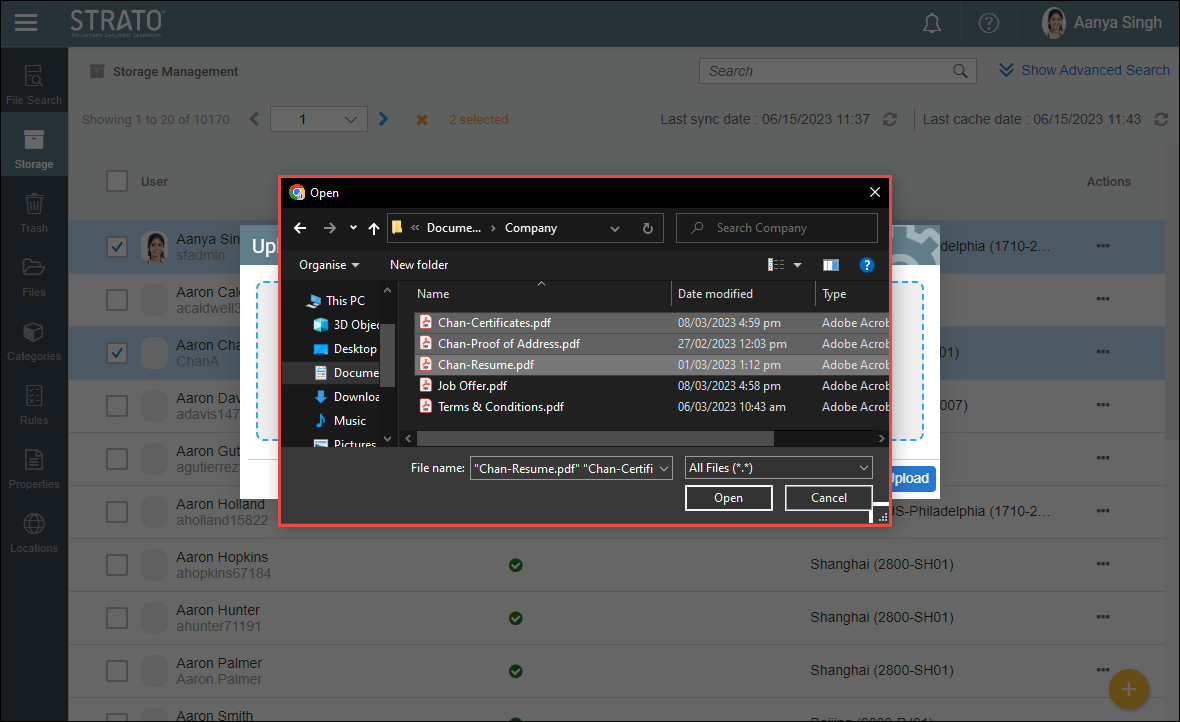
 This will lead to Upload Files pop-up screen.There are two options to upload file/s, by clicking to upload or by dragging and dropping:
- The click to upload option will open a file browser window. Navigate to the location of the file needed to be uploaded from the computer. Select the file to upload, then click on the open button or equivalent to start.
- The drop file option will require the user to click and hold the file/s from the file browser, then drag and drop it to the pop-up screen.

- The click to upload option will open a file browser window. Navigate to the location of the file needed to be uploaded from the computer. Select the file to upload, then click on the open button or equivalent to start.
- Upload button
Within the storage management section, the user can utilize the upload button to add files to the storage.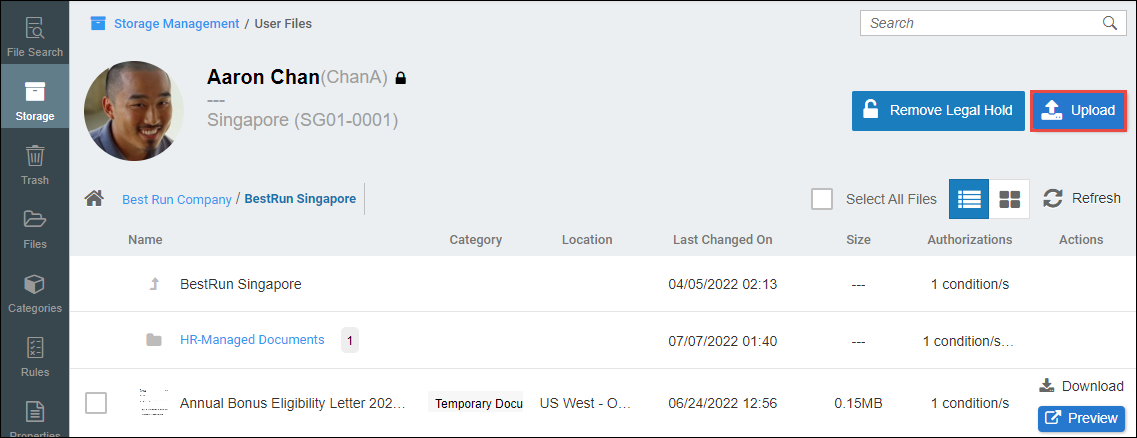
- Drag and Drop functionality
The user may also use the drag-and-drop functionality which works once the screen is on the User Files page or the folder list section.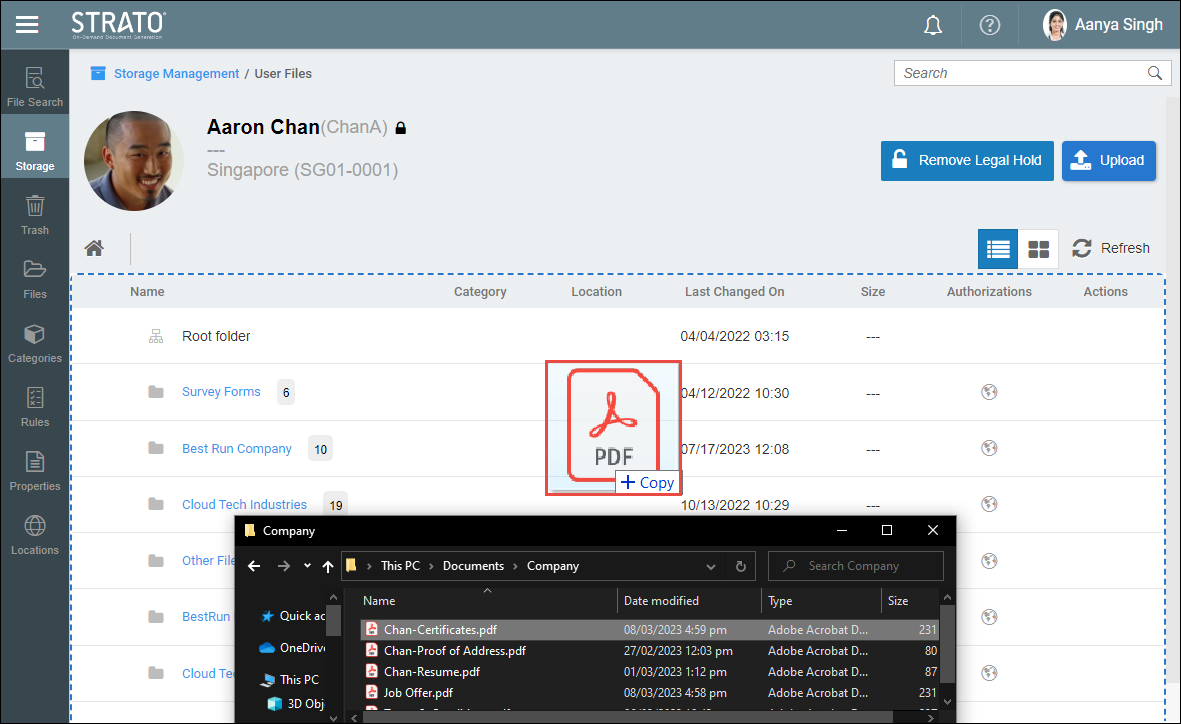
Selection of Storage Folder for File management and Storage Management
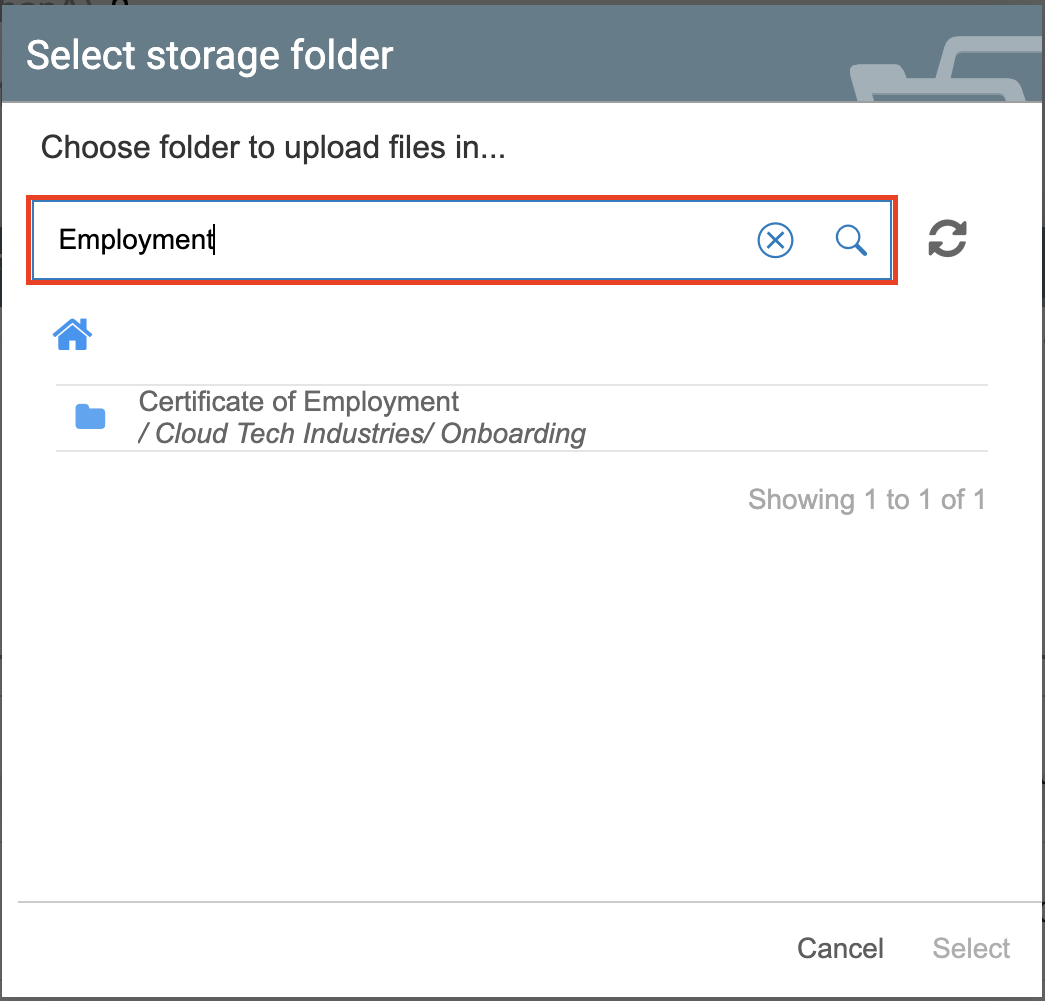
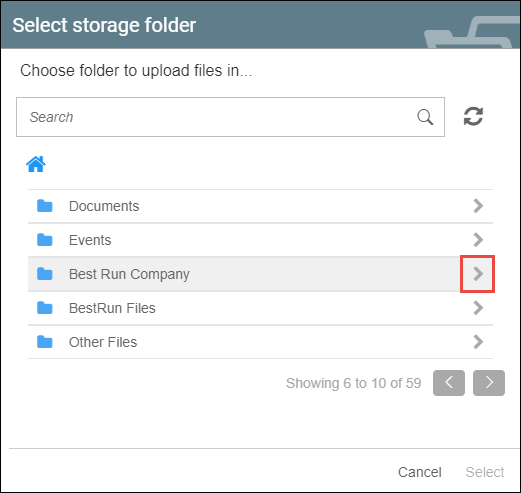
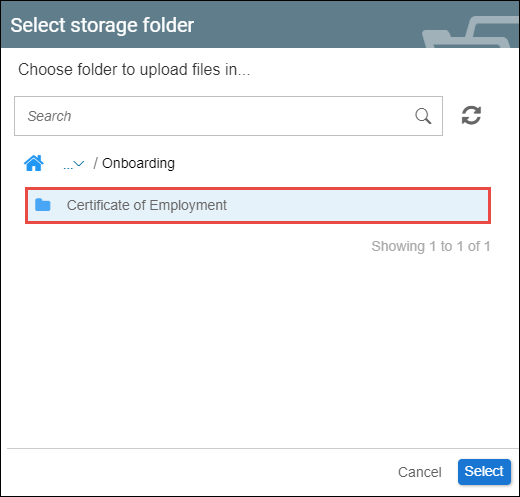
For both File Management and Storage Management, if the user uploads from the Root folder, a pop-up screen will prompt the user to select a designated folder as shown:
- To navigate through the selection, the user has two options:
- The search bar at the center or top portion of the pop-up screen enables users to search for specific folders using keywords or search terms.
- The navigation button located at the bottom of the screen enables users to access additional folder options by navigating to the next page.
- The search bar at the center or top portion of the pop-up screen enables users to search for specific folders using keywords or search terms.
- To upload files into a subfolder, click on the arrow icon located at the rightmost side of the respective folder, This will lead to a list of subfolders. From the list, click the desired folder and click the 'Select' button.
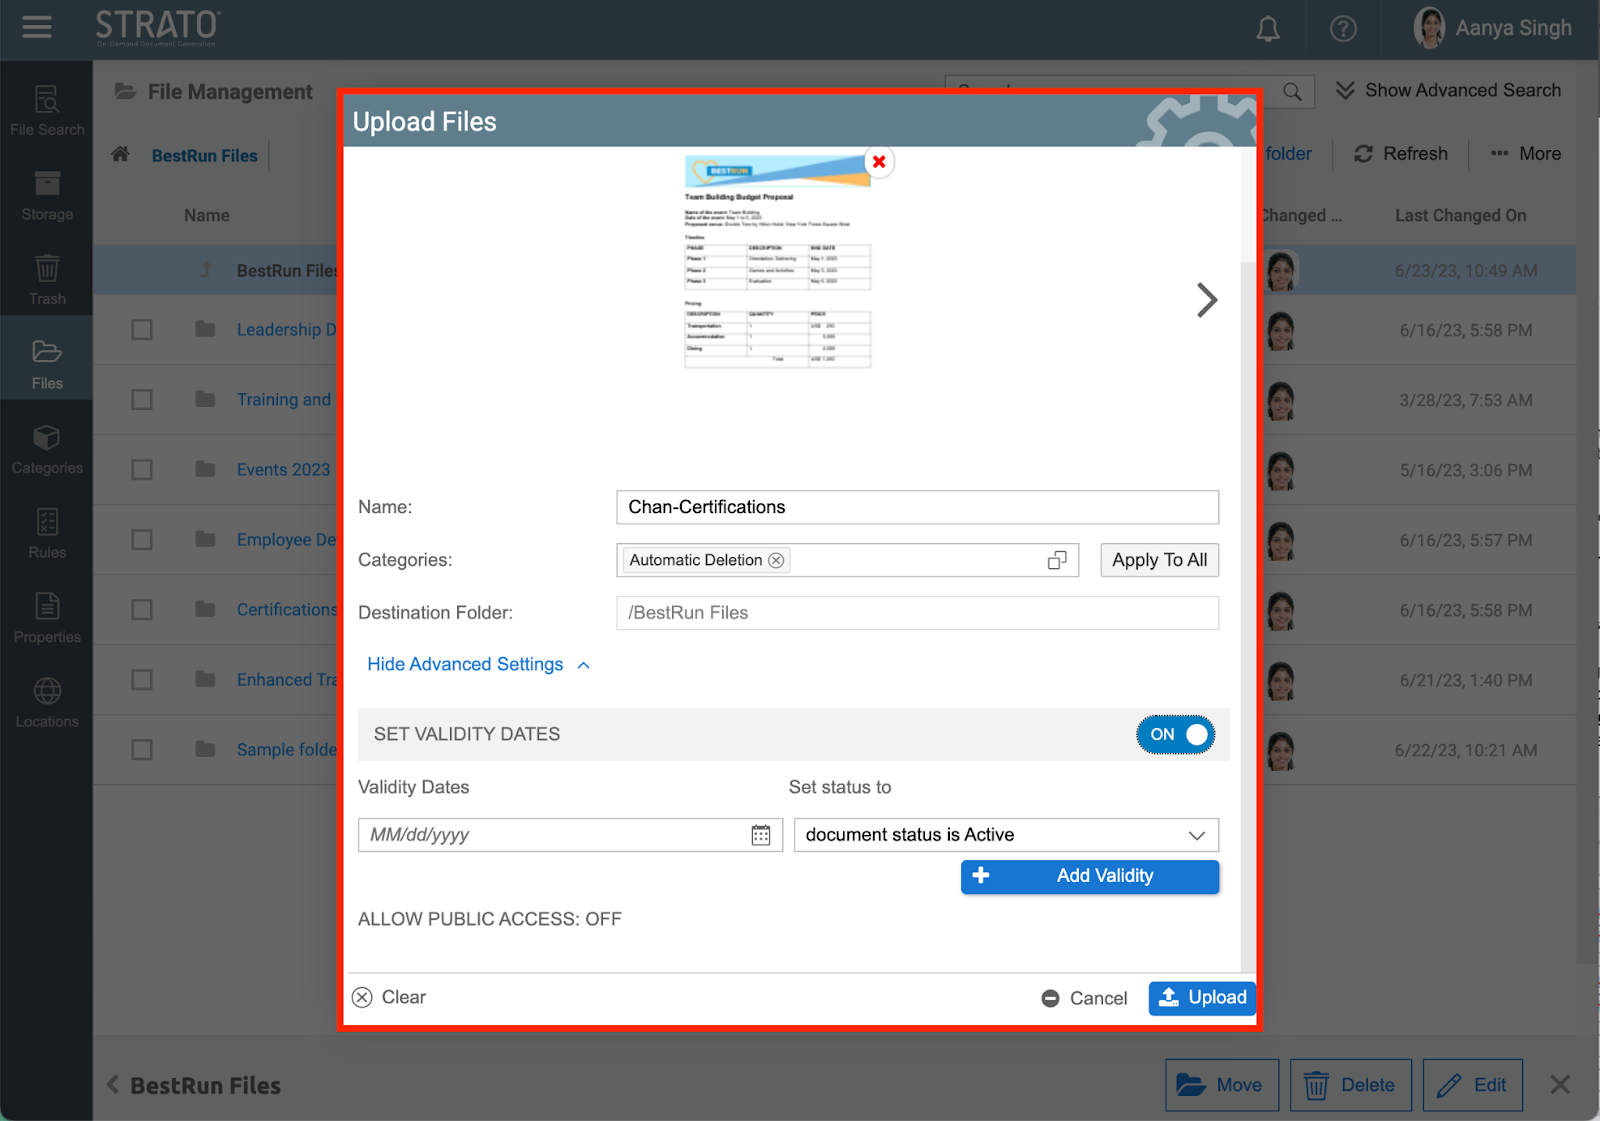
Single File Upload
Once the designated location is selected for the single file upload, a pop-up screen will appear allowing the user to configure the settings for the file. This applies to both File Management and Storage Management: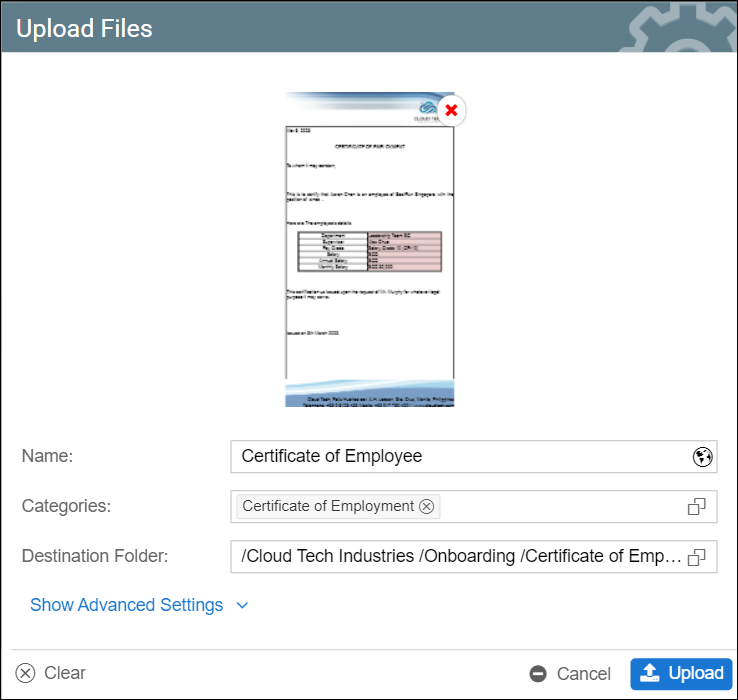
- Name, Category, and Destination Folder - the required fields to configure when uploading files.
- Delete or ‘x’ button - allows the user to remove the file that is being uploaded.
- Show Advanced Settings - all other settings are hidden and collapsed to minimize the non-essential tools.
- Set Validity Dates - under the Advanced Settings, this action enables the user to set the validity date and the status of either Active, Archive, Expired or Deleted of the file(s) being uploaded. By default, this toggle is turned OFF.
- Viewable By Recipient - this toggle allows the user to determine if the uploaded file will be available to the recipient.
- Allow Public Access - indicates whether the uploaded file/s can be accessed publicly. By default, this toggle is turned off and cannot be modified during upload.
Multiple Files Upload
For uploading of multiple files, the following additional buttons will become available: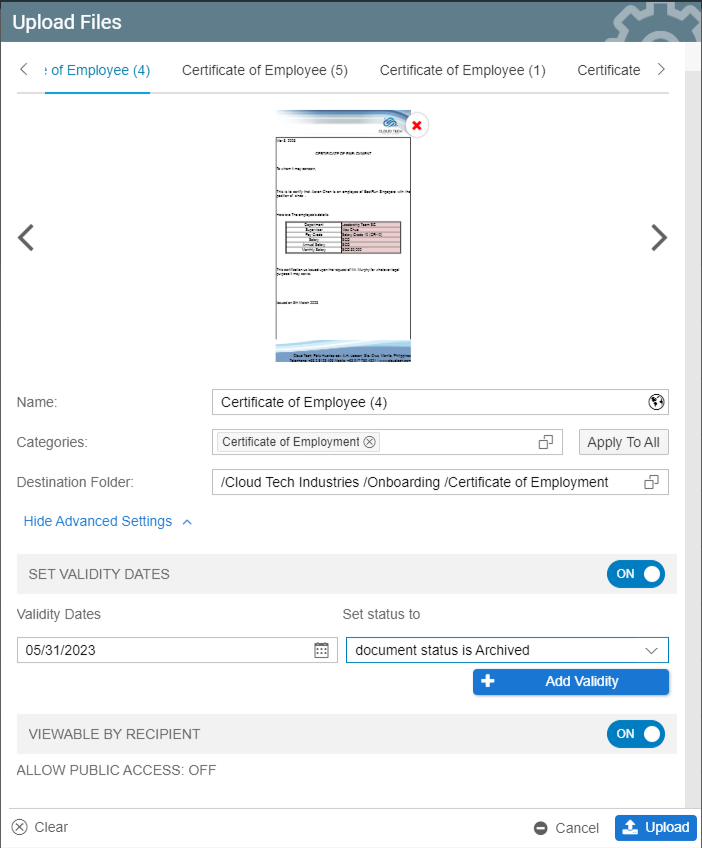
- ‘Apply To All’ button for Categories - This button is applicable when there are multiple files selected for upload. When clicked, the currently selected category will be applied to all files selected for upload.
- Navigation Arrow - The navigation arrow only appears once the user uploads two or more files, allowing them to configure each file separately.
The maximum file size is configured via the Storage Max Upload Size setting in the Strato Admin Tool. This value is entered in bytes. For example, the value shown in the screenshot below is 241,172,480 bytes, which is equal to 230 MB.
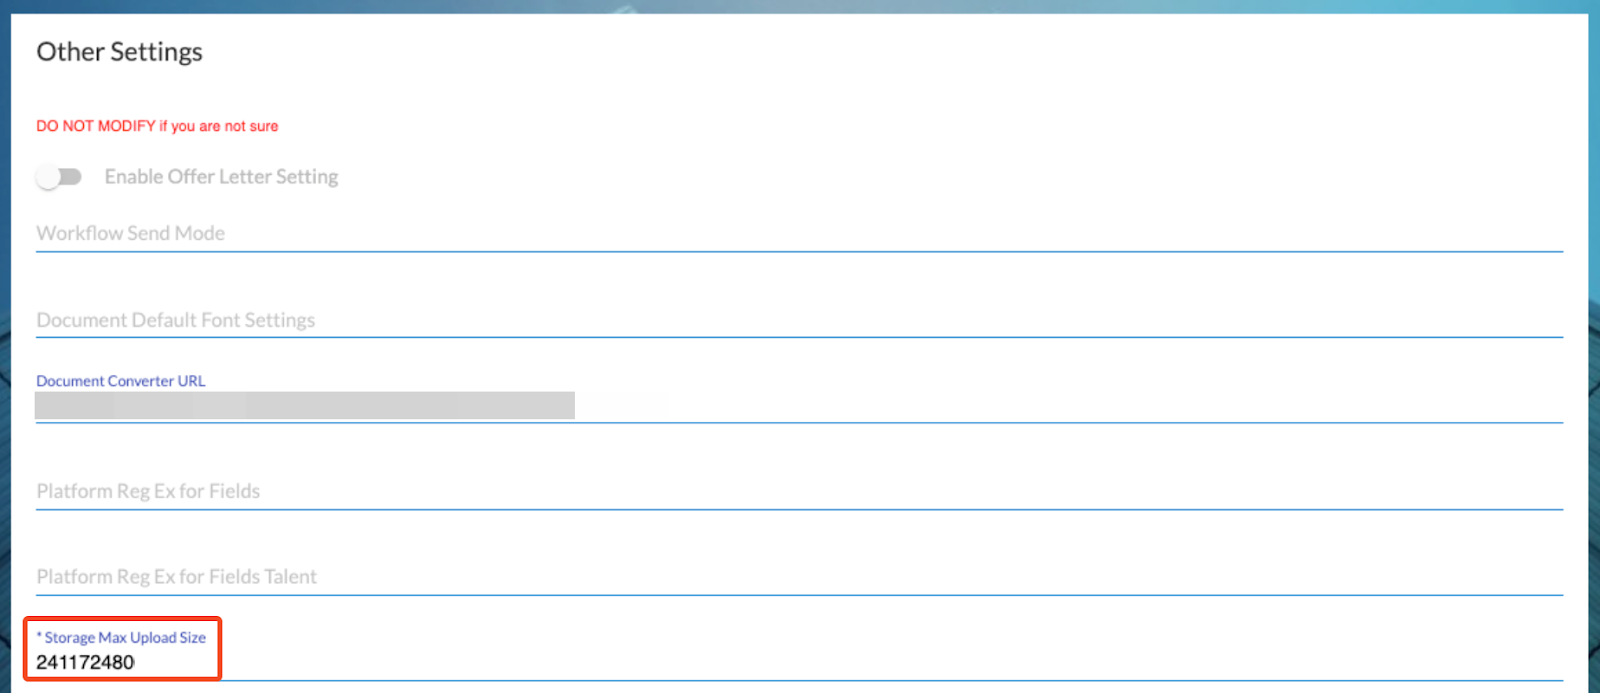
Note that the final upload capacity may still depend on external factors such as web server limits, network conditions, request timeouts, or security policies.
Upon uploading, only image files (.jpg, .jpeg, .png, .bmp, .gif, .tiff, .ico, .svg, .webp) and PDF files will have a preview. Other file types that are allowed but do not have a preview on upload include: .doc, .docx, .xls, .xlsx, .rtf, .odt, .csv, .ods, .ppt, .pptx, .odp, and .msg.
If more than 20 files are selected, only the first 20 files are uploaded, and the others are discarded. To avoid errors, it is recommended to upload documents in smaller batches of 20 files or less.
Download Files
Downloading Files in FIle Management
Downloading files in File Management can be done in two ways:
- Downloading files can be done by selecting the files using the checkbox and clicking the Download button shown at the bottom of the screen.
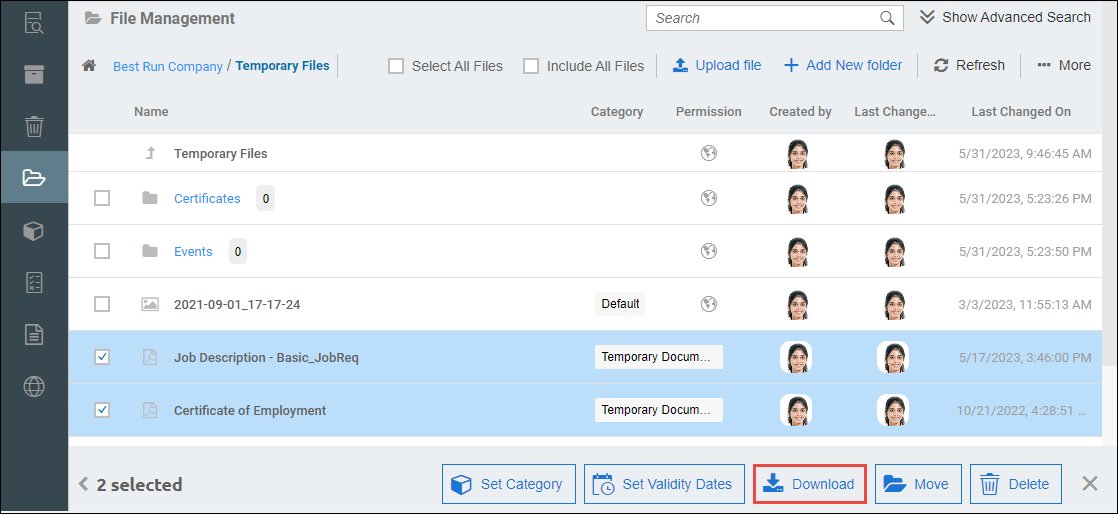
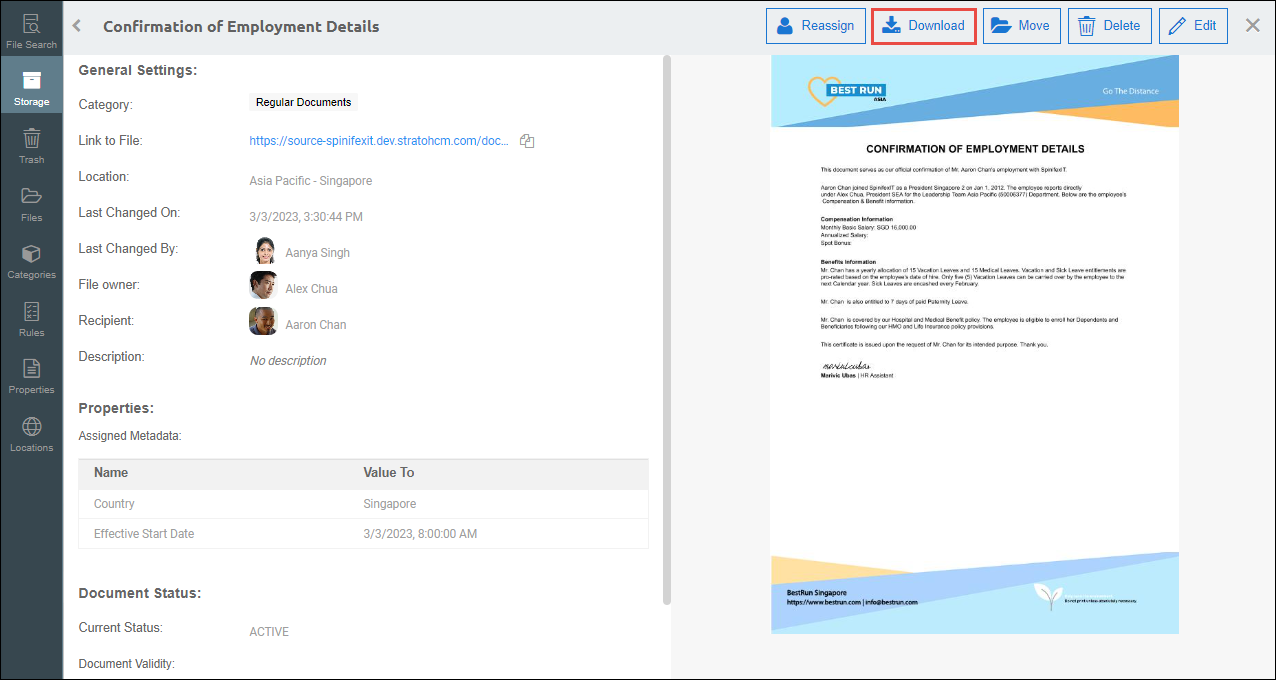
- A Download button is also available on the File Information page when the user views a specific file. This button is located at the top part of the preview pane.
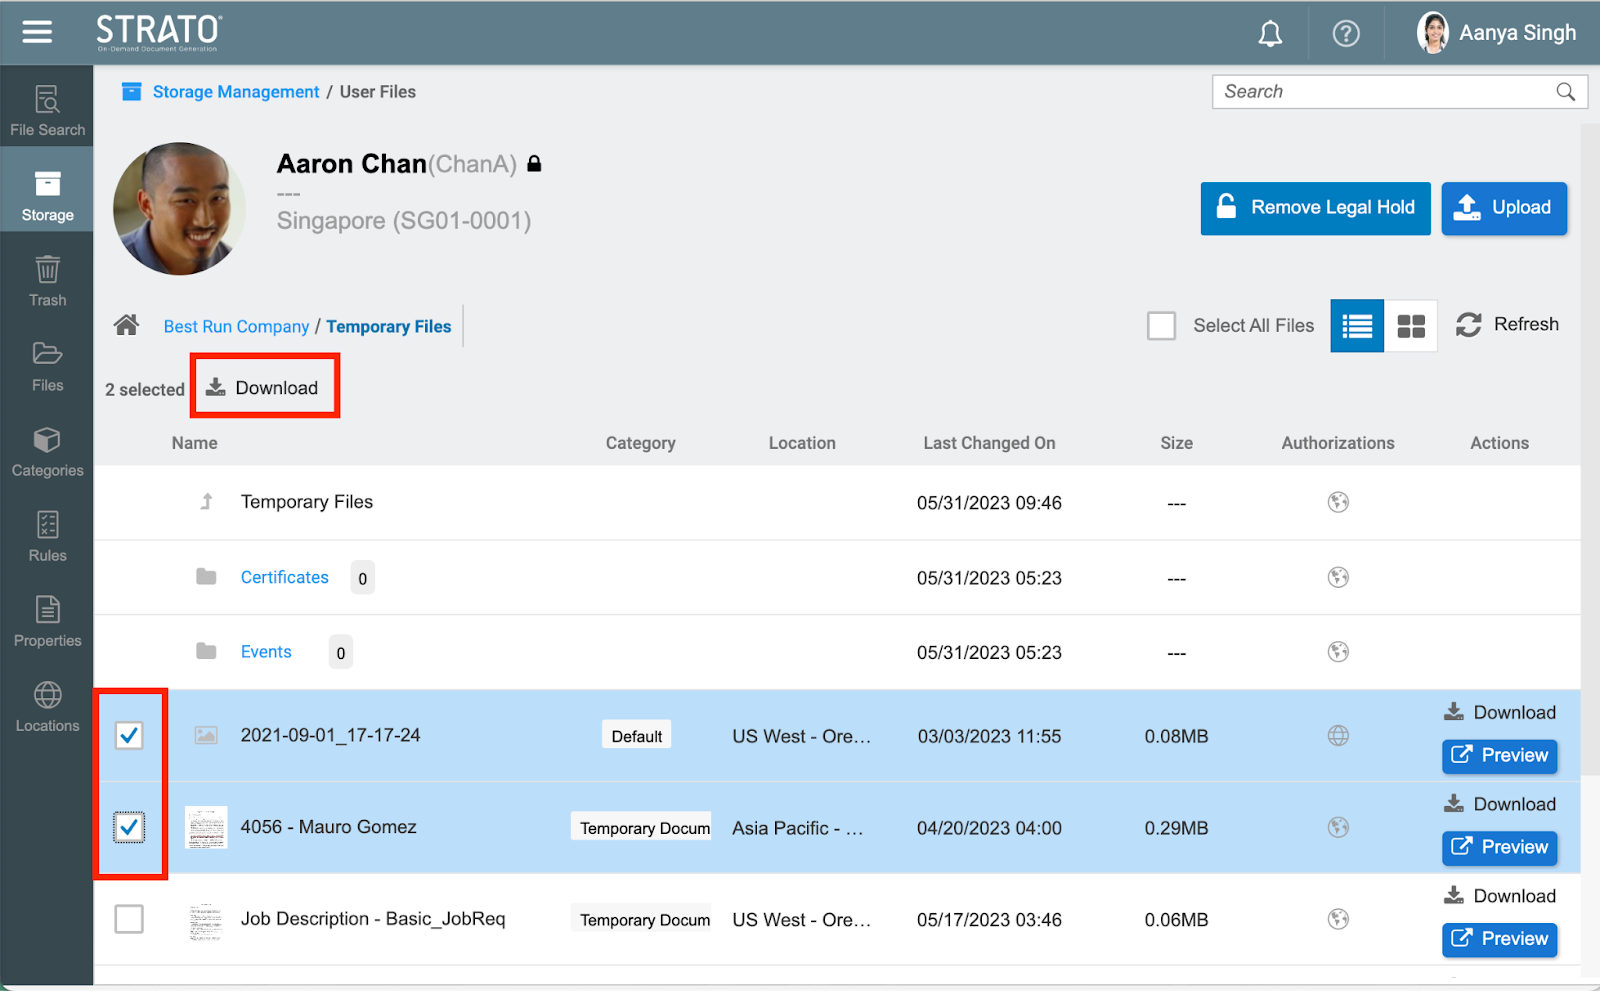
Downloading File/s in Storage Management
In Storage Management, there are two ways to download files:
- Users can either click the Download button from the actions column of a specific file.
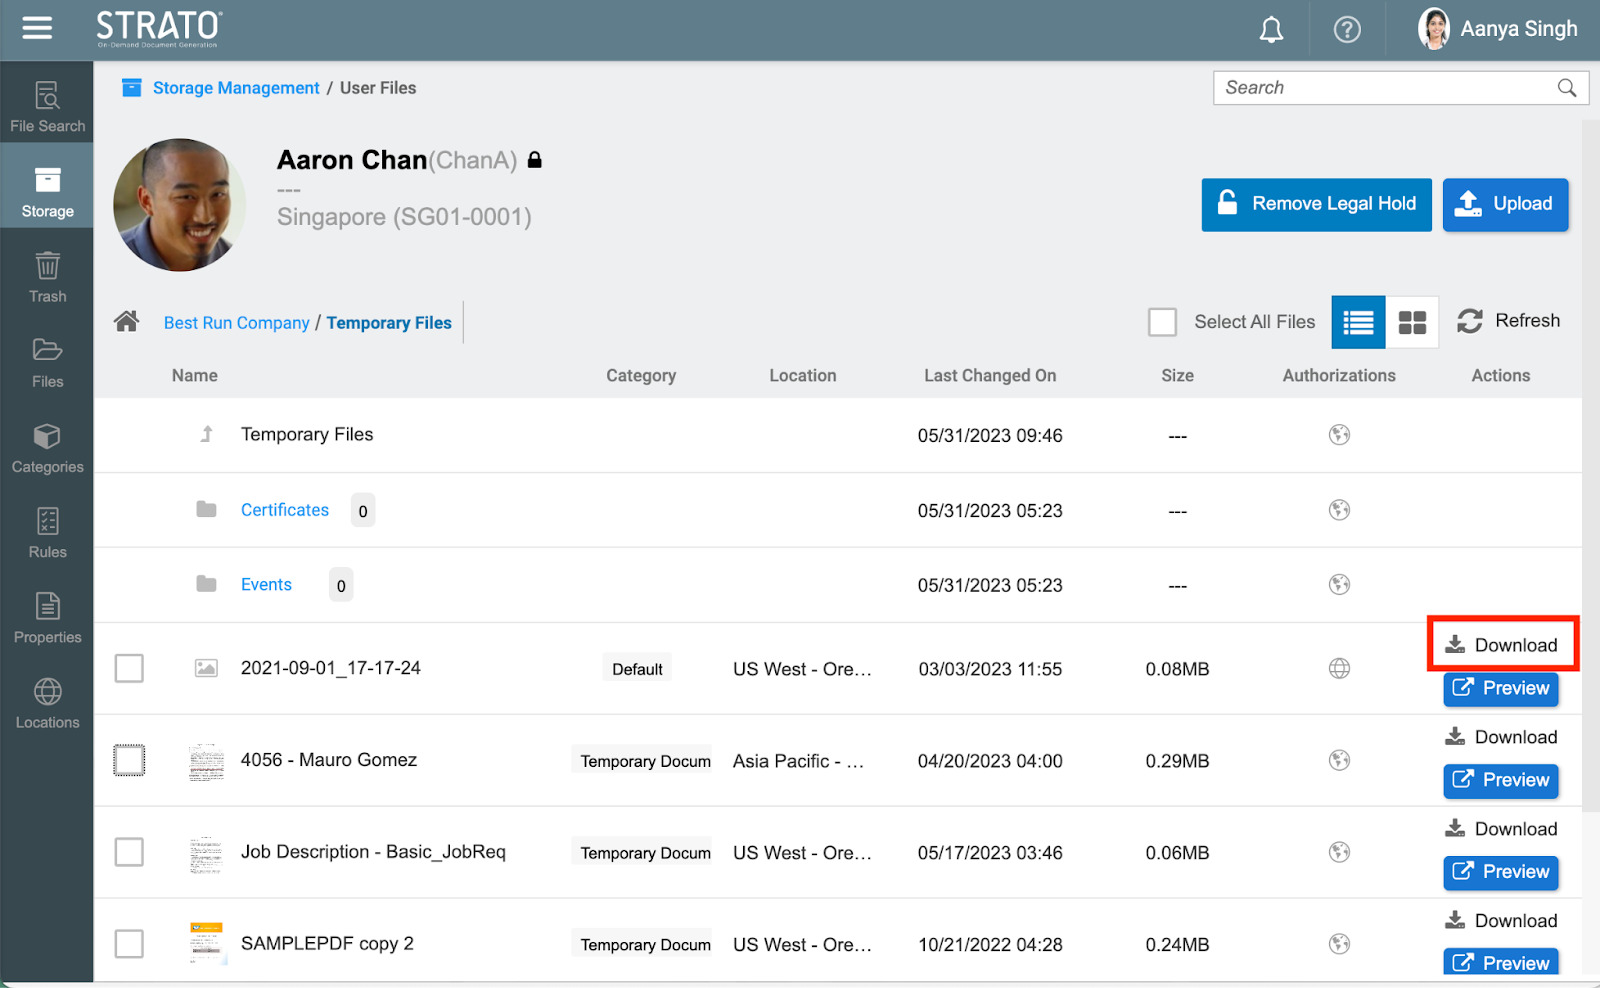
- File/s can be downloaded using mass actions above when selecting one or multiple files using the checkbox located next to the file name.