Generate Documents with Validity Dates via Workflow
Overview
In line with Strato Documents' capability on generating documents with pending data (same as future-dated data) from the SuccessFactors workflow, is the feature of Strato Workflow on generating documents based on a given date range (via Generate Document(s) step).
This capability allows users to provide a date range in the workflow that will be passed to Strato Documents in order to generate templates with validity dates. A good example is generating a promotion letter for an employee based on the effective dates of the promotion. With the given date range, the promotion letter will generate and display future-dated data.
Integrated Features and Tools
Strato Workflow:
- Strato Dashboard widget: Generator Card
Sample Use Case
In the sample use case, the workflow template configured below is for generating a COE document with future-dated data. Based on the position change for an employee which is effective on a specific start date (future date), Strato Workflow can already generate a COE document using a date range.
From this sample template, once executed, the following steps will execute:
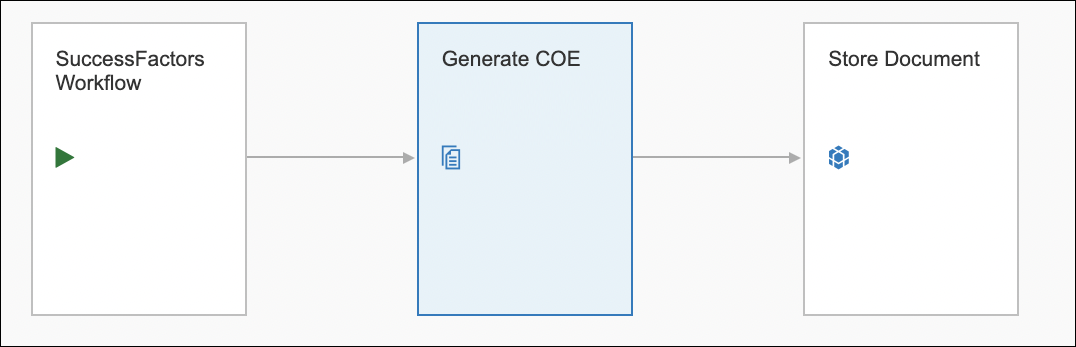
- The Success Factors Workflow Trigger will call Strato workflow to execute the generation of the COE document. (More details about Triggers here: Workflow Triggers)
- Then the COE document will be generated in the Generate Document(s) step, retrieving pending information from SuccessFactors Workflow (Employee Central data).
- After generating the document, the last step is for the workflow to upload the document in storage via the Store Document step.
Configuration and Document Generation
This basic How-To shows how to configure the workflow template and the Strato Dashboard set-up for the sample use case above:
- First, create the workflow from the Workflow Template Editor, and make sure to add the following workflow components/steps:
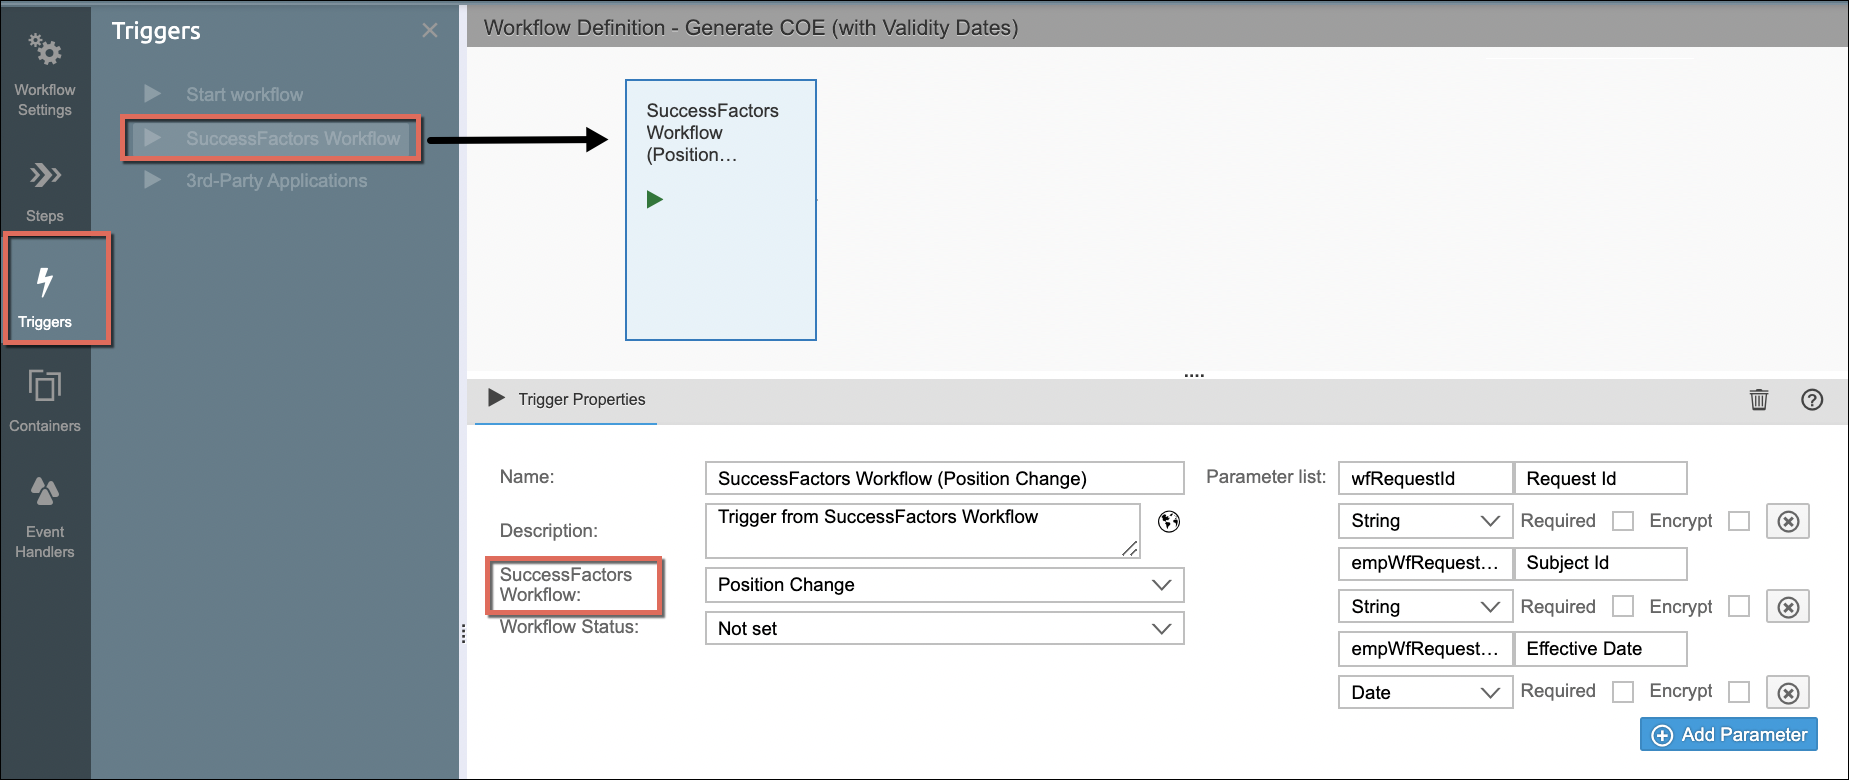
- Trigger: Add the SuccessFactors Workflow Trigger component and make sure to select the required SuccessFactors Workflow from the Step Properties. (Note: The Parameter List fields are already pre-set. Configure it further if required.)
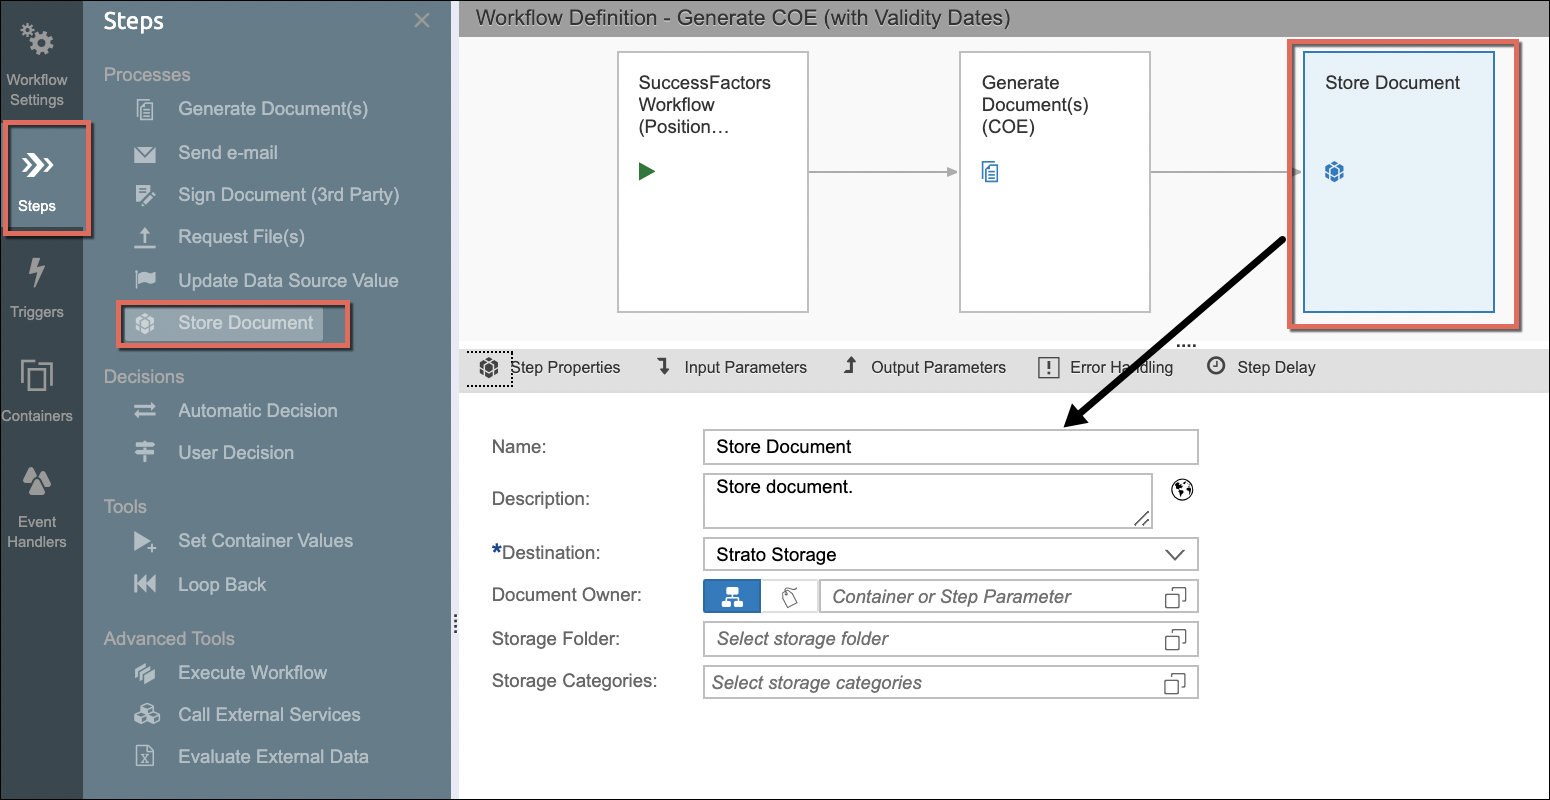
- Generate Document step: After the Trigger, add the Generate Document(s) step and select the document template to be generated from the Step Properties.
From the Input Parameters, as shown in the image below, make sure to select the required Begin Date and End Date. In this example, the Effective Date parameter coming from the SuccessFactors Workflow is selected as this is retrieving future-dated data based on the SuccessFactors Workflow effectivity date. Make sure to set the Get Pending Data.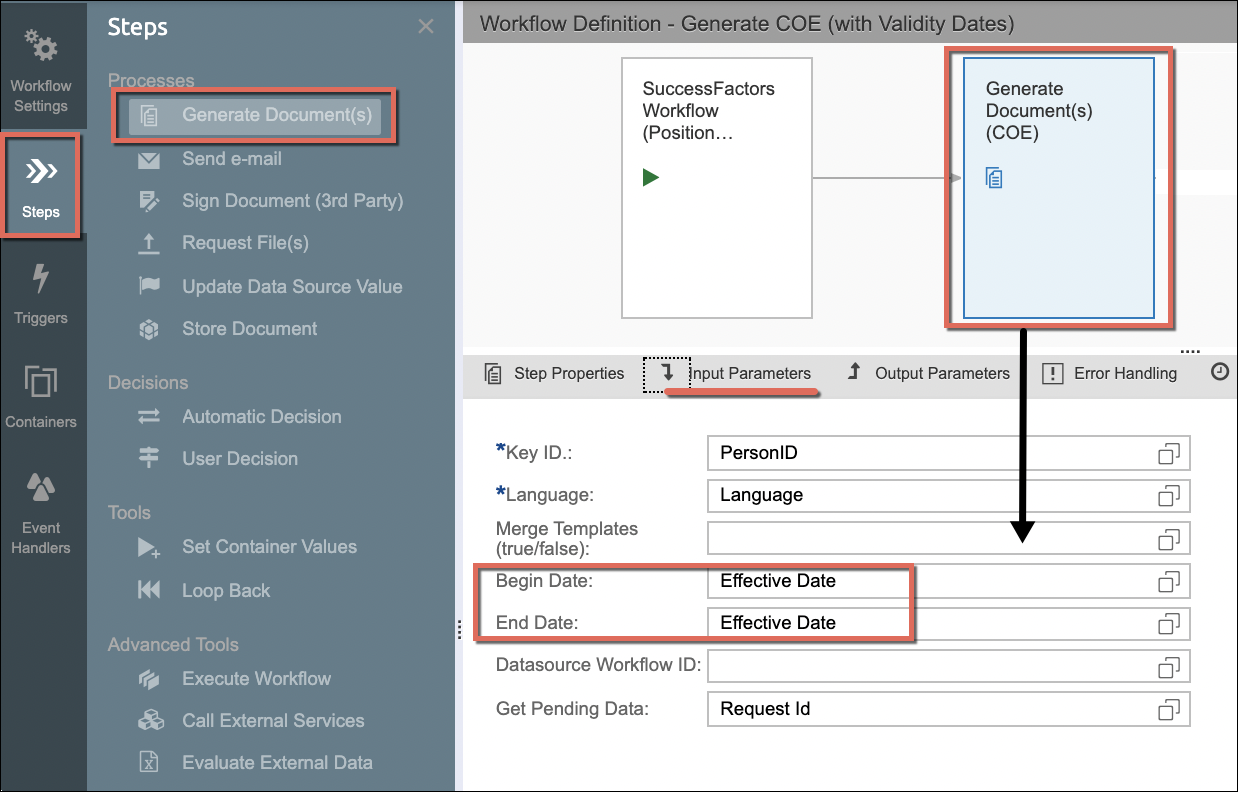
- Store Document: The last step of the workflow, as per the sample use case, is the Store Document step. Configure it accordingly based on where it should be saved in the storage.
- Trigger: Add the SuccessFactors Workflow Trigger component and make sure to select the required SuccessFactors Workflow from the Step Properties. (Note: The Parameter List fields are already pre-set. Configure it further if required.)
- Save and Publish your workflow template.
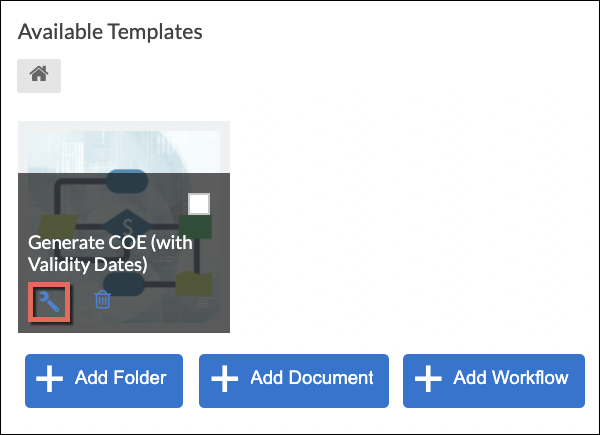
- Next, go to your Generator Card in your Strato Dashboard widget.
- From its Edit Mode, select a tab where to add this newly created workflow template (ex: under the MSS tab to generate a workflow for employees under you)
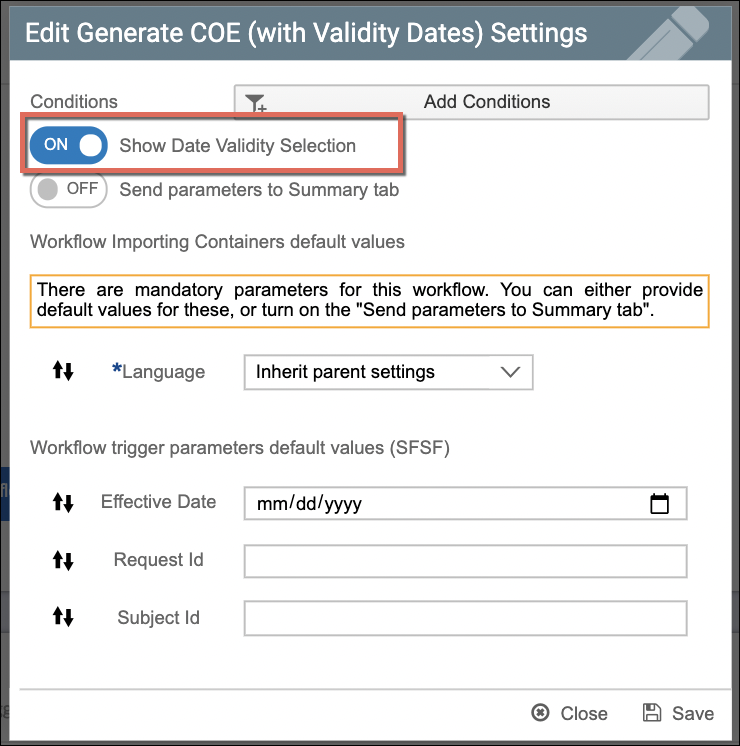
- After adding the workflow template, click its Gear icon to view the workflow template settings and make sure that the Show Date Validity Selection is enabled.
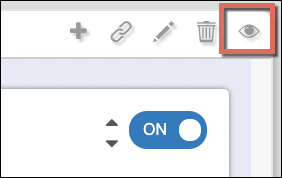
- Now switch to the View Mode of the Generator Card by clicking the Eye icon from the upper-right corner of the dashboard screen.
- From the view mode, go to the tab where you have added the workflow template (ex: in the MSS tab to generate the workflow for an employee under you)
- Select an employee(s) to generate the workflow for in the Select Employees screen, and click Next Step.
- From the Select Templates screen, select the workflow template and click Next Step.
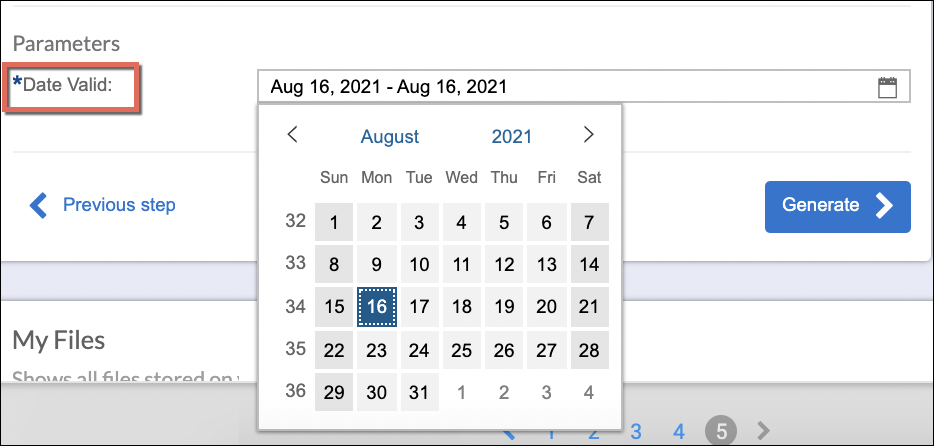
- From the Summary screen, select the Validity Date required for the generation of the document, and click Generate.