Manually Trigger a Strato Workflow via Dashboard Widget (Generator Card)
A Strato Workflow automatically executes by configuring its trigger feature, and here are the ways to trigger a workflow:
- Via a trigger from external applications (for these options, the integration between Strato Workflow and the external application is configured within the Trigger component of the Workflow Template) :
- SuccessFactors application (read: How to Trigger Strato Workflow via SuccessFactors (Integration Centre)
- SuccessFactors Workflow (integrating an external SuccessFactors workflow in the trigger)
- By manually triggering the workflow(s) from the Dashboard widget via a Generator Card. More information on its use case and functionality in the sections below.
- (To see the overview of the Generator Card in Dashboard Widget, read: Generator Card (Dashboard))
Use Case
For scenarios where a manager wants to send a document to an employee that requires signature (ex: Performance Review), or for when an employee requests for a COE or any other employee documents related requests which require signatures from different departments, Strato is capable of executing documents routing for signature using Strato’s Internal workflow. Such workflows are designed via the Strato Workflow Engine, which can then be manually triggered by an admin or manager in the Dashboard Widget - Generator Card.
Prerequisite
To be able to manually trigger a workflow within the Generator Card, you should first have the following:
Generator Card - the card where the workflow template is going to be added/triggered. (To add cards in the dashboard, read: Adding Templates in the Generator Card / About generator cards: Card Type - Generator Card)
- Strato Workflow Template - The Workflow Template to be manually triggered should have already been added to the Generator card (read: Strato Workflow Engine)
How-To Trigger Workflow Manually
In this sample scenario, a manager wants to manually trigger a worklfow for Employee Data Change in the Generator Card (MSS). These are the steps to be taken by the manager:
- The manager will go to the Dashboard widget, and access the Generator Card.
- From the tabs in the Generator Card, the manager selects the tab where the workflow template to be triggered is located. (In this sample scenario, it is the Employee Data Change workflow sitting in the For My Team tab.)
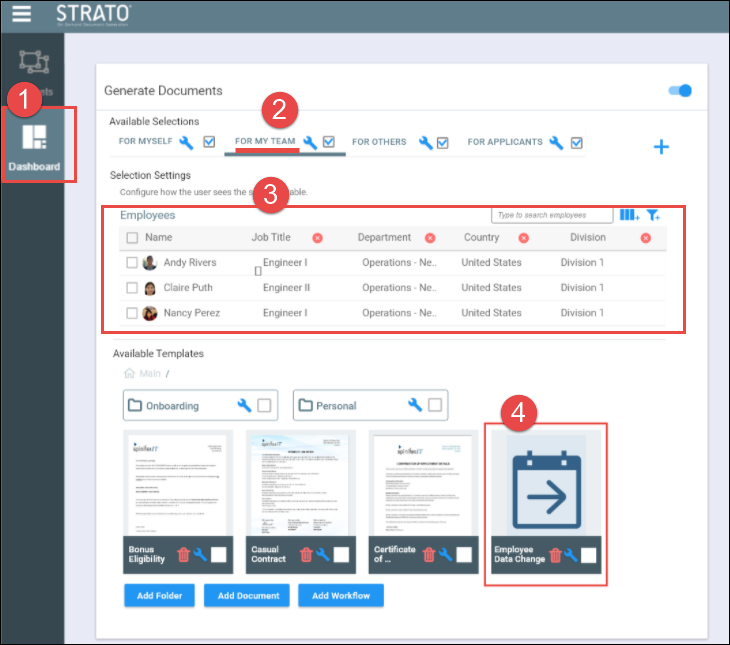
- The manager then selects the employees from the selection table whom the workflow will run for.
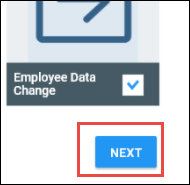
- Next, the manager selects the workflow to be triggered by ticking the selection box of the workflow template. This will then enable the Next button on the lower-right side of the card.
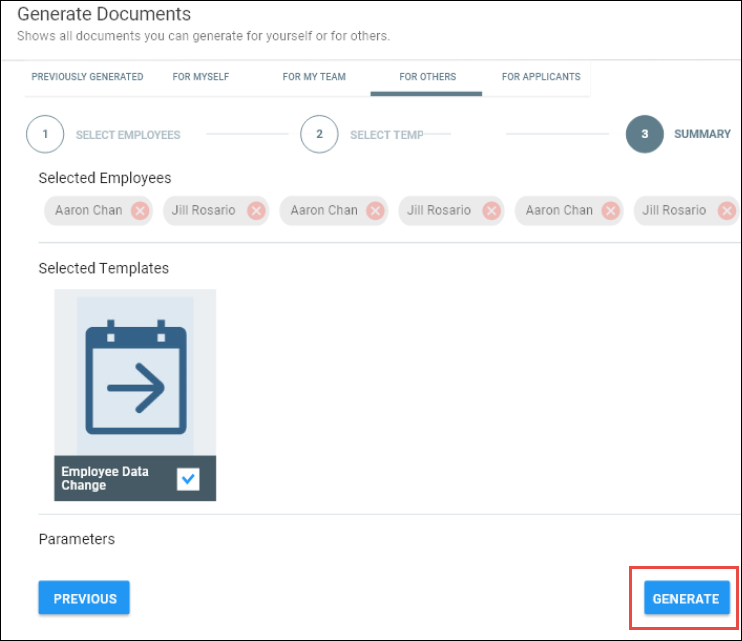
- The manager clicks Next, which leads to the Summary screen of the card.
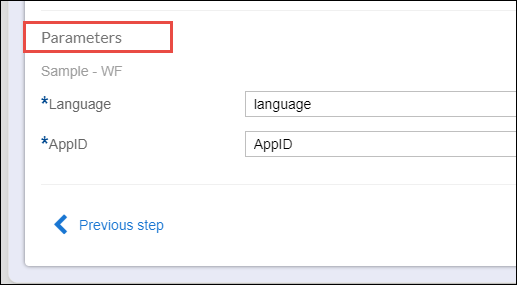
- This screen shows the selected workflow will be executed for the selected employees. This screen can also show the parameters used in the workflow if that setting is enabled.
- 💡
Notice that there is a Parameters section at the bottom of the Summary screen. The parameters used by the workflow will only be displayed here if the Send parameters to Summary tab option is enabled within the workflow templates settings from the Generator Card.
If the Send parameters to Summary tab option, shown below, within the workflow templates settings from the Generator Card is not toggled on, then there will be no parameters to be displayed in the Summary screen, such as shown in the image above in step 5.

- From the Summary screen, the manager clicks the Generate button, which will then start the workflow for the selected employees.
- Once the selected template is triggered, a pop-up confirmation message will appear as shown in this sample screen:
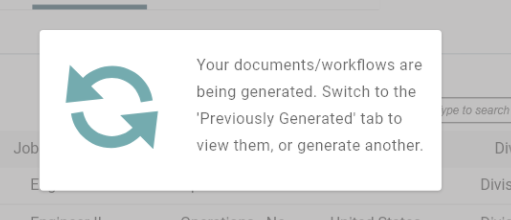
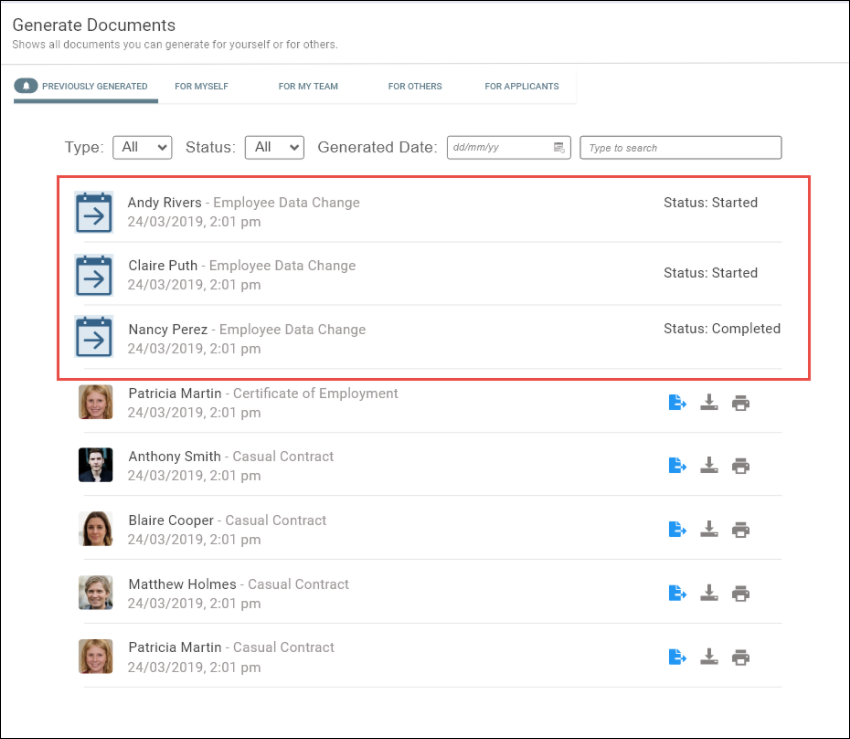
- To view the generated workflow (or all the other templates previously generated), click on the Previously generated tab from the upper-left section of the card.