Add / Create New Custom Widget - Widget Settings
As discussed in the Introduction to Widget Settings article, you can create custom Widgets, and you can also add them in your dashboard for instant access.
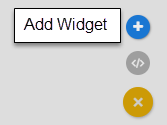
Adding a custom widget is simply done by clicking the Actions button from the lower-right corner of the Widget Settings screen, and then clicking the Add Widget button.
The Add Widget screen will be displayed, which you will define the following settings:
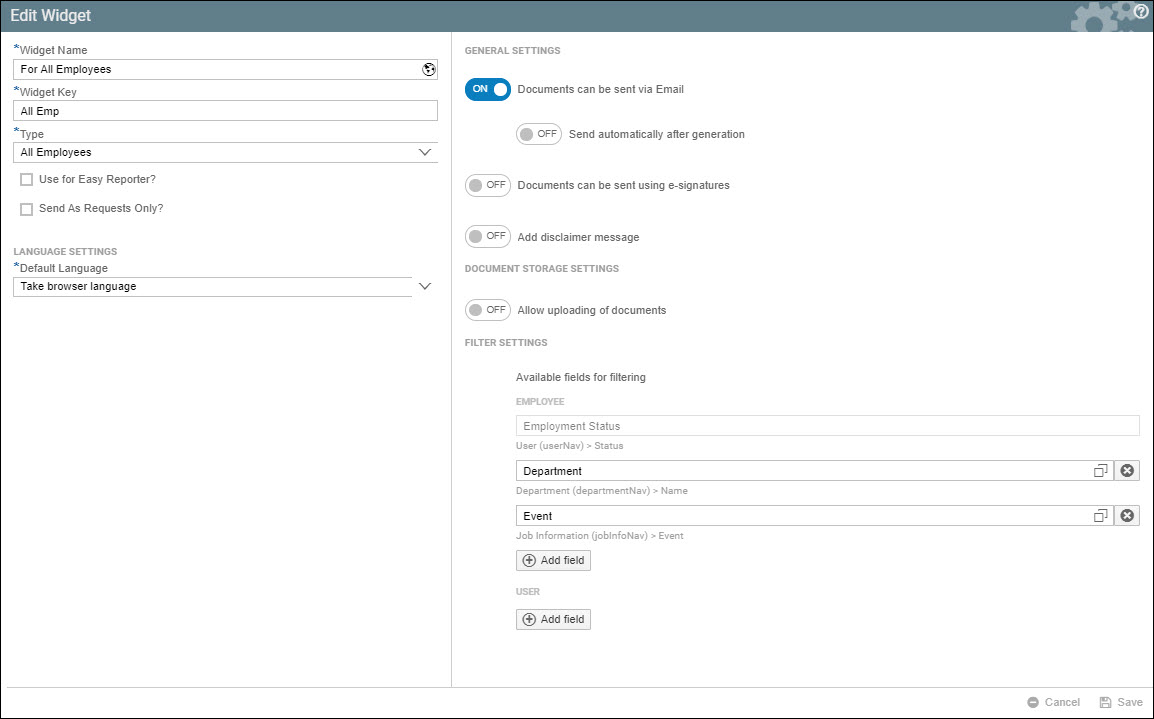
Widget Settings
| Widget Name | This will be name of your Widget |
| Widget Key | This is a shorter version of your Widget Name |
| Type | Select here the type of widget you are creating. Depending on your role and the modules activated in your Strato system, the selections available here will vary. To find out which Widget Type you need to create in Strato, read: Widget Types - Custom Widgets For creating Application widgets, read: Creating an Application Widget |
| Use for Easy Reporter? | This option will only be available if your widget type is All Employees, My Team, or My Records. If ticked, the option Period Field will be available in this widget's General Settings. |
| Send As Requests Only? | This option will only be available if your widget type is All Employees, My Team, or My Records. If ticked, the document generation for this widget will then only be limited to the managers and HR admins. Employees will not have the capability to generate the document, but instead have the option to request for the document generation. A sample document that can be requested for generation would be Certificates of Employment. |
| Default Language | Choose the language of the widget. There are three options:
|
Here are the available General / Document Settings when creating a widget:
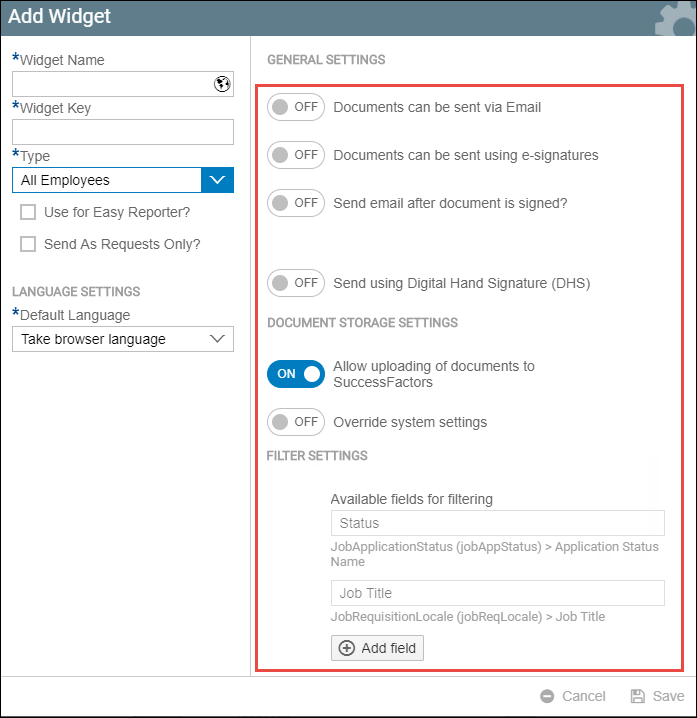
General Settings
| Period Field | This option will only be available if the widget type you are setting is for All Employees, My Team, or My Records widget. , and the Use for Easy Reporter? option is ticked. You can choose between Period Selection and Date Selection. |
| Document Template | This field is only available for Application widgets. Here is where you select which document template to use. To know more about document templates, read: Document Templates in Strato |
| Documents can be sent via Email | When this option is toggled on, you can enable or disable automatic sending after document generation. An Email field must be selected. |
| Documents can be sent using E-signatures | This option will be available if there is an E-signature workflow integrated in your Strato. When toggled on, you can choose an E-signature provider, depending on what is configured by your admin. More information about E-signature Workflow here: How to Set E-signature Workflow in Application Widget |
| Send email after document is signed | This toggle option can be used. When toggled on, an Email field must be selected. |
| Add disclaimer message | When enabled, this option will display a message in the preview based on a condition. For more details about this feature, read Add disclaimer message. This option is also available in a group level and on a template level. |
| Send Using Digital Hand Signature | This option will be available if an E-signature workflow using Digital Hand Signature is enabled in your Strato. Read more about DHS here: Strato with Digital Hand Signature (DHS) Integration . |
Document Storage Settings
| Allow uploading of documents | This option is only available if you have the Strato Database set as your document storage destination. This is for the Strato Storage functionality. For more information, read: |
| Allow uploading of documents to SuccessFactors | To know more about uploaded documents in SFSF, read: Access Uploaded Documents in SuccessFactors (Stored Documents) |
| Override System Settings | When toggled on, an MDF Object in SuccessFactors and the Field of that MDF Object must be selected. Read: Access Uploaded Documents in SuccessFactors (Stored Documents) |
Filter Settings
| Available Fields for Filtering | When creating an Employee or Application widget, you can add fields that you can use as a filter when selecting employees before generating a document. Read more here: Filter Settings for Widgets |
To know how to Edit or configure your existing custom widgets, read: